There are many reasons why a wall might crack.
It could be because of the age of the building, the materials used, the climate, or the way the building is used. It could also be because of the ground underneath the building or the trees growing nearby.
Let’s look at each of these reasons in more detail.
In this post we'll cover:
- Is That Crack in Your Wall Serious?
- Why Your Old Home is Prone to Cracks
- Why a New Build May Develop Wall Cracks
- Why Leaving Your Home Vacant Can Cause Wall Cracks
- Why Faulty Taping of Drywall Can Create Cracks in Your Walls
- Plaster Shrinkage: A Common Cause of Wall Cracks
- When Your Neighbor’s Renovation Projects Cause Wall Cracks
- The Phenomenon of Differential Movement in Walls: What You Need to Know
- Adding Climbing Plants to Your Wall: Potential Damage and Maintenance
- Why Walls Crack: The Ground Beneath Your Feet
- Subsidence: The Homeowner’s Worst Nightmare
- The Battle Against Damp and Moisture Ingress
- When Trees Attack: How Tree Roots Can Cause Cracks in Your Walls
- When the Ceiling Cracks: What Causes It and How to Fix It
- Fixing Those Pesky Cracks in Your Walls
- Conclusion
Is That Crack in Your Wall Serious?
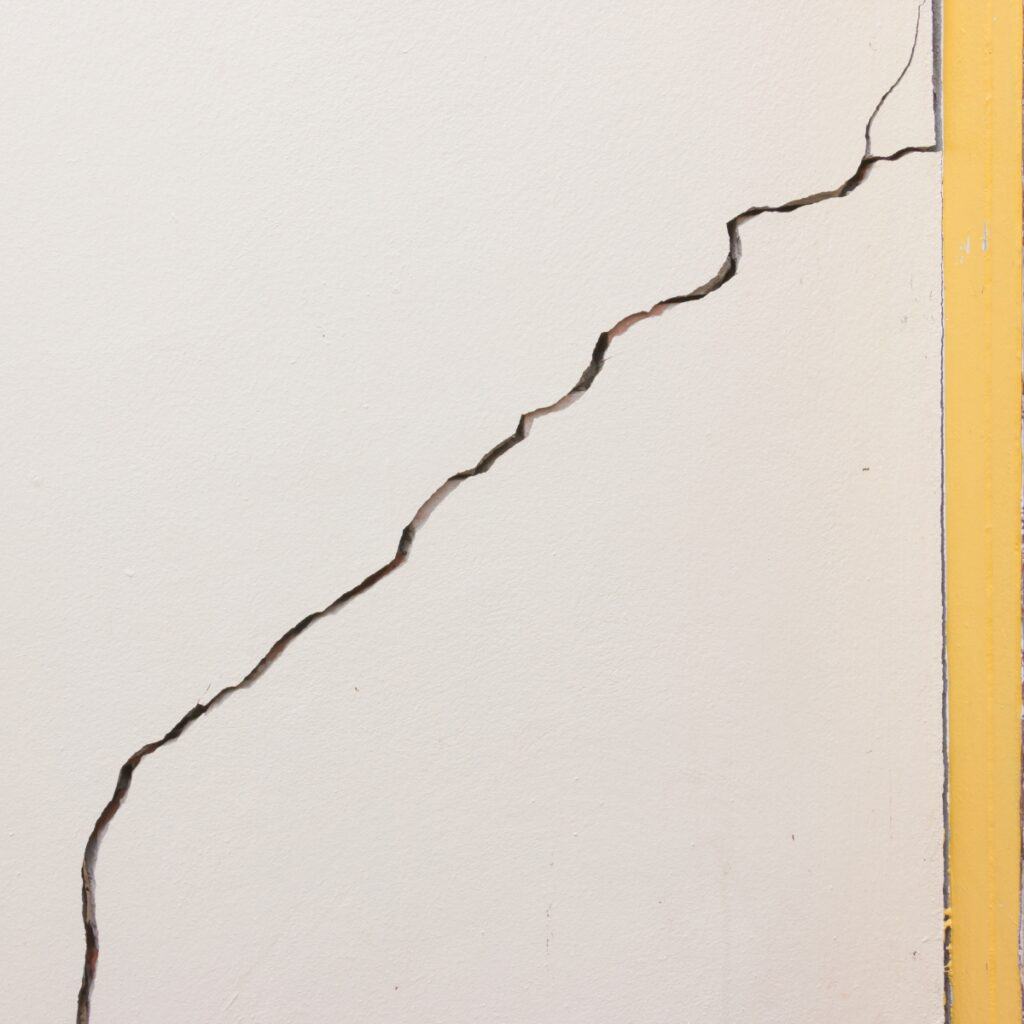
As a homeowner, seeing a crack in your wall can be a cause for concern. However, not all cracks are created equal. Here’s what you need to know to determine if that crack is serious or not:
Size Matters
The size of the crack is a good indicator of its severity. A singular hairline crack on interior walls shouldn’t be a cause for concern. However, if the crack is more than ¼ inch wide, it could be a sign of a more serious issue. Additionally, if the crack continues to grow over time, it’s important to take action.
The Filling Process
If you’ve determined that the crack is not serious, you can simply fill it with spackling paste, allow it to dry, and then repaint. However, if the crack is wider than ¼ inch, it’s important to take the following steps:
- Use a putty knife to remove any loose debris from the crack
- Fill the crack with joint compound or spackling paste
- Use a putty knife to smooth the surface
- Allow the compound to dry completely
- Sand the surface until it’s smooth
- Repaint the area
Improvement and Home Maintenance
While filling a crack in your wall may seem like a simple process, it’s important to address the underlying issue to prevent the crack from reappearing. Here are some tips to improve and maintain your home:
- Keep an eye on the humidity levels in your home to prevent moisture buildup
- Address any drainage issues around your home to prevent water from seeping into your foundation
- Regularly inspect your home’s foundation for signs of settling or subsidence
- Hire a professional to inspect your home’s structure if you notice any significant cracks or other issues
Remember, while a crack in your wall may seem like a minor issue, it could be a sign of a more serious problem. By understanding the severity of wall cracks and taking the necessary steps to address them, you can keep your home in top condition.
Why Your Old Home is Prone to Cracks
Your home is old, and that could be the cause of the cracks you’re seeing. Older homes were constructed using lime, shifting ground, and other materials that are less flexible than modern cement renders and mortars. As a result, these homes are more prone to structural failure and cracks.
Temperature and Humidity Changes
Temperature changes and variations in humidity levels can cause your old home’s structure to shrink and swell over a prolonged period of time. This can result in cracks appearing on the walls, especially in newly plastered walls that experience hairline cracks as they dry out.
Immediate and Wider Causes
In some cases, cracks can occur due to immediate causes such as faulty taping of drywall or settling of the ground. However, in older homes, cracks may be caused by wider issues such as the settling of the house over time or the growth of tree roots.
Repairing Cracks
If you notice cracks in your old home, it’s important to consult with an experienced professional, such as an Ian Chartered Surveyor like Haynes House Manuals. Depending on the severity of the crack, you may need to patch it up with spackling paste or fill it with a fine patch. However, if the crack is significant or wider than an inch, it’s best to consult with a professional to ensure the structural integrity of your home is not compromised.
In summary, your old home is prone to cracks due to its age, construction materials, and exposure to temperature and humidity changes. While some cracks may be superficial and easily fixed, others may indicate a more significant issue and require immediate attention from a professional.
Why a New Build May Develop Wall Cracks
Not all wall cracks in a new build are a cause for concern. Here are some factors to consider:
- Size: If the cracks are less than 1/8 inch wide, it’s typically considered normal and not a cause for worry.
- Location: Horizontal cracks are more concerning than vertical cracks, as they can signal a more significant issue.
- Effects: If you notice additional effects, such as water damage or a sagging ceiling, it may be a sign of a more significant problem.
Addressing Wall Cracks in a New Build
If you’ve noticed wall cracks in your new build, here are some steps you can take:
- Clean the area: Before patching the crack, it’s essential to clean the area thoroughly to ensure the patch adheres correctly.
- Patch the crack: Depending on the type of crack, there are different patching materials available. It’s best to consult with a professional to achieve the best results.
- Control moisture: Keeping the area dry is essential to prevent further cracking.
- Regular checks: Regularly checking for new cracks can help you catch any potential issues early.
Why Leaving Your Home Vacant Can Cause Wall Cracks
Leaving your home vacant for a long period of time can have a significant impact on the walls. Fluctuations in temperature and humidity levels can cause framing members and drywall to expand and contract, resulting in cracking. This can be especially true in older homes that were not built to be climate controlled.
Protecting Your Walls
There are numerous methods to protect your walls from excess moisture and temperature changes. Utilizing a dehumidifier can help keep the air dry and prevent wet conditions that can affect the walls directly. Applying a waterproofing compound to the walls can also help prevent moisture from penetrating the walls.
Preventing Improper Wall Cracks
Properly addressing wall cracks is important to prevent them from becoming a bigger issue. Depending on the types of cracks found, different methods may be utilized to prevent them from getting worse. For example, small, thin cracks can be set with a compound, while larger cracks may require the use of a block or other strong material.
The Best Time to Address Wall Cracks
The best time to address wall cracks is as soon as they are discovered. This will give you the best chance of preventing them from becoming a bigger issue. If left untreated, wall cracks can actually weaken the structure of your home and make it less safe to live in.
The Unique Potential of Modern Building Materials
Modern building materials offer a range of options for preventing wall cracks. These materials are designed to be stronger and more durable than traditional materials, making them better suited for protecting your walls. Additionally, modern materials can be utilized to create a complete barrier against moisture and other potential causes of wall cracks.
Why Faulty Taping of Drywall Can Create Cracks in Your Walls
Faulty taping of drywall is a common reason for cracks in walls. It happens when the tape used to cover the seams between drywall sheets is not properly installed or is of poor quality. This can lead to the tape pulling away from the drywall, leaving a gap that can eventually turn into a crack.
What to Do if You Notice Cracks in Your Walls
If you notice cracks in your walls, it’s important to take action to prevent them from getting worse. Here are some steps you can take:
- Check the rest of the area: Look for other cracks or signs of damage in the same area.
- Determine the cause: Try to figure out what caused the cracks in the first place.
- Fix the problem: Once you’ve determined the cause, take steps to fix the problem. If it’s faulty taping of drywall, you may need to remove the tape and start over.
- Cover the cracks: Use a high-quality spackle or joint compound to cover the cracks and achieve a smooth finish.
- Allow enough drying time: Make sure the spackle or joint compound is completely dry before painting or wallpapering over it.
Why Proper Taping of Drywall is Essential for Your Home’s Structure
Proper taping of drywall is essential for your home’s structure because it:
- Creates a strong and smooth surface for finishing.
- Helps to resist cracks and other damage.
- Allows for easier handling and installation of the drywall sheets.
- Saves you money in the long run by preventing potential damage that may require costly repairs.
Plaster Shrinkage: A Common Cause of Wall Cracks
Plaster shrinkage occurs when the liquid in a plaster material evaporates, causing the material to shrink as it dries. This can cause small cracks to form in the plaster, which can affect the integrity of the wall structure over time.
How Does Plaster Shrinkage Affect Walls?
Plaster shrinkage can cause a variety of different types of cracks to appear in walls. These cracks can be small and hairline, or they can be larger and more significant. They can form horizontally or vertically, and they can appear in different layers of the wall, including the plaster, lath, and surrounding space.
What are the Potential Causes of Plaster Shrinkage?
Plaster shrinkage can be caused by a number of different factors, including moisture, insulating and heating issues, and the type of material used to build the wall. Some of the most common causes of plaster shrinkage include:
- Faulty taping of drywall
- Neighboring renovation projects
- Differential movement
- Climbing plants
- Settlement
- Subsidence
- Damp and moisture ingress
- Tree roots
How Can You Detect Plaster Shrinkage?
Detecting plaster shrinkage can be difficult, as the cracks may be small and difficult to see. However, some key signs that you may have plaster shrinkage include:
- Small cracks appearing in the plaster
- Cracking or flaking of the paint on the wall
- A sound similar to cracking or popping when the wall is touched
If you suspect that you have plaster shrinkage in your walls, it is important to investigate the issue further to ensure that the wall’s integrity is not compromised.
When Your Neighbor’s Renovation Projects Cause Wall Cracks
When your neighbor decides to renovate their home, it can be exciting to see the changes taking place. However, it can also be a cause for concern if you start noticing cracks in your walls. The ground underneath your house is a delicate balance, and any force or movement can cause cracks in the walls. When your neighbor is carrying out a renovation project, they may be cutting into the ground, excavating, or expanding their house, which can cause movement in the ground underneath your house. This movement can then cause cracks to appear in your walls.
The Effect of Trees and Roots on Your House’s Foundation
Trees and their roots can be a particular problem when it comes to wall cracks caused by neighboring renovation projects. If your neighbor is building an extension or carrying out work on their garden, they may be removing trees or stumps. When trees grow, their roots can carry moisture and grow underneath your house’s foundation. If your neighbor removes a tree, the roots may dry out and shrink, causing the ground to shift and move. This movement can then cause cracks to appear in your walls.
The Phenomenon of Differential Movement in Walls: What You Need to Know
Differential movement is a structural phenomenon that occurs when different parts of a building move at different rates. This can be caused by a variety of factors, including shifts in the soil, sunken foundations, and changes in temperature or humidity. When differential movement occurs, it can create a range of effects, from slight cracks in the walls to severe damage to the house’s structure.
How Can You Prevent Differential Movement?
Preventing differential movement requires a lot of careful planning and attention to detail during the construction process. Some steps that can be taken to prevent differential movement include:
- Using high-quality materials that are designed to withstand changes in temperature and humidity
- Installing a custom joint system that allows for independent movement of different parts of the building
- Adding metal flashing to the roof and foundation to help prevent water damage
- Inspecting the building regularly to ensure that any signs of movement are dealt with quickly and correctly
Adding Climbing Plants to Your Wall: Potential Damage and Maintenance
Climbing plants can be a beautiful addition to any building, but they can also cause damage if not properly maintained. Here are some reasons why:
- Climbing plants use their roots to attach themselves to the wall, which can cause cracks and damage to the structure.
- The weight of the plant can also cause stress on the wall, leading to potential structural damage.
- The plant can trap moisture against the wall, leading to dampness and potential mold growth.
How to Achieve a Smooth Finish with Climbing Plants
If you’re determined to add climbers to your wall, there are ways to do it that can minimize damage and make maintenance easier:
- Use screws or other types of support that won’t damage the wall.
- Choose a type of plant that won’t require a lot of maintenance or trimming.
- Use a level to ensure the plant is growing straight and won’t cause stress on the wall.
- Consider using a helpful product like a trellis or wire mesh to help guide the plant’s growth.
How to Patch and Repair Damage Caused by Climbing Plants
If you’re worried about potential damage, it’s important to know how to repair it:
- Use a patching compound to fill in any cracks or damage caused by the plant’s roots.
- Sand down the surface to create a smooth finish.
- Consider using a waterproof sealant to prevent moisture from seeping into the wall.
Adding climbing plants to your wall can be a beautiful addition, but it’s important to understand the potential damage and maintenance required. By following these tips, you can help ensure a better outcome for both your climbers and your wall.
Why Walls Crack: The Ground Beneath Your Feet
Settlement cracks occur when the ground beneath a structure shifts or settles. This can happen for a variety of reasons, including:
- The weight of the building itself
- Weight imposed by furniture and other objects
- Changes in moisture levels in the soil
- Natural movement of the earth’s crust
How Settlement Affects Buildings
When a building settles, it can cause the foundation to shift and settle as well. This can lead to problems such as:
- Cracking in walls and masonry
- Structural damage
- Subsidence
- Uneven floors
- Doors and windows that no longer open or close properly
How Buildings Adjust to Settlement
While settlement is a natural occurrence, buildings are designed to accommodate for it. Here are some ways that structures adjust to settlement:
- Foundations are designed to be flexible, allowing for movement without harmfully affecting the building’s structure.
- Joints are provided between different parts of the building, allowing for movement without causing cracking or other damage.
- Walls and other parts of the building are constructed with materials that can compress and settle without cracking or breaking.
When Settlement Becomes a Problem
While minor settlement is normal and happens periodically, major settlement can cause serious problems for homeowners. Here are some signs that settlement may be becoming a problem:
- Cracks in walls or masonry that grow over time
- Doors and windows that no longer open or close properly
- Uneven floors
- Hairline cracks in the foundation
If you notice any of these signs, it’s important to have your home inspected by a professional to determine the cause of the problem and the best course of action.
Subsidence: The Homeowner’s Worst Nightmare
Subsidence refers to the sinking or settling of the ground beneath a building, causing it to sink or become unstable. This can result in cracks appearing in walls, floors, and doors, destabilising the support of the building and potentially causing catastrophic visual and financial issues for homeowners.
How Does Subsidence Occur Naturally?
Subsidence can occur naturally as a result of the settlement, such as in the following scenarios:
- Foundations in new builds and extensions will settle under their own weight over time, which can result in hairline cracks. The same can happen to freshly plastered interior walls that need to dry out over time.
- Frosts can cause subsoils to freeze and expand, which can lead to the ground sinking when it thaws.
- Squelchy subsoils that encourage heave when they dry out.
What are the Effects of Subsidence?
The effects of subsidence can be devastating for homeowners, including:
- Cracking walls, floors, and doors
- Movement in the building, causing doors and windows to stick or not close properly
- The ability of the building to support itself is compromised, which can lead to structural damage and safety concerns
- The worst-case scenario is that the building may need to be demolished and rebuilt
How to Deal with Subsidence?
Dealing with subsidence needs to be done in a timely and professional manner to avoid financial problems. Here are some steps homeowners can take:
- If you suspect subsidence, contact a professional to assess the problem and advise on the best course of action.
- If subsidence is confirmed, the cause needs to be identified and dealt with. This may involve underpinning the foundations or removing trees or other sources of moisture.
- Homeowners should also contact their insurance company to see if they are covered for subsidence-related issues.
The Battle Against Damp and Moisture Ingress
Damp and moisture ingress are caused by water penetrating the building structure. This can be caused by a variety of factors such as:
- Faulty workmanship during construction
- Deterioration of building materials over time
- Extreme weather conditions such as heavy rain
- Shrinkage of plaster and mortar
- Loose or deteriorated pointing and cement joints
- Penetration of rainwater through brickwork, render, or exterior walls
- Climbing plants and tree roots causing structural damage
The Role of Quality Workmanship in Preventing Damp and Moisture Ingress
Preventing damp and moisture ingress requires appropriate workmanship during construction and regular maintenance. Here are some ways to achieve quality workmanship:
- Use appropriate building materials and ensure they are of high quality
- Ensure that the building structure is suitable for the weather conditions in the area
- Regularly inspect and maintain the building structure to prevent deterioration
- Keep an eye on neighboring renovation projects that may cause damage to your building
The Importance of Research in Fixing Damp and Moisture Ingress
Research is essential in fixing damp and moisture ingress. Here are some ways research can help:
- Learn about the appropriate building materials and techniques for your area
- Understand the causes and symptoms of damp and moisture ingress
- Identify the appropriate methods for fixing the problem
- Return your building to its former splendor by fixing the problem appropriately
When Trees Attack: How Tree Roots Can Cause Cracks in Your Walls
Trees are a beautiful addition to any yard, but they can also be the cause of major headaches for homeowners. Tree roots seeking water can grow to the point where the pressure they exert on a wall causes foundation walls to bulge and slabs to crack and move. There are even cases where tree roots have grown into or through concrete walls, cracking them and causing further structural damage.
The Damage Tree Roots Can Cause
When tree roots grow too close to your house, they can cause a variety of problems, including:
- Cracks in walls and foundations
- Bulging or leaning walls
- Slab and foundation movement
- Structural damage to your house
- Leaking or damaged pipes and plumbing
- Moisture and water damage in your basement
What to Do If You Suspect Tree Roots Are Causing Wall Cracks
If you suspect that tree roots are causing cracks in your walls or foundation, it’s important to take action as soon as possible to prevent further damage. Here are some steps you can take:
- Call an arborist to assess the situation and advise you on the best course of action.
- Hire an engineer to evaluate the structural integrity of your house and recommend any necessary repairs.
- Consider waterproofing your basement to prevent moisture and water damage.
- Repair any leaking or damaged pipes or plumbing.
- If necessary, remove the tree or trees causing the problem.
Preventing Tree Roots from Causing Wall Cracks
Prevention is key when it comes to tree roots and wall cracks. Here are some tips to help prevent tree roots from causing damage to your house:
- Plant trees at least 10 feet away from your house.
- Choose trees with smaller root systems, such as dogwoods or magnolias.
- Install a root barrier to prevent roots from growing too close to your house.
- Regularly inspect your house for signs of wall cracks or foundation damage.
- If you have an older house, consider having your pipes and sewer lines inspected and replaced if necessary.
Remember, prevention is always better than cure when it comes to tree roots and wall cracks. By taking the necessary steps to prevent tree roots from causing damage to your house, you can save yourself a lot of time, money, and headaches in the long run.
When the Ceiling Cracks: What Causes It and How to Fix It
Ceiling cracks can be caused by a variety of factors, including:
- Structural issues: If your home’s foundation is settling or shifting, it can cause the walls and ceiling to crack. Underpinning or lifting the foundation may be necessary to fix the problem.
- Soil movement: Changes in the soil beneath your home can also cause structural issues that lead to ceiling cracks.
- Temperature and humidity: As with wall cracks, changes in temperature and humidity levels can cause the ceiling to expand and contract, leading to cracks.
- Load-bearing walls: If you have load-bearing walls in your home, they can cause the ceiling to sag over time, leading to cracks.
- Cosmetic issues: Sometimes, ceiling cracks are simply a cosmetic problem caused by settling or minor structural issues.
Signs of a More Serious Problem
While some ceiling cracks are purely cosmetic, others can indicate a more serious structural issue. Here are some signs to look out for:
- Multiple cracks in a pattern: This could indicate a load-bearing issue.
- Cracks that are wider than 1/4 inch: This could indicate a more serious structural problem.
- Sagging or dipping in the ceiling: This could indicate a load-bearing issue or foundation problem.
If you notice any of these signs, it’s important to consult a professional to assess the problem and determine the best course of action.
Fixing Those Pesky Cracks in Your Walls
Before you start repairing the crack, it’s important to identify the cause of the problem. This will help you determine whether the crack is simply cosmetic or if it indicates a more serious structural issue. Some common causes of cracks in walls include settling, foundation problems, and framing issues. Inspect the crack closely to determine if it is vertical or horizontal, as this can also indicate the cause of the problem.
Gathering Materials and Tools
Once you’ve identified the cause of the crack, it’s time to gather the necessary materials and tools. Depending on the size and location of the crack, you may need the following:
- Drywall compound or spackle
- Drywall tape
- Sanding block or sandpaper
- Putty knife or trowel
- Primer and paint
- Utility knife or scraper
- Glue
- Water
Preparing the Surface
Before you start filling the crack, you need to prepare the surface. This involves scraping away any loose or flaking material around the crack and sanding the edges slightly to create a smooth surface. If the crack contains any debris or water, make sure to remove it before you start filling.
Filling the Crack
To fill the crack, start by applying a thin layer of drywall compound or spackle to the crack with a putty knife or trowel. If the crack is slightly larger, you may need to apply drywall tape first to reinforce the area. Once the compound or spackle dries, sand the surface until it is smooth and level. Depending on the size of the crack, you may need to repeat this process multiple times, allowing each layer to dry before applying the next.
Finishing Touches
Once the compound or spackle dries and the surface is smooth, it’s time to apply primer and paint to match the rest of the wall. Make sure to use a high-quality paint that will blend well with the rest of the wall. If the crack was particularly large or required extra reinforcement, it may be a good idea to bring in a professional to ensure that the repair is done correctly.
Unique Methods for Unique Cracks
While the above steps are common for repairing cracks in walls, there are some unique methods that may be required depending on the specific crack. For example, if the crack is the result of settling or foundation problems, you may need to address the underlying issue before repairing the crack. Similarly, if the crack is in a new build, it may be a good idea to consult with the builder to determine the best way to repair the crack.
The Importance of Repairing Cracks
While small cracks in walls may seem like a minor cosmetic issue, they can actually indicate a more serious problem with the structure of your home. Leaving cracks unaddressed can result in further damage and potentially costly repairs down the line. By inspecting and repairing cracks as soon as they appear, you can ensure that your home remains in good condition for years to come.
Conclusion
So, there you have it- why walls crack. Cracks are usually a sign of a bigger problem, so it’s important to address the underlying cause and maintain the wall properly to prevent future cracks from appearing. It’s not as difficult as it seems, so don’t be afraid to get started. With these tips, you’ll be on your way to a smooth wall-cracking life!

I'm Joost Nusselder, the founder of Tools Doctor, content marketer, and dad. I love trying out new equipment, and together with my team I've been creating in-depth blog articles since 2016 to help loyal readers with tools & crafting tips.