I love creating free content full of tips for my readers, you. I don't accept paid sponsorships, my opinion is my own, but if you find my recommendations helpful and you end up buying something you like through one of my links, I could earn a commission at no extra cost to you. Learn more
A circular saw is one of the most used tools by woodworkers, both at the professional level as well as hobbyists. That is because the tool is very versatile, and it can do such a wide variety of tasks.
However, there are a few situations where a circular saw struggle. A long rip cut is one of them. How do you rip narrow boards with a circular saw?
There are a handful of reliable ways to do this. However, a bit of extra work is needed to be done. I mean, a circular saw is not called the jack of all trades for no reason. I will discuss three easy methods of ripping narrow boards here.
In this post we'll cover:
Steps For Ripping Narrow Boards With A Circular Saw
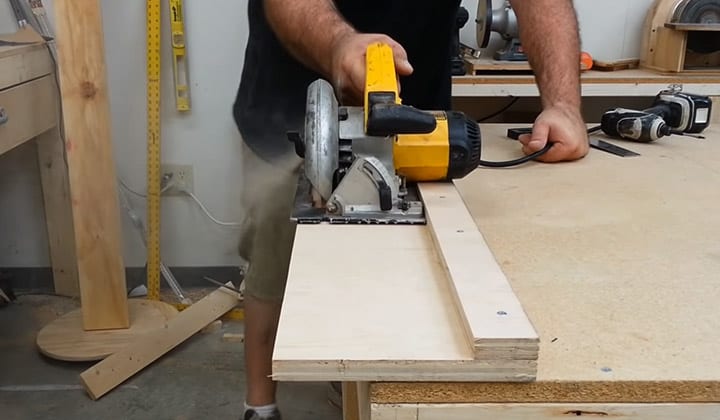
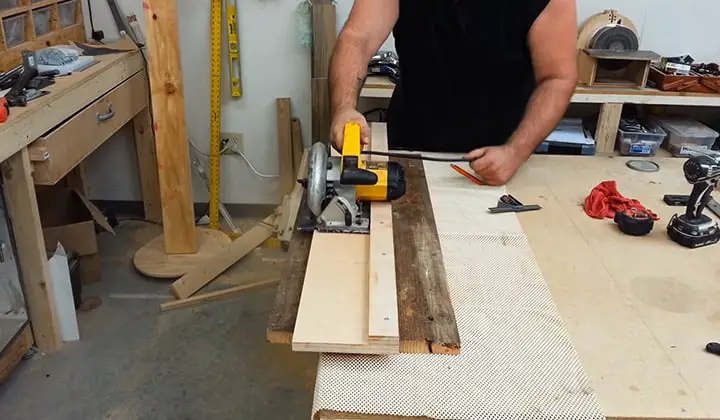
1. The Guide Fence Method
Using a guide fence is one of the easiest and simplest ways of getting the desired cut. Not just ripping narrow boards, in general, whenever you need a long straight cut, a guide fence will come in handy. They help tremendously to keep the blade saw straight. Also, they can be purchased ready-to-use, or they can be made at home, with the material you have at the back of your garage, two pieces of wood, glue, or a couple of nails(or both).- Select two pieces of wood, one wider, and the other being narrower, and both at least a couple of feet long.
- Stack the two, with the narrow one on top.
- Fix them in place, by any means, like glue or screw.
- Put your saw on top of the wider one and against the edge of the smaller ones.
- Run your saw along the length, always touching the edge of the other plank, cutting off the excess wood.
- Very easy to obtain
- Repeatable.
- Works on almost any thickness of material your saw can handle, as many times as you can handle.
- It is bulky and takes quite some space
- It can be problematic with blades with more or less kerf
2. The Edge Guide Method
If the guide fence was overwhelming for you, or you do not want to go through the trouble of making one, or it is too big and bulky for what it does (frankly, yes it is), and instead you want a simpler neat looking solution, then an edge guide might be just the tool you can fall in love with. An edge guide is an attachment for your circular saw. It is basically an extension with a pocket-size fence underneath that sticks out below the surface of your saw. The idea is, the narrow board, being narrow, can easily fit in the space between the blade and the guide. Oh! The distance from the blade to the guide is adjustable to some degree. When running the blade on your wood piece, all you need to do is to try to maintain contact between the guide and the edge of the wood. As long as the guide does not leave the edge, you will never go off your straight line. Since the attachment stays on the saw, it can be really small and insignificant enough so that you may even forget that you own one. That sounds incredible. Why would one ever need a guide fence when we have an edge guide, right? Actually, there is a catch. You see, the edge guide sits on the opposite side of the saw from the blade. Thus, in order to use it, your board needs to be at least slightly wider than the gap between the fence and the blade. Any less than that will render your set up ineffective. Pros- Neat and simple, looking as well as easy to install and use
- Built of stronger materials (usually metal), thus lasts longer than a wooden guide fence
- It requires relatively wider boards to work with
- In case of replacement, getting a new one is relatively harder and costs more overall
3. The Zero Prep Method
Many people, including a lot of the veterans, prefer not to invest a lot of time or effort in preparations, especially when they need to handle a wide variety of cuts and blades. The other two methods that I mentioned above have their drawbacks. The guide fence falls short as soon as you install a new blade to your circular saw or you change the saw. It may feel too limiting. The edge guide method, on the other hand, does not help at all when the workpiece is too narrow or too wide. In cases like that, This method will surely be useful like always. Here’s How To:- Choose a piece of wood longer than the length of your saw and thicker than the board you will be working on. The width can be any. We will call it the ‘base-piece’.
- Place the base-piece on a table and put the saw on top.
- Clamp all three together, somewhat loosely, because you will be doing quite a bit of adjusting. But not so loosely that the saw wobbles.
- At this point, the saw is fixed with the table, as a table saw, but the saw is on top and upside down.
- Pick a sacrificial piece of wood, run the saw, and feed the wood from the front of the saw. But not all the way in, just enough to have a mark on the wood of where the saw will cut. Make sure that the edge of the wood is touching the base-piece.
- Measure the width you are cutting. Adjust the saw as you need, moving the blade closer to the base-piece if you need a thinner strip or vice versa.
- Run the saw again, but this time, flip the piece of wood upside down and feed it from the backside of the saw. And make a similar mark as before.
- If the two marks match, then your setup is done, and you can clamp everything securely and proceed to work on the real workpiece. Always remember that the workpiece should be touching the base-piece.
- If the two do not match, then adjust, as mentioned above.
- Very simple to set up once you have some experience
- No cost or no waste. Easily adjustable
- Somewhat less stable compared to the other methods. Prone to be ruined accidentally, especially in inexperienced hands
- Needs to be set up from the ground up every time, and set up may feel excessively time-consuming
Conclusion
While all three methods are useful, my personal favorite one is the guide fence. The reason being, It is so simple to make and use. The other two methods are equally useful, if not more, I am sure. Overall, all of them have their advantages and drawbacks. I hope you can find the one that suits you the best.
I'm Joost Nusselder, the founder of Tools Doctor, content marketer, and dad. I love trying out new equipment, and together with my team I've been creating in-depth blog articles since 2016 to help loyal readers with tools & crafting tips.