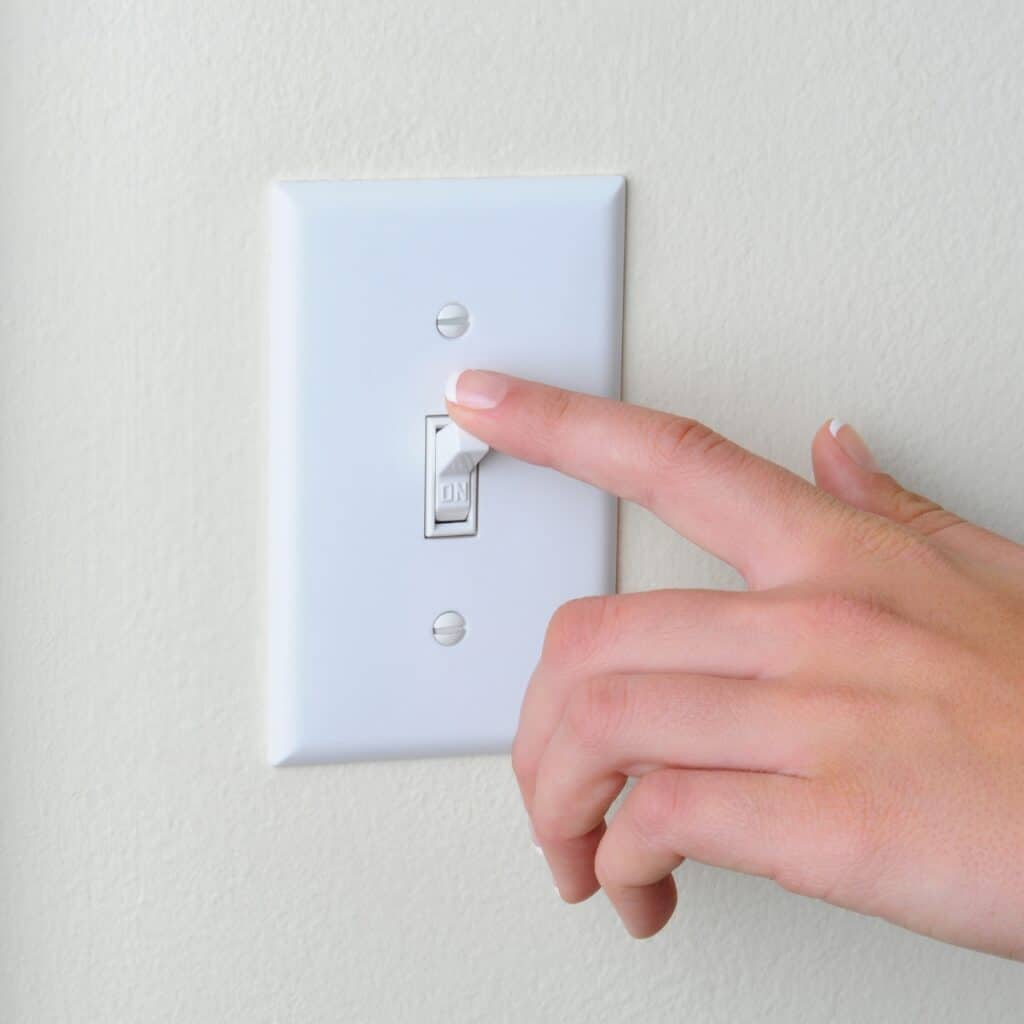
So you’re flipping a lightswitch and it doesn’t work? That’s a bummer, but it happens. But what exactly is a lightswitch?
A lightswitch is a device that controls the flow of electricity to a light fixture. It’s a simple device that completes the circuit to turn the light on and off. There are many different types of lightswitches, but they all serve the same purpose.
In this article, I’ll explain how a lightswitch works and how it’s different from other electrical devices. Plus, I’ll share some fun facts about this useful device.
In this post we'll cover:
- Wall-Mounted Switches: A Variety of Types and Designs
- How a Light Switch Actually Works
- The Evolution of Light Switches: From Functional to Stylish
- Wiring Your Light Switch: A Beginner’s Guide
- Switches and Dimmers: A Comprehensive Guide
- The Art of Light Switch Design
- Variations on Light Switch Design
- Multiway Switching: The Art of Controlling Lights from Multiple Locations
- The Anatomy of a Wall Switch
- From Porcelain to Polycarbonate: The Evolution of Light Switch Materials
- Conclusion
Wall-Mounted Switches: A Variety of Types and Designs
- There are several types of wall-mounted switches available in the market, each designed for different uses and purposes.
- Some of the most commonly found types of wall-mounted switches include:
– Single Pole Switches: These are the most basic type of switches that are used to control a single light or outlet.
– Double Pole Switches: These switches are designed to control two separate circuits and are commonly used in large buildings or homes with high voltage requirements.
– Three-Way Switches: These switches are used to control a single light or outlet from two different locations.
– Four-Way Switches: These switches are used in conjunction with three-way switches to control a single light or outlet from three or more locations.
- Each type of switch requires a certain wiring form and may have specific requirements for the type of wire and circuit used.
Design and Style
- Wall-mounted switches come in a wide range of designs and styles to match the desired look and feel of the room.
- Some of the design and style options available include:
– Pure white or black finishes for a sleek and modern look.
– Different materials such as metal or plastic to achieve a certain aesthetic.
– Smart switches that allow for additional control options through internal circuitry and plug-in options.
– Varieties that allow for adjustment of the voltage and current supply.
- Some switches may also include additional features such as built-in covers to protect the wiring and prevent accidental touching of live wires.
Wiring and Installation
- Wall-mounted switches are wired and connected to the electrical outlet box mounted in the wall.
- The wiring may include a neutral wire, a ground wire, and one or more wires carrying the current from the power source to the light or outlet.
- It is important to make sure that the wires are properly marked and connected to the correct screws on the switch to ensure proper function and protect against electrical hazards.
- Some switches may require a certain type of cable or wiring to be used, so it is important to refer to the manufacturer’s instructions before installation.
- Wall-mounted switches are usually fairly easy to install and can be done by the user with basic electrical knowledge, but it is always a good idea to consult a professional electrician if unsure.
Matching and Choosing
- When looking for a wall-mounted switch, it is important to choose one that matches the desired style and finish of the room.
- Some switches may also offer a wide range of colour options to choose from.
- It is also important to choose a switch that is designed for the specific use and voltage requirements of the light or outlet it will be controlling.
- Certain brands may be considered more reliable or offer additional features, so it is important to do research before making a purchase.
How a Light Switch Actually Works
A light switch is a simple device that controls the flow of electricity to a light fixture. It interrupts or completes a circuit, allowing you to turn the light on or off. The switch is designed to be installed in a wall box and is connected to the wiring that supplies power to the light fixture.
The Importance of Proper Wiring
It is important to wire a light switch properly to ensure safety and proper functioning. Improper wiring can cause a lack of power or voltage, which can damage the light fixture or cause a fire. Here are some important things to note:
- Always turn off the power before attempting to wire a light switch.
- Follow wiring diagrams and instructions carefully.
- Test the switch before installing it in the wall box.
- Make sure the switch is properly grounded.
The Exception: Lighted Switches
Lighted switches are a kind of toggle switch that integrates a small light bulb into the switch mechanism. They are designed to provide a visual indication of whether the light is on or off. Lighted switches are uncommon in newer homes but can be found in older homes. They require a different kind of wiring than standard switches and may require a replacement fixture or ceiling box.
The Different Varieties of Light Switches
There are many different varieties of light switches, including:
- Toggle switches: These are the most basic type of light switch and have a lever that flips up and down to turn the light on and off.
- Rocker switches: These switches have a flat surface that you press on one side to turn the light on and the other side to turn it off.
- Dimmer switches: These switches allow you to control the brightness of the light by adjusting the amount of electricity flowing to the fixture.
- Smart switches: These switches can be controlled remotely using a smartphone or other device and can integrate with other smart home devices.
The Evolution of Light Switches: From Functional to Stylish
Light switches have come a long way since their inception in the late 1800s. The first switches were simple toggles that controlled the flow of electricity to a single light bulb. Over time, switches evolved to include dimming capabilities, multiway switching, and remote control. Today, light switches are an essential element of modern electrical wiring and circuit control.
Cultural Significance and Examples of Light Switches
Light switches have become a ubiquitous part of our daily lives, and their design and style have become a reflection of our personal taste and character. Here are some examples of how light switches have been used in different cultures and styles:
- Traditional Japanese homes often feature light switches that are located on the floor and are operated with the foot.
- In modern homes, light switches are often designed to be a key element of the room’s decor, with a variety of styles and covers to choose from.
- Some light switches are designed to be “smart,” allowing users to control their lights with their voice or through a mobile app.
- Light switches can also be a force for good, with some models designed to help people with disabilities or the elderly to turn their lights on and off more easily.
The Importance of Style and Design
While light switches may seem like a small detail, they can have a big impact on the overall look and feel of a room. Here are some key considerations when choosing a light switch:
- Style: Light switches come in a variety of styles, from traditional toggle switches to modern touchscreens. Choose a style that complements the room’s decor.
- Functionality: Consider how the light switch will be used. Do you need a dimmer switch or a multiway switch?
- Safety: Make sure the light switch meets safety standards and is designed to prevent electrical shocks.
- User-Friendly: Choose a light switch that is easy to use and understand, with clear labeling and a sharp, responsive feel.
Wiring Your Light Switch: A Beginner’s Guide
Wiring a light switch involves connecting wires to the switch and to the electrical box. Here are some basics to keep in mind:
- The switch connects the hot wire, which carries the voltage, to the light fixture.
- The neutral wire, which carries the current back to the service panel, is typically white and connects directly to the fixture.
- The ground wire, which is typically green or bare, connects to the electrical box and provides a path for electricity to flow safely to the ground in case of a short circuit.
- The wires are typically encased in a cable, called NM, which contains a black wire (hot), a white wire (neutral), and a bare or green wire (ground).
Tools and Materials You’ll Need
Before you start wiring your light switch, make sure you have the following tools and materials:
- Wire stripper
- Screwdriver
- Voltage tester
- NM cable
- Light switch
- Electrical box
Steps to Wiring Your Light Switch
Here are the steps to follow when wiring your light switch:
1. Turn off the power to the circuit you’ll be working on by switching off the circuit breaker in the service panel.
2. Remove the existing switch by unscrewing the screws that hold it in place and gently pulling it out of the box.
3. Check the wiring in the box to make sure it contains the necessary wires (hot, neutral, and ground) and that they are connected correctly.
4. If you’re adding a new switch, you’ll need to run a new cable from the switch to the fixture.
5. Strip the ends of the wires and connect them to the switch, following the manufacturer’s instructions and the wiring diagram that comes with the switch.
6. Place the switch back into the box and secure it with screws.
7. Turn the power back on and test the switch to make sure it works.
Replacing an Existing Light Switch
If you’re replacing an existing light switch, follow these steps:
1. Turn off the power to the circuit you’ll be working on by switching off the circuit breaker in the service panel.
2. Remove the existing switch by unscrewing the screws that hold it in place and gently pulling it out of the box.
3. Check the wiring in the box to make sure it contains the necessary wires (hot, neutral, and ground) and that they are connected correctly.
4. Disconnect the wires from the existing switch and connect them to the new switch, following the manufacturer’s instructions and the wiring diagram that comes with the switch.
5. Place the new switch back into the box and secure it with screws.
6. Turn the power back on and test the switch to make sure it works.
Rule of Thumb
When working with electrical wiring, it’s important to remember this rule of thumb: if you don’t feel comfortable doing the job, ask for help from a professional electrician. Wiring involves knowing the right type of wire to use, how to connect the wires, and how to avoid potential hazards that could cause damage or harm.
Switches and Dimmers: A Comprehensive Guide
- Single-Pole Dimmers: These dimmers are used to control the brightness of a single light or set of lights from one location. They have two brass-colored screws and one green screw for the ground wire.
- Three-Way Dimmers: These dimmers are used when you want to control the brightness of a single light or set of lights from two different locations. They have three screws, two brass-colored and one black-colored, and one green screw for the ground wire.
- Multi-Location Dimmers: These dimmers are used in conjunction with two or more three-way switches to control the brightness of a single light or set of lights from three or more locations. They have four screws, two brass-colored and two black-colored, and one green screw for the ground wire.
- Fan Speed Control Dimmers: These dimmers are used to control the speed of ceiling fans. They have four wires, two for power and two for the fan motor.
Choosing the Best Switch or Dimmer
- Determine the type of switch or dimmer you need based on the specific function you want it to perform.
- Consider the design and style of the switch or dimmer to ensure it fits with the overall aesthetic of the room.
- Make sure you are familiar with the wiring requirements and are able to handle the installation process or hire a professional to help.
- Decide if you want a standard switch or dimmer or a smart switch or dimmer that allows for remote control.
- Check the available connections in the electrical box to ensure the switch or dimmer you choose will fit.
- If you are unsure, consult a guide or ask for help from a professional.
The Good News
- Despite the large variety of switches and dimmers available, the basic wiring and function is usually similar across all types.
- Most switches and dimmers require little to no maintenance once installed.
- Adding a switch or dimmer can help create a specific mood or change the overall feel of a room.
- Ground wires are essential for safety and should always be connected properly.
The Art of Light Switch Design
When it comes to light switch design, the primary goal is to create a switch that is easy to use and offers complete control over the lighting in a given area. The design of the switch must allow for quick and easy action, allowing users to turn lights on and off with ease. Different types of switches are available to suit specific needs, including single and multiple switches, as well as dimmer switches that allow for greater control over the amount of light in a room.
Understanding the Internal Circuitry
Light switches are designed to control the flow of power to a specific area, and they do this by interrupting the electrical circuit that powers the lights. When the switch is turned on, it completes the circuit, allowing electrical energy to flow through the wiring and into the light fixture. When the switch is turned off, the circuit is broken, and the flow of power is stopped.
Materials and Design Elements
The materials used in light switch design are essential to the overall function and appearance of the switch. The switch itself is typically made of plastic or metal, with metal switches being more durable and long-lasting. The design of the switch can vary widely, from vintage designs that harken back to a bygone era to modern, sleek designs that offer additional features and extras.
Types of Switches and Their Uses
There are many different types of light switches available, each designed to suit a specific need or function. Some of the most common types of switches include:
- Single pole switches: These are the most common type of switch and are used to control a single light or group of lights in a specific area.
- Three-way switches: These switches are used to control the same light or group of lights from two different locations.
- Four-way switches: These switches are used in conjunction with three-way switches to control the same light or group of lights from three or more locations.
- Dimmer switches: These switches allow for greater control over the amount of light in a room, allowing users to adjust the brightness to their liking.
Designing for Safety and Efficiency
Light switch design must also take into account the safety and efficiency of the switch. The wiring and circuits used in the switch must be designed to handle the voltage and electrical energy required to power the lights, and the switch must be able to withstand the changes in voltage and current that occur when the switch is turned on and off.
Adding Additional Features and Extras
Light switch design has come a long way in recent years, and many switches now offer additional features and extras to make them more user-friendly and efficient. Some of these features include:
- Override switches: These switches allow users to bypass the automatic settings of the switch and manually adjust the lighting as needed.
- Timer switches: These switches allow users to set a specific time for the lights to turn on and off, making them ideal for use in areas where lighting is required at specific times.
- Motion sensor switches: These switches are designed to turn lights on and off automatically when motion is detected in the area, making them ideal for use in areas where lighting is needed only when someone is present.
Variations on Light Switch Design
Light switches are an essential part of our daily lives, and they come in various designs to suit different needs and preferences. In this section, we will explore the different variations on light switch design that are available in the market today.
Toggle Switches
Toggle switches are the most commonly used type of light switch. They have a simple design that consists of a lever that you flip up or down to turn the light on or off. These switches are available in various styles, including illuminated toggle switches that light up when the switch is in the “on” position. They are typically available in white or black, but custom colors and inlays are also available.
Push Button Switches
Push button switches are another type of light switch that is commonly used in Australia. They have a button that you push to turn the light on or off. Some push button switches are designed to pop up when the switch is depressed, providing a tactile indication that the switch has been activated.
Multiway Switches
Multiway switches are used when you want to control a single light from multiple locations. They typically have three or more connections and are available in toggle, rocker, and push button designs.
Dimmer Switches
Dimmer switches allow you to control the amount of light that a bulb produces. They work by lowering the voltage that is supplied to the bulb, which reduces the amount of energy that is released as light. Dimmer switches are available in various designs, including toggle, rocker, and slide switches.
Fluorescent Light Switches
Fluorescent light switches are designed to work with fluorescent bulbs, which require a different type of control mechanism than traditional incandescent bulbs. These switches typically have a brief delay before the light turns on, and they may produce an audible snap when they are turned on or off.
Multiway Switching: The Art of Controlling Lights from Multiple Locations
Multiway switching is a type of wiring scheme that allows you to control a light or a lamp from multiple locations. This is achieved by interconnecting two or more electrical switches to control an electrical load from more than one location. In other words, multiway switching allows you to turn a light on or off from two or more different switches placed in different locations.
The Basics of Multiway Switching
Multiway switching is achieved by using a combination of two or more ordinary switches, which are wired together in a specific way to achieve the desired result. The following are some of the basic terminologies and settings used in multiway switching:
- Live: This is the wire that carries the current from the power source to the switch.
- Switch: This is the device that is used to turn the light on or off.
- Terminal: This is the point where the wire is connected to the switch.
- Common: This is the terminal that is used to connect the switch to the electrical load.
- Circuit: This is the path that the current follows to complete the electrical circuit.
- Voltage: This is the difference in electrical potential between two points in a circuit.
- Low voltage: This is a type of voltage that is less than 50 volts.
- High voltage: This is a type of voltage that is greater than 50 volts.
- Wiring: This is the process of connecting wires together to form an electrical circuit.
- Short circuit: This is a type of circuit that allows the current to flow in a path of least resistance, bypassing the electrical load.
- Arc: This is a type of electrical discharge that occurs when the current jumps across a gap between two conductors.
- Fixture: This is the light or lamp that is being controlled by the switch.
The Difference Between Multiway Switching in the UK and the US
Multiway switching is known by different names and terminologies in the UK and the US. In the UK, it is usually called intermediate switching, while in the US, it is called three-way or four-way switching, depending on the number of switches involved. The actual wiring and schematics may also be slightly different in the two countries, so it is important to follow the local codes and regulations when installing a multiway switching system.
The Anatomy of a Wall Switch
The wires of a wall switch are connected to the screw terminals on the side of the switch body. The neutral wire connects to the silver screw, the hot wire goes into the brass screw, and the ground wire connects to the green screw in the switch or the electrical box. The screw terminals are designed to support the wires and keep them securely in place. Some switches also feature ports for connecting additional wires or devices.
The Risks of Clicking
One potential risk associated with wall switches is the wear and tear that can occur over time. As the switch is flipped on and off, the mechanical components inside can wear down, causing the switch to lose its characteristic snap or click. This can make it harder to operate the switch and may even result in the switch becoming disconnected from the circuit. To avoid these risks, it’s important to inspect your switches regularly and replace them if necessary.
From Porcelain to Polycarbonate: The Evolution of Light Switch Materials
In the early days of electrical switches, porcelain was the material of choice for surface-mounted switches. These switches operated as rotary switches with a rotary mechanism. Later, more durable materials like Bakelite and Ebonite were used. Bakelite was a type of plastic made from phenol formaldehyde resin and was known for its heat resistance and electrical non-conductivity. Ebonite, on the other hand, was a hard, dense, and durable material made from vulcanized rubber.
Modern Materials: Polycarbonate and Fire-Resistant ABS
Today, modern plastics like polycarbonate and fire-resistant ABS are the materials of choice for light switches. Polycarbonate is a thermoplastic material that is known for its high impact resistance, clarity, and heat resistance. It is also a good electrical insulator, making it ideal for use in electrical switches. Fire-resistant ABS, on the other hand, is a type of plastic that is made by adding flame retardants to ABS (Acrylonitrile Butadiene Styrene). This material is known for its high impact resistance, toughness, and resistance to heat and chemicals.
Other Materials Used in Light Switches
Aside from porcelain, Bakelite, Ebonite, polycarbonate, and fire-resistant ABS, other materials are also used in light switches. These include:
- Steel: Steel is a strong and durable material that is often used for the switch plates and covers.
- Copper: Copper is a good conductor of electricity and is often used in the electrical circuit of the switch.
- Aluminum: Aluminum is a lightweight and corrosion-resistant material that is often used for the switch plates and covers.
- Graphite: Graphite is a good conductor of electricity and is often used in the electrical circuit of the switch.
Conclusion
So, there you have it- everything you need to know about lightswitches.
They’re not as simple as you might think, but now you know all the ins and outs, you can make the right choice when it comes to choosing the right one for you.

I'm Joost Nusselder, the founder of Tools Doctor, content marketer, and dad. I love trying out new equipment, and together with my team I've been creating in-depth blog articles since 2016 to help loyal readers with tools & crafting tips.