A stain is a change of color from the surface or material it’s on. You have accidental stains on surfaces, like a spill of coffee, and intentional stains like the staining of wood, rust staining, or even stained glass.
There are many different types of stains, but they all have one thing in common: they cause a change in the appearance of the material they are found on. Some stains can be removed with cleaning products and some will never come out. It all depends on the type of stain and the material it is found on.
Stain can also refer to the substance used to create a stained effect on wood, also known as pickling paint.
Staining is a great way to add color and protection to wood. But what does it mean in DIY?
Staining can mean adding color and protection to wood. But what does it mean in DIY? It can mean applying a liquid or gel substance to wood to change its color or protect it from decay.
In this article, I’ll explain what it means in DIY, why it’s important, and how to do it right.
In this post we'll cover:
The Evolution of Wood Stain: From Ancient Times to Modern DIY
Wood staining began as a practical means of protecting wood from the elements. The ancient Egyptians and Greeks used natural oils and resins to protect their wooden structures from water and mold. In the Middle Ages, woodworkers used a mixture of boiled linseed oil and soot to create a dark finish that protected the wood from rot and insects.
The Rise of Wood Finishes
As woodworking became more refined, craftsmen began to experiment with different forms of wood finishes. In the 18th century, French masters developed a technique called “French polishing,” which involved applying multiple thin coats of shellac to achieve a smooth, high-gloss finish. This technique was time-consuming and required a great deal of practice to master, but it became the standard for fine furniture.
The Emergence of Modern Wood Stains
In the 19th century, chemists began to develop new products designed to protect wood and add color. One of the first modern wood stains was called “Aniline dye,” which was a soluble dye that could be thinned with water and applied to wood. This product was popular because it allowed woodworkers to achieve a wide variety of colors and sheens, and it was quick and easy to apply.
The Evolution of Wood Stain Products
Over time, wood stain products have become more versatile and user-friendly. Today, there are many different types of wood stains available, each designed for a particular type of wood or project. Some of the most popular types of wood stain include:
- Oil-based stains: These stains are heavy and typically require sanding to achieve a smooth finish. They are ideal for hardwoods and are known for their rich, deep colors.
- Water-based stains: These stains are thinner and easier to work with than oil-based stains. They dry quickly and are ideal for softwoods and small projects.
- Gel stains: These stains are thick and designed to stand on the surface of the wood, making them ideal for vertical surfaces and difficult-to-stain woods.
- Penetrating stains: These stains are designed to penetrate deep into the wood grain, providing extra protection and a longer-lasting finish.
Choosing the Right Wood Stain
Choosing the right wood stain depends on a variety of factors, including the type of wood you’re working with, the design of your project, and the sheen and color you’re looking to achieve. Some important things to consider when choosing a wood stain include:
- The differences between oil-based and water-based stains
- The type of wood you’re working with and its natural grain
- The sheen and color you’re looking to achieve
- The amount of time you have to work on the project
- The level of protection and durability you need
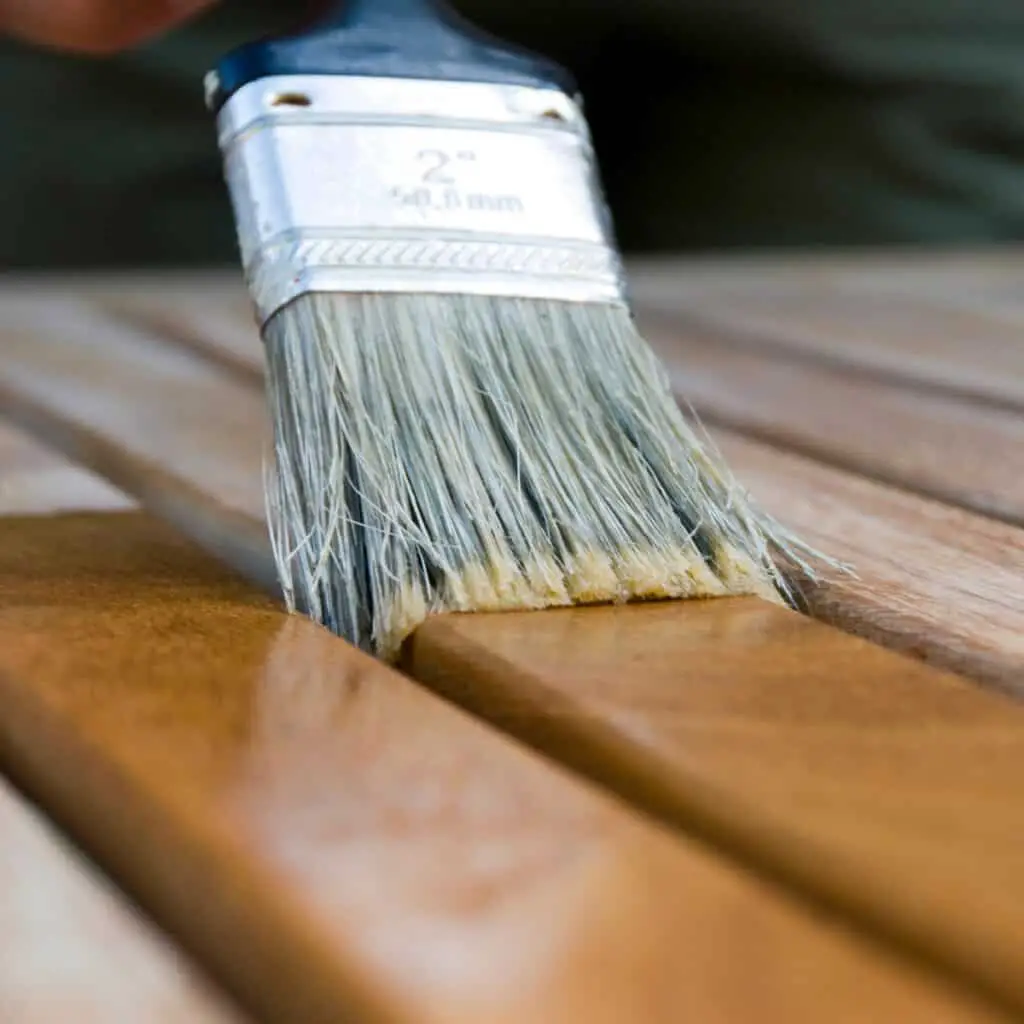
Applying Wood Stain
Applying wood stain is a multi-step process that begins with cleaning and sanding the wood to ensure a smooth surface. Once the wood is clean and smooth, you can begin applying the stain using a brush, rag, or spray gun. Some tips for applying wood stain include:
- Mixing the product thoroughly before applying
- Letting the stain sit for a few minutes before wiping away excess
- Applying multiple coats to achieve the desired color and sheen
- Using a clear coat or sealer to protect the wood and increase durability
- Being careful not to let the stain run or pool in one area
Exploring the World of Wood Grain Stains
When it comes to staining wood, there are a variety of products available in the market. Each type of stain has its own unique characteristics that make it ideal for particular uses. Here are some of the most popular types of wood grain stains:
- Oil-based Stains: These stains are known for their rich color and high durability. They contain strong solvents that increase the drying time and achieve a tough finish. They are ideal for interior work and are available in a range of colors.
- Water-based Stains: These stains are considered to be more environmentally friendly than oil-based stains. They are easy to apply and dry quickly. They are also versatile and can be used on a variety of wood types. However, they may not be as durable as oil-based stains.
- Gel Stains: These stains are perfect for achieving a smooth finish. They are thick and can be applied without excess dripping. They are ideal for vertical surfaces and can be used on both interior and exterior woodwork.
- Powdered Stains: These stains are a cost-effective option for people looking to achieve a particular color. They come in small packets and need to be mixed with water to form a solution. They are available in a range of colors and are ideal for small projects.
Understanding the Difference Between Stain and Finish
Stain is a liquid or gel that adds color to wood. It consists of a collection of chemical ingredients that are either suspended or dissolved in a solvent or carrier, typically alcohol. Stains come in a wide variety of colors, from light to dark, and are designed to change the coloring of the wood without adding a heavy coating. Stains are typically thin and do not offer much protection to the wood.
What is the Difference?
The main difference between stain and finish is that stain adds color while finish protects the wood. Stain is basically a coloring agent that soaks into the wood, while finish works by creating a clear barrier that holds up against precipitation, sunlight, and foot traffic. Stain is usually meant for indoor use, while finishes are designed to stand up to the elements outside.
Types of Stains and Finishes
There are a wide variety of stains and finishes available, each with its own set of features and benefits. Some of the most common types of stains include liquid and gel stains, while finishes can include varnishes, clear coats, and sealers. It’s important to check the label and read up on the specific ingredients and products before picking a stain or finish to work with.
Applying Stain and Finish
When applying stain, it’s important to wipe off any excess and let it sit for a little bit before wiping it down again. This will help the stain soak into the wood and create a warmer sheen. When applying finish, it’s important to apply a thin coat and let it dry completely before adding a second coat. This will significantly increase the protection it offers.
Indoor vs. Exterior Use
Stains are typically meant for indoor use, while finishes are designed to stand up to the elements outside. Exterior finishes are typically more refined and specifically formulated to hold up against precipitation and sunlight. They also offer a higher level of protection than indoor finishes, which are meant to protect against foot traffic and other indoor elements.
Choosing the Right Applicator for Your Staining Project
When it comes to applying stain to wood, you have several options to choose from. Here are some of the most common applicators and their advantages:
- Brushes: This method allows for more control over the stain and is generally better for larger projects. Bristle brushes are great for oil-based stains, while foam brushes work well with water-based stains. However, brushes tend to leave brush marks and may require more maintenance.
- Rags: Using a lint-free rag to apply stain is a popular method because it allows you to wipe away excess stain and achieve a more polished look. This method is better for smaller projects and tends to be quicker than using a brush. However, it can be tough to get even coverage with rags.
- Foam: Specialty foam applicators are a newer option on the market and are great for applying water-based stains. They provide even coverage and are easy to use, but may not work as well for oil-based stains.
Exceptions to the Rule: When to Use Something Different
While brushes, rags, and foam are the most common applicators for staining, there are some exceptions to the rule. Here are some things to consider:
- Acrylic or Latex Paint Brushes: If you’re looking for a safer option, you can use a brush that’s meant for acrylic or latex paint. These brushes are generally easier to clean and don’t require as much maintenance as bristle brushes.
- Specialty Applicators: If you’re working with a tough-to-reach area or a small space, you may want to consider using a specialty applicator like a sponge brush or a small foam roller.
- Spraying: While not as common, spraying stain onto wood is an option that allows for quick coverage and a nice finish. However, this method requires more set up time and may not be necessary for smaller projects.
Indoors vs. Outdoors: What You Need to Know
When it comes to applying stain, whether you’re working indoors or outdoors can make a big difference. Here are some things to consider:
- Indoors: If you’re working indoors, it’s necessary to choose an applicator that won’t spontaneously combust or emit smelly fumes. Water-based stains tend to be safer for indoor use, and foam brushes or rags are great options.
- Outdoors: If you’re working outdoors, you may want to consider using a brush or sprayer for quicker coverage. Oil-based stains tend to be tougher and provide more protection for unfinished wood that remains porous.
Remember, the applicator you choose can make a big difference in the outcome of your staining project. Take the time to decide which method is best for your specific project and enjoy the beautiful finish it will bring to your wood.
Conclusion
So, staining means coloring or covering with a liquid or a powder, and it’s something you can do yourself at home for your wood projects.
It’s important to know what type of stain you need for what type of wood and what project you’re working on, and it’s important to use the right tools and to follow the instructions.
So, don’t be afraid to try it yourself and have fun with it!

I'm Joost Nusselder, the founder of Tools Doctor, content marketer, and dad. I love trying out new equipment, and together with my team I've been creating in-depth blog articles since 2016 to help loyal readers with tools & crafting tips.