Your stairs are as good as new with a staircase renovation
The stairs are used very intensively. Every day you walk up and down the stairs with the whole family.
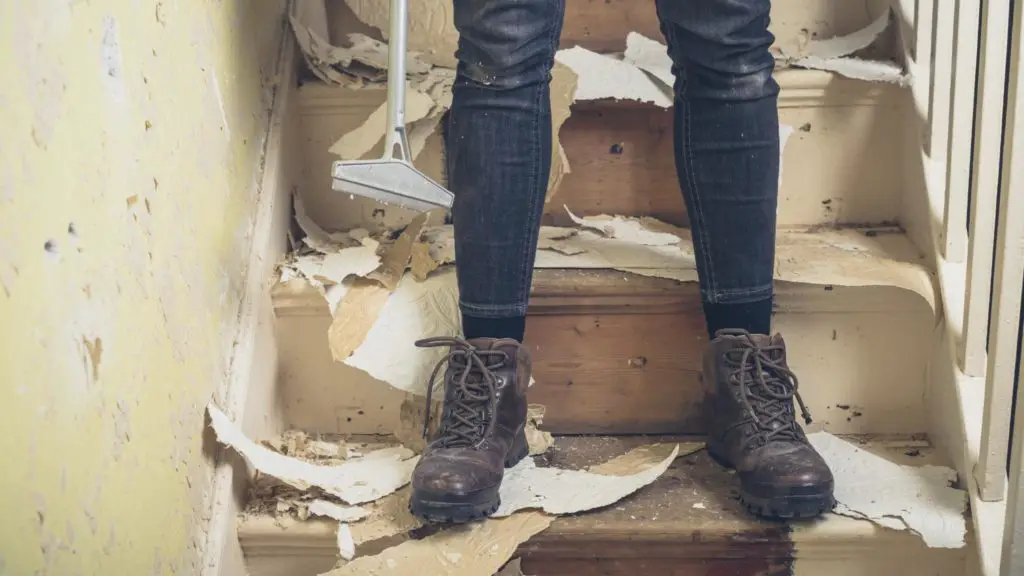
Because the stairs are used so intensively, it is not surprising that they can be damaged considerably over the years. Is your staircase so badly damaged that it no longer looks neat and representative?
Then you can do something about this. Invest in a staircase renovation and your staircase will look as good as new again.
On this page you can read more about renovating your stairs. You can read not only how best to outsource a staircase renovation, but also how you can renovate your stairs (tread) yourself. Are you planning to give your stairs a major overhaul? Then the information on this page is certainly interesting for you.
Do you want to paint the stairs? Read also:
Scratch-resistant paint for tables, floors and stairs
Painting stairs, which paint is suitable
Painting banisters how do you do this
Have stairs painted? Free quote request
Outsource the staircase renovation
Most people choose to outsource their staircase renovation. If you outsource your staircase renovation, you can be sure that your staircase will be renovated to a high standard. An expert in stair renovations knows exactly how to take care of your stairs.
In addition, you will save a lot of time if you choose to outsource staircase renovation. You don’t have to get started with new stair coverings yourself, but just leave it to an expert. While your staircase is being renovated, you are busy with other things. Think of your work, the kids and/or your partner.
Do you want to outsource your staircase renovation? Then we recommend that you request quotes from various stair renovation experts. You can then compare these offers. By comparing quotes, you will eventually find the best stair renovation expert. In this way you will also find the expert with the lowest stair renovation rates. This is beneficial, because with an expert with low rates you can save tens to hundreds of euros on renovating your stairs.
Renovating stairs yourself: step-by-step plan
Renovating your stairs yourself is not difficult, but it does take a lot of time. Keep this in mind if you decide to carry out your staircase renovation yourself. Take enough time for this job, because only then will the end result be beautiful.
To renovate your stairs yourself, follow the steps below. Please note: the step-by-step plan below focuses on a staircase renovation with carpet. If you renovate your stairs with wood, laminate, vinyl or another type of material, your step-by-step plan will look slightly different. However, most steps, including calculating the amount of stair covering, are about the same.
Good to know: follow the steps below if you have removed your old stair covering. In the step-by-step plan you can read how to install new stair coverings on your stairs. `When you have removed the old covering, it is wise to first thoroughly clean, degrease and sand the stairs (sanding machine).
Step 1: calculate the amount of stair covering
Before you can renovate your stairs, you first need new stair coverings. Before you go to the store to purchase new stair coverings, calculate exactly how much stair covering you need. You do this by measuring and adding up the depths of the steps, the curves of the stair noses and the height of all risers.
Note: Measure the depths of all steps on the deepest side. If you don’t do this, you will unconsciously buy too little stair covering.
Do you put carpet under your new stair covering? Then order extra stair coverings. Add 4 centimeters of extra stair covering for each step and add another half a meter to a meter of stair covering to the total, so that you are guaranteed to order enough stair covering.
Step 2: Cutting the Underlay
To cut the carpet underlay, make a mold of each stair tread. You simply do this with paper, by folding and/or cutting the paper into the correct shape. Note: the mold must run around the stair nosing.
Give each mold a number. This way you know which mold belongs to which step. Now use the molds to cut the underlay into the correct shapes and dimensions. Take an extra 2 centimeters on each side for the underlay. This way you can be sure that you are not cutting your carpet underlay too small.
Step 3: cut the carpet underlay
Once you have cut all the pieces of underlayment with the templates, place them on the steps of your stairs. Now cut off the excess carpet along the edges. You can do this with a simple hobby knife.
Step 4: Glue and Staple
In this step you work from top to bottom. So you start at the top step and always work one step down. Apply carpet glue to the steps with a notched trowel. Then place the underlay on the glue. Press this firmly on, so that the glue adheres well to the underlay. Secure the edges of the carpet with staples. You also do this on the bottom
nt of the step nose.
Step 5: cutting carpet
Once you have glued and stapled the carpet underlay to the steps of the stairs, make new molds for the stair treads. The old molds are no longer correct, since there is now carpet underlay on the steps.
You give all molds a number again, so that you don’t get them mixed up. And if you cut the carpet to the shapes and dimensions of the moulds, you take another 2 centimeters per mould. Even now you want to avoid cutting too little carpet for your stair step.
Step 6: Glue
You stick your new stair covering to the carpet underlay with carpet glue. Apply this glue to the underlay with a trowel. Once the adhesive is on the carpet underlay, place the cut carpet piece on the stair step. You tap the edges and the nose of the carpet piece with a hammer, so that these parts are firmly attached. After this, use a stone chisel or carpet iron to tap the edges of the carpet.
Tip: do you want to be sure that your carpet adheres well to the underlay? Add temporary staples or nails here and there. You can remove these again when the glue has cured well. The staples or nails ensure that the carpet adheres well to the underlay and the end result of your staircase renovation looks good.
Step 7: Coating the Risers
For a complete staircase renovation, you also cover the risers of your stairs. You do this by measuring the dimensions of the risers and then cutting out pieces of carpet. Apply carpet glue to the risers with a notched trowel. Then stick the carpet pieces. With a hammer you knock the edges and with a stone chisel or carpet iron you ensure that the carpet adheres extra well to the risers.
Step 8: finishing the stairs
You are now almost done with your staircase renovation. To ensure that the end result of the staircase renovation looks really great, you must finish the stairs neatly. You do this by removing loose wires from the new stair covering. You also neatly remove any temporary staples or nails that you have placed for better adhesion of the stair covering. Once you’ve done this, you’re done with your staircase renovation.
Do you still want to outsource your staircase renovation after reading the step-by-step plan above? Then this is no problem at all. Request several quotes for your stair renovation, compare them and hire the best and cheapest stair renovation expert directly.
painting stairs
Do you want to give your stairs a new, fresh look? Fortunately, this is not very difficult, but it does take some time. Do you want to be able to continue using the stairs in the meantime? Then you would do well to paint the steps alternately. In this step-by-step plan we show you exactly how to paint the stairs and what you need for this.
Would you rather renovate the stairs? Take a look at this super handy staircase renovation package:
What do you need?
You do not need a lot of material for this job and there is a chance that you already have a lot at home. All other materials can simply be bought in the hardware store.
Acrylic primer
Stair paint
masking tape
Soap
degreaser
Coarse sandpaper grit 80
Medium-coarse sandpaper grit 120
Fine sandpaper grit 320
quick putty
acrylic sealant
hand sander
paint tray
paint rollers
round tassels
Paint roller with bracket
paint scraper
caulking syringe
Bucket
Cloth that does not fluff
Soft hand brush
The step-by-step plan
Is the staircase still covered with carpet and is it glued? Then make a solution of warm water and soap in a bucket. Then make the steps very wet and repeat after three hours. In this way, the steps are soaked. Now let the soap soak in for about four hours. After this you can pull the carpet off the steps together with the glue.
Then you have to remove all glue residues. The best way to do this is to scrape it off with a putty knife. Can’t get the glue off properly? then this is a non-water-based glue. In this case, Coke may work. Dip a brush into a container of cola and then apply it liberally to the glue residue. Wait a few minutes and then scrape off the glue. If this also fails, you will have to use a chemical solvent to remove the glue.
When you have removed all glue residue, it is time to degrease the steps. Degrease not only the steps but also the risers and the sides of the steps. After you have degreased these, sponge them with clean water.
If there are loose paint flakes on the stairs, remove them with a paint scraper. After this, you sand the damaged parts by hand. You do this with coarse sandpaper grit 80.
Now you sand the entire staircase thoroughly, this is best done with a hand sander. You use medium-coarse sandpaper grit 120. Then remove all the dust with a soft brush and then with a damp cloth.
Seal the transition between the stairs and the wall with masking tape. keep it in mind
e that you remove this tape immediately after painting the first layer to prevent glue residues. With a second layer you tape everything again.
It is now time to prime the stairs. If you want to continue to use the stairs, you do this by painting the steps, risers and sides alternately. The primer not only ensures better adhesion, but also makes any cracks and irregularities clearly visible. Use a small paint roller for the corners and brush and for the larger parts. After five hours the primer is dry and you can sand the painted parts with fine sandpaper grit 320. Then wipe with a damp cloth.
Have irregularities been found? Then smooth it out. You do this by working with a narrow and a wide putty knife. Apply a small amount of putty to the wide putty knife and fill in the imperfections with the narrow putty knife. After the putty is completely dry, sand the stairs again.
After sanding, you can eliminate all cracks and seams with acrylic sealant. You can remove the excess sealant immediately with a damp cloth.
Then it is time to paint the stairs in the desired color. Do this at the edges with a brush and the large parts with a paint roller. If you want to continue using the stairs, do this again and again. The paint must then dry for 24 hours.
If it is necessary to apply a second layer, you must first sand the steps with fine sandpaper grit 320. Then clean the steps with a damp cloth before applying the second layer. This layer also has to dry for another 24 hours.
Additional tips
It is best to use acrylic paint for the stairs because it is extra hard and is also a lot less harmful to the environment. Keep in mind that you use brushes and rollers that are specially intended for acrylic paint. You can see this on the packaging.
Do you want to paint the stairs in a dark color? Then use gray instead of white primer.
Use quick putty so that you can apply several layers in a few hours.
Do not clean the brushes and rollers between coats. Wrap them tightly in aluminum foil or submerge them in water.
For the time being, you can only walk on the painted steps in socks. After a week, the paint has completely cured and only then can you enter the stairs with shoes.
Stair painting – Painting with a wear-resistant paint
Also read this article about staircase renovation.
Supplies paint stairs
Bucket
all-purpose cleaner
wipe
Vacuum cleaner
paint scraper
Sander and/or sandpaper grit 80, 120, 180 and 240
Dustpan/Dust
adhesive cloth
dust mask
Putty knives (2)
Two component putty
caulking syringe
acrylic sealant
Acrylic paint
paint tray
Felt roller (10 cm)
Brush (synthetic)
Cover foil or plaster
Wear-resistant paint
household stairs
Masking Tape/Painting Tape
Click here to buy supplies in my webshop
Painting a staircase and which paint should you use to get a nice end result. Painting stairs requires good preparation in advance. Before you start, make sure to put a plaster runner on the floor or cover it with a foil. In addition, the main thing is the moment of topcoating. The time after that must be at least 48 hours before you can walk over it again. Do this without shoes.
Wear resistance
The final coat should be a paint that has good wear resistance. This is because it is regularly walked on and wears out faster than normal objects. The paint contains an additive that ensures that the surface hardly wears. Also choose a water-based paint, also called an acrylic paint. A water-based paint does not yellow compared to an alkyd-based paint.
Degrease, sand and putty stairs
Start with degreasing first. When the steps have dried you can start sanding. If the surface is rough and parts of the paint are peeling off, first remove any remnants of loose paint with a paint scraper. After this, take a sander with 80-grit sandpaper and continue sanding until the paint no longer comes off. Then sand with 120-grit sandpaper. Sand until it becomes a smooth surface. Sand the rest of the stairs by hand using 180-grit sandpaper. Run your hand over it for any unevenness. Now make the steps dust-free with a duster and a vacuum cleaner. Then clean with a tack cloth. If there are dents, cracks or other irregularities, first treat these with a primer, including the other bare parts. Then apply a quantity of two-component filler and fill the holes and cracks. When this has hardened, prime the bare spots again.
Kitten seams and paint the stairs twice
Take the caulking gun with an acrylic sealant in it. An acrylic sealant can be painted over. Kit all the seams you see. You often see a large seam where the stairs are on the wall. Also kit these for a tight whole. Maybe 1 filling is not enough
eg to close the seam. Then wait a while and seal it a second time. The next day you can start with the first top coat. Take an acrylic paint for this. If it is a transparent staircase, paint the back first. Then the front. Paint the sides first and then the step. Do this per step and work your way down. Allow the paint to cure for 48 hours. Then sand lightly with sandpaper grit 240 and make everything dust-free and wipe with a damp cloth or tack cloth. Now you can apply a second coat and let it dry. Wait at least 48 hours before walking the steps again. If you are not able to wait that long, you can choose to paint the steps alternately so that you can still walk up every evening. Just wait until the painted steps are dry. This goes quite quickly because it is an acrylic paint. Do you also want to paint the banister? Then read on here.
I wish you a lot of painting fun!
Click here to buy water-based paint (Acrylic paint).
BVD.
Piet
Also read my blog about staircase renovation.

I'm Joost Nusselder, the founder of Tools Doctor, content marketer, and dad. I love trying out new equipment, and together with my team I've been creating in-depth blog articles since 2016 to help loyal readers with tools & crafting tips.