Jewelry sets are easily cluttered and it is very common for small jewelry to get lost if not stored properly. There are so many ideas to keep your jewelry sets organized and using a jewelry box is more popular.
To keep your jewelry safe from the hands of your kids or a greedy neighbor a jewelry box is a better choice. You can choose a jewelry box plan for yourself or you can make one for your beloved lovely lady.
As the Valentine gift, wedding gift, birthday gift, or as a token of love to make your beloved one happy you can choose a beautiful jewelry box. Here are 15 exclusive jewelry box ideas for your choice.
In this post we'll cover:
How to Make a Homemade Jewelry Box
To a woman, a jewelry box is a matter of great love and emotion. Like the jewelry, jewelry boxes are also precious to the women. You will find so many gorgeous and precious jewelry boxes made of expensive materials in the market but when you will make one at home and gift it to your beloved lady I can assure that she will treat this gift more precious.
In this article, I will discuss a total of 3 methods to make a jewelry box that you can make easily and quickly even if you do not have any DIY skill.
Method 1: Jewelry Box from Cardboard
Required Tools and Materials
You need to gather the following materials to make a jewelry box from cardboard:
- Cardboard
- Pencil and ruler
- X-acto knife
- Scissors
- Fabric
- Hot glue gun
- White glue
- Yarn
- Button
4 Easy and Quick Steps to Make a Jewelry Box from Cardboard
Step 1
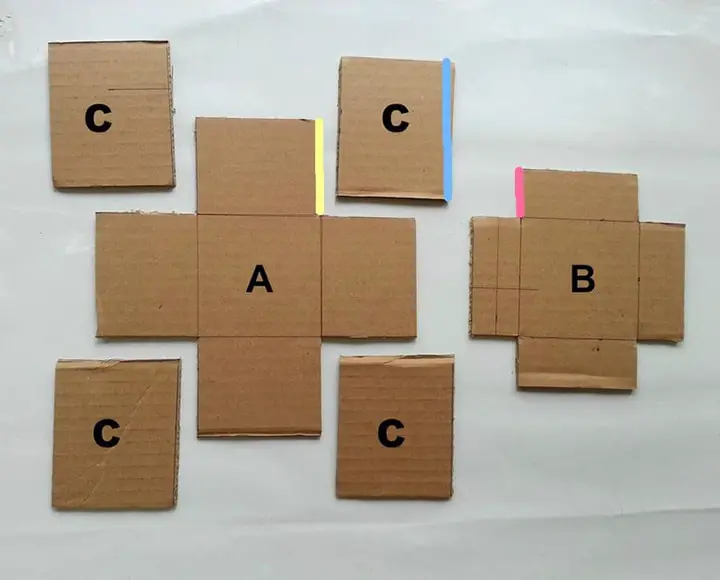
Cut the cardboard into 6 pieces like the image above. The “A” will be used to make the box, the “B” will be used to make the lid.
Then fold up all the 4 sides of A and B. Attach these using scotch tape or glue.
Step 2
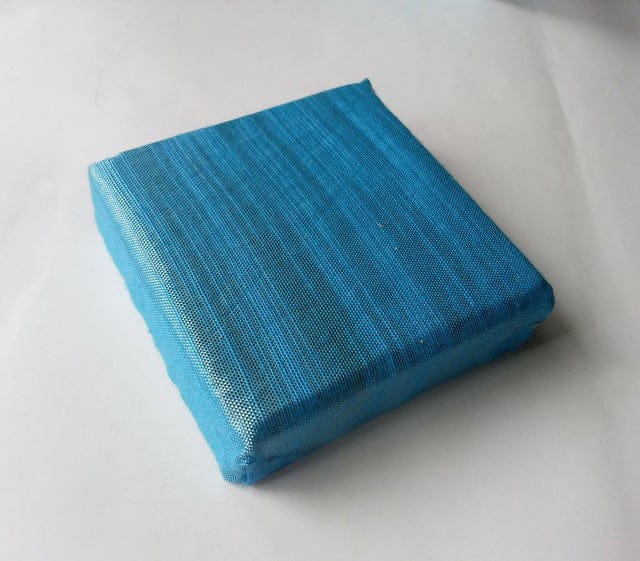
Cover the box as well as the lid with your favorite fabric. Glue the fabric with the box as smoothly as possible. If the fabric is not attached smoothly it will not look good. So, this step should be done with care.
Step 3
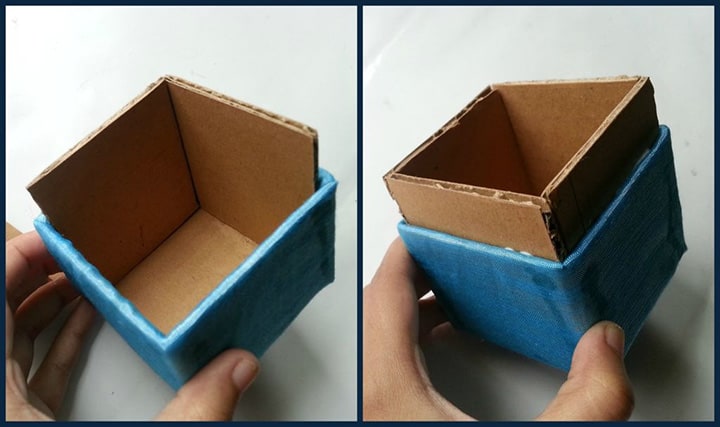
Now insert the inner layers as shown in the image.
Step 4
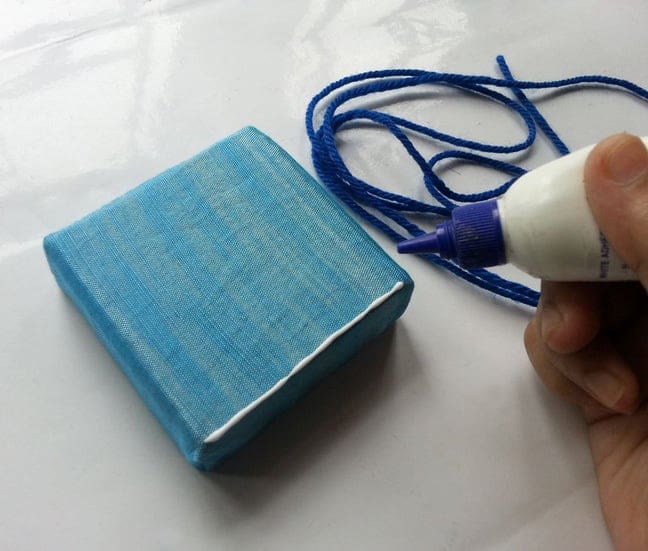
The jewelry box is ready and now it is time for decoration. You can use any kind of decorative piece like beads, stone, threads, etc. to beautify your jewelry box and attach the piece using glue.
Method 2: Jewelry Box from Old Book
Required Tools and Materials
You need to gather the following materials in your collection to make an adorable jewelry box from an old book:
- An old book with hardback, the book should be at least 1½” thick
- Acrylic craft paint
- Craft paintbrush
- Craft knife (like an X-Acto)
- Mod Podge Gloss
- Vintage clip art (printed on a LASER printer)
- 4 Photo corners
- Decorative scrapbook paper (2 pieces)
- 4 Wooden beads (1″ diameter)
- E6000 glue
- Scissors
- Ruler
- Pencil
7 Simple Steps to Make a Jewelry Box from an Old Book
Step 1
The main task is to create a niche inside the book where you will store your jewelry. To do this, paint the outside of the pages using the mod podge so that the pages remain glued together and you do not feel any kind of difficulties while making the niche.
Step 2
Take the ruler and pencil and mark the inner section. If you want a big niche you can cut a wide area but if you want a small niche then you have to cut a small area.
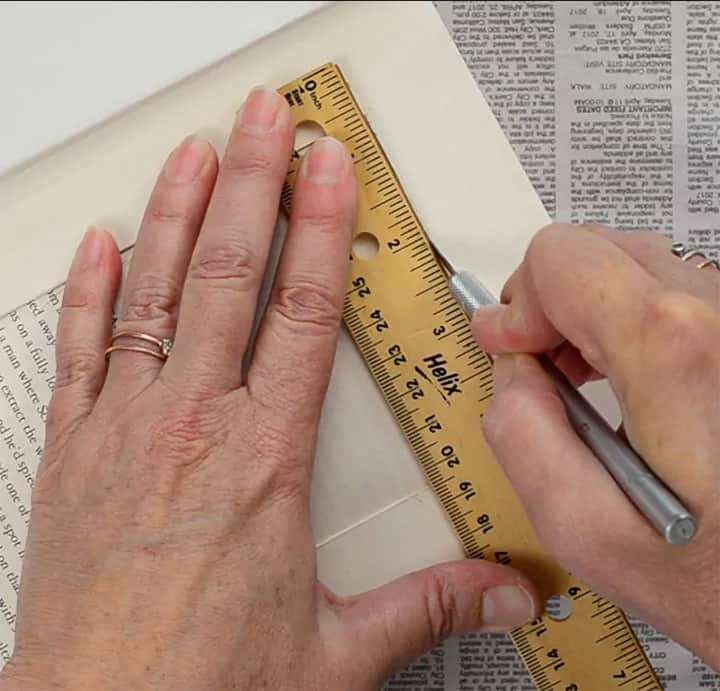
To cut the niche use the craft knife and the ruler. I will recommend you not to try to cut all the pages at once. Such an attempt will destroy the shape of your niche. So, it is better to start cutting with the first 10 or 15 pages.
Step 3
After making the niche again use the Mod Podge and glue the inside of the cut edge. Give time to dry the Mod Podge.
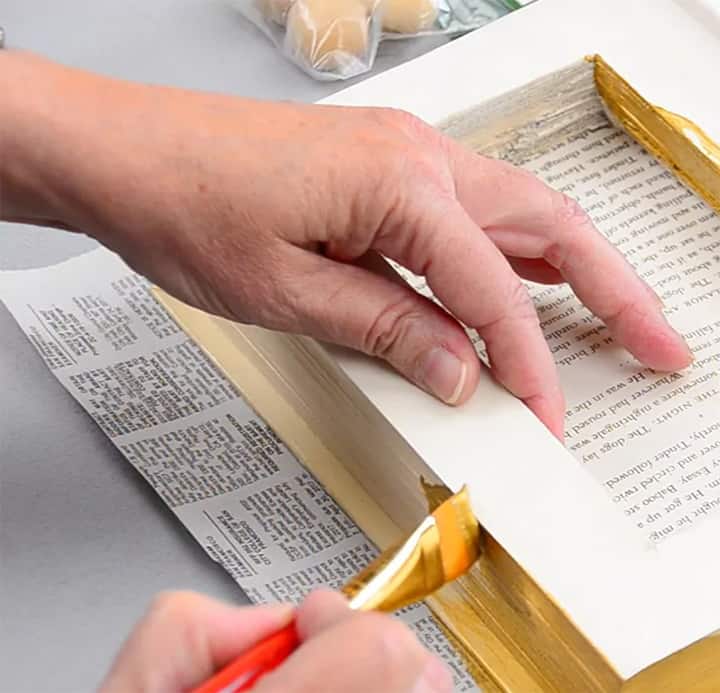
Step 4
Paint the outside of the edges of the pages with golden color paint. The cover and the inside should also be painted with golden color.
Step 5
Now, measure the size of the niche opening on the paper and cut a piece of scrapbook paper of the same size so that you can fit it inside the niche and the first page.
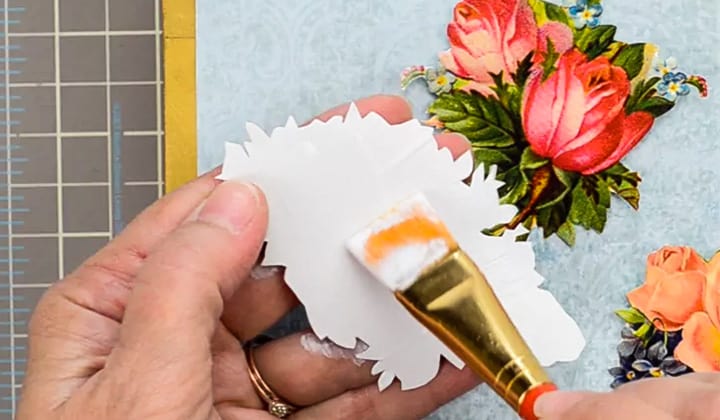
Step 6
For decoration, you can cut a rectangular shape scrapbook paper. It should be a little bit smaller in size than the lid.
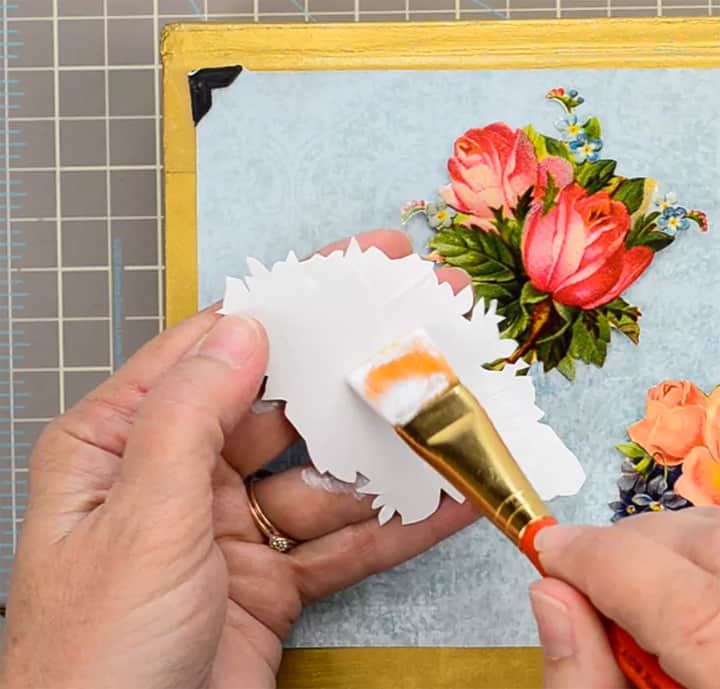
Then glue the photo corners on each corner using the Mod Podge and coat the rear portion of the page using the Mod Podge and attach it to the cover using glue.
Step 7
Prepare the wooden beads by painting it with golden color for decoration. Then give some time so that it is dried properly. Take the E6000 glue and attach the beads to the bottom of the book box so that it can act as bun feet.
Your beautiful jewelry box is ready. So, go hurry and keep your jewelry set in your brand new jewelry box.
Method 3: Convert a Simple Box into a Pretty Jewelry Box
We get beautiful boxes with many products. Instead of throwing those beautiful boxes away, you can convert those boxes into a wonderful jewelry box.
Required Tools and materials
- A box with lid (If the box does not have any lid you can make a lid using cardboard and fabric)
- 1/4 yard velvet fabric of your favorite color
- Straight pins and sewing machine
- Hot glue gun or fabric glue
- Cotton batting
- Fabric scissors
- Cutting mat
- Rotary cutter
- Ruler
6 Easy and Quick Steps to Convert a Simple Box into a Pretty Jewelry Box
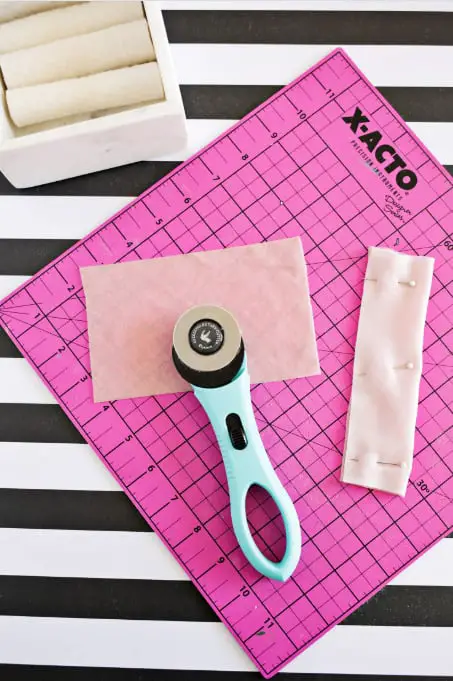
Step 1
The first step is to make some long rolled pillows. To make the pillows cut the cotton batting 1 inch wide and pin all the pieces in place for now.
Step 2
Measure the circumference of the batting rolls. You can use a cloth measuring tape for measurement. For the convenience of sewing add 1/2″ to your measurement. It will give you an allowance of 1/4 inch when you will sew it.
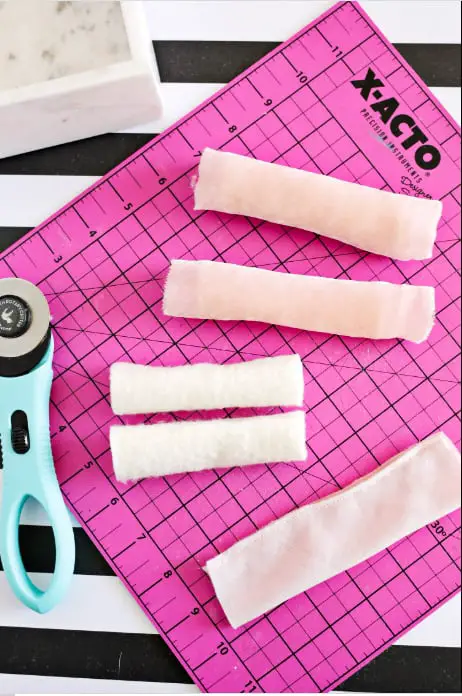
Step 3
Take the velvet fabric and cut it into a rectangle. It should cut 1 inch longer than the length of the batting roll. The width should also be 1 inch greater than the batting roll.
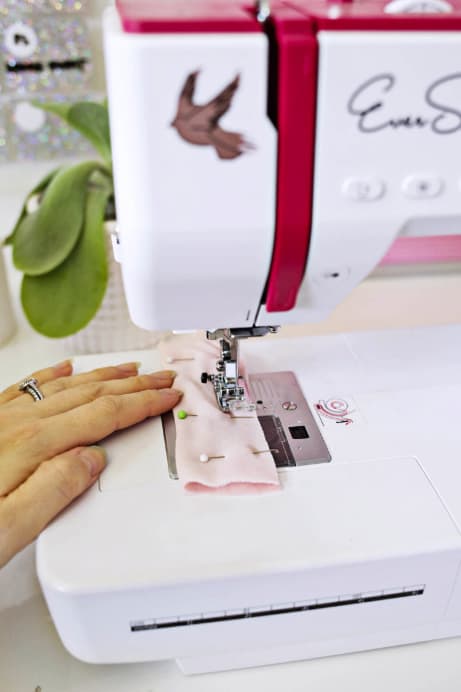
Step 4
Now stuff the cotton batting into the tube and take that pin out from it. The sewing and stuffing process should be repeated for each batting roll.
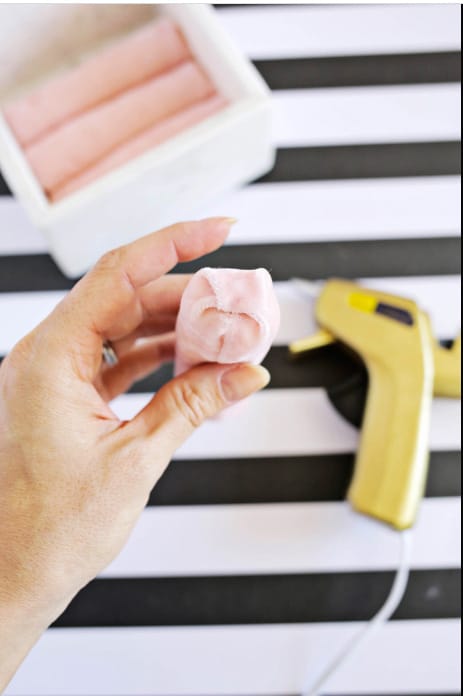
Step 5
Now close both ends of the batting roll. You can use hot glue to close the ends of the roll or quick-dry fabric glue can also be used.
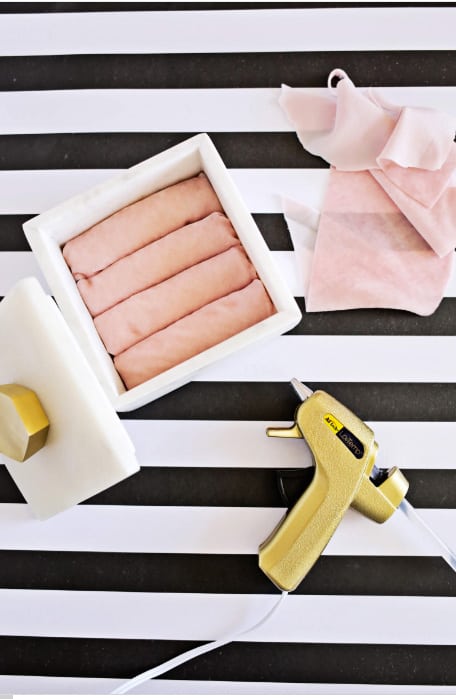
Step 6
Insert the batting roles inside the box and now it is ready to store your jewelry. You can keep rings, nose pin, earrings, or bracelets in this beautiful jewelry box.
Final Verdict
How gorgeous the jewelry box will be, depends on how you are decorating it. A beautiful piece of fabric that is rarely come into your use, some beautiful beads, jute ropes, pearls, etc. can be used to decorate the jewelry box.
Making a jewelry box can be a good DIY project for moms who have teenager daughters. To generate your own unique jewelry box idea you can review some free jewelry box plans.
The durability of the jewelry box depends on the strength and sturdiness of the frame. So, I will recommend you to use a strong material to make the frame.
15 Free Jewelry Box Ideas
Idea 1
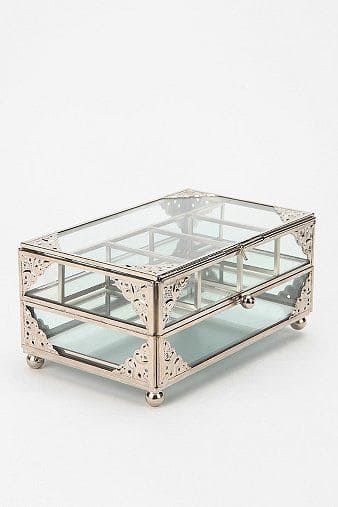
Glass is a fascinating material and as a glass and ceramic engineer, I have a special feeling for glass. So I am starting this article by introducing you with a wonderful jewelry box made by glass. Metal has also been used to make this jewelry box and the combination of both glass and metal has made it a marvelous product that you would love to have.
Idea 2
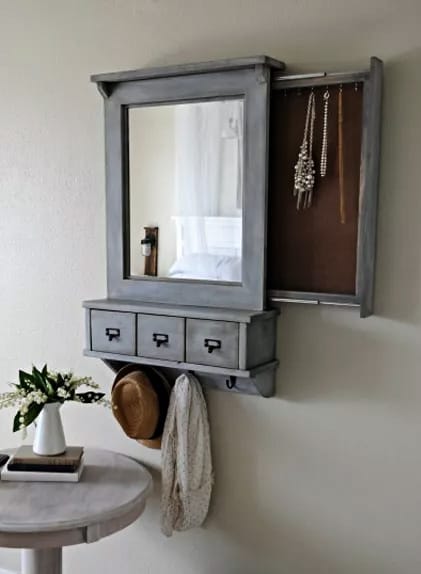
It is a wonderful idea to hide your jewelry. To keep your valuable jewelry set safe you can have a jewelry box behind a mirror-like image. It is not so costly and easy to make. With a beginner’s woodworking skill you can make a secret compartment for your jewelry like this.
Idea 3
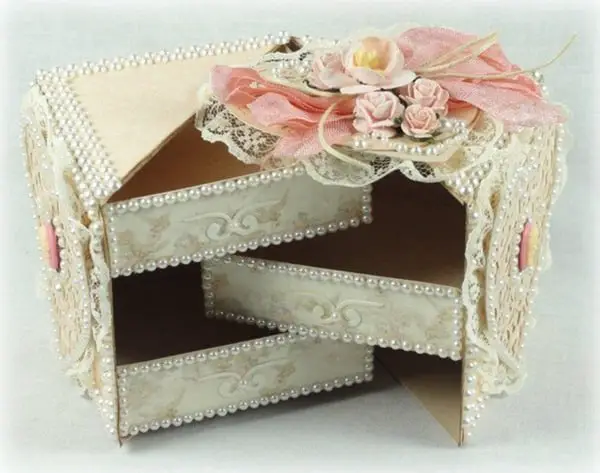
When I saw this jewelry box I just said “WOW” and I thought it a very expensive jewelry box. But you know what I found at the end?- This is a cheap jewelry box that one can make at home.
This gorgeous jewelry box is made of cardboard. You need cardboard, scissors, printed template, patterned paper, glue, Ribbons, and beads or other decoratives according to your choice. It can be a wonderful gift for your wife, daughter, mom, sister, or other near and dear lovely ladies.
Idea 4
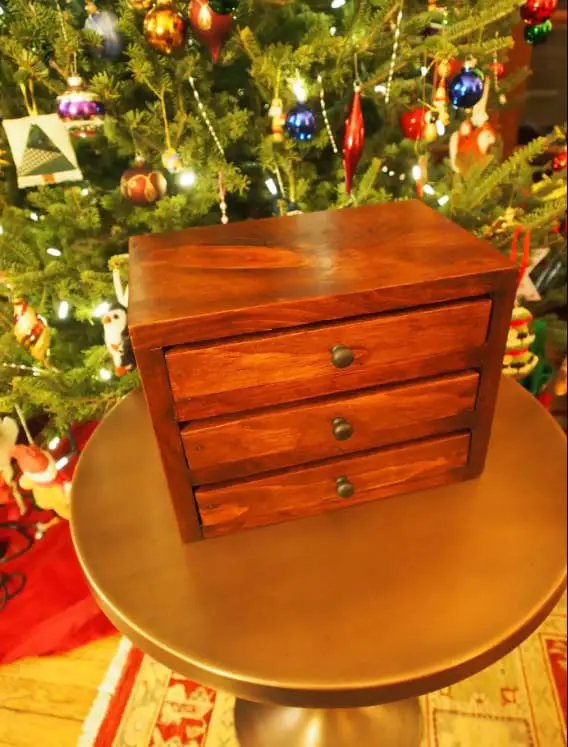
This is a dresser style jewelry box. Boards of standard size have been used to make this jewelry box. The drawers of this jewelry box have been lined in felt and the bottom has also been covered with felt so that it can be glided smoothly.
Idea 5
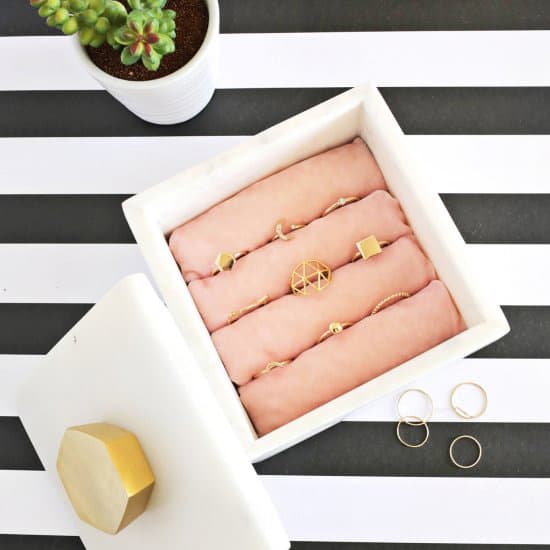
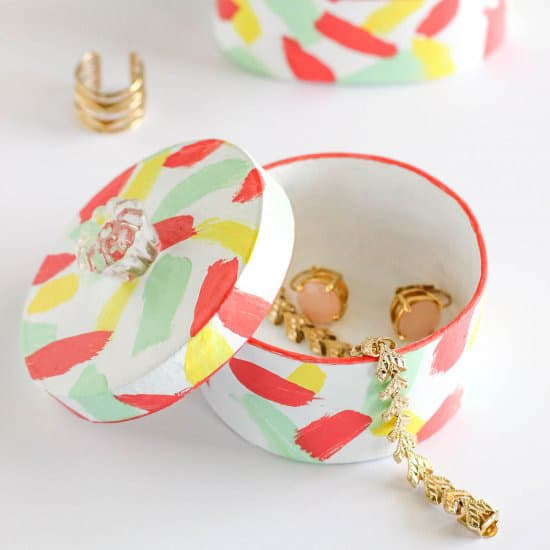
To store your rings and earrings this is a perfect box because rings and earrings are very likely to scattered that is hard to find when needed. The golden knob on this white color jewelry box matched perfectly.
Since there are multiple shelves you can store your rings and earrings by category in this jewelry box. You can also keep your bracelet in this box.
Idea 6
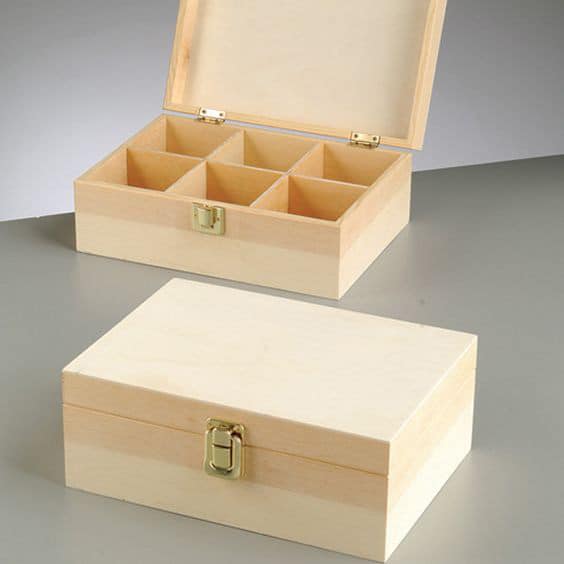
This jewelry box is made of wood. It has a total of six compartments where you can keep your jewelry by category. To make this jewelry box colorful you can paint it or you can also cover it with patterned paper or fabric and decorate with decorative accessories.
Since it is made of wood it is a durable jewelry box that you can use for many years. The design of this jewelry box is not intricate rather simple cutting and attaching mechanisms are applied to make this box. With a woodworking skill of a beginner, you can make this jewelry box within a short time.
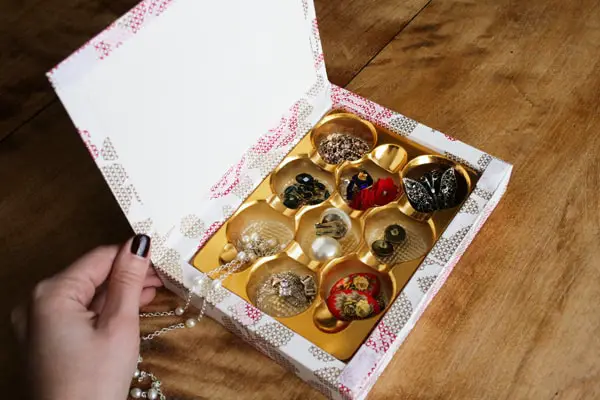
Idea 7
You can use your old compact powder boxes to keep your jewelry. If the box is worn out and does not look good you can paint it with new colors and give it a new look.
You can keep your earrings, rings, bracelet, nose pin, or other small jewelry in this box. You can also keep bangles in it.
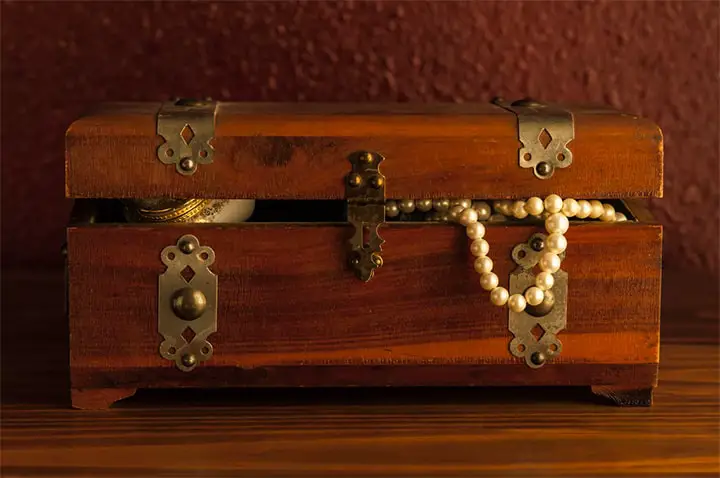
Idea 8
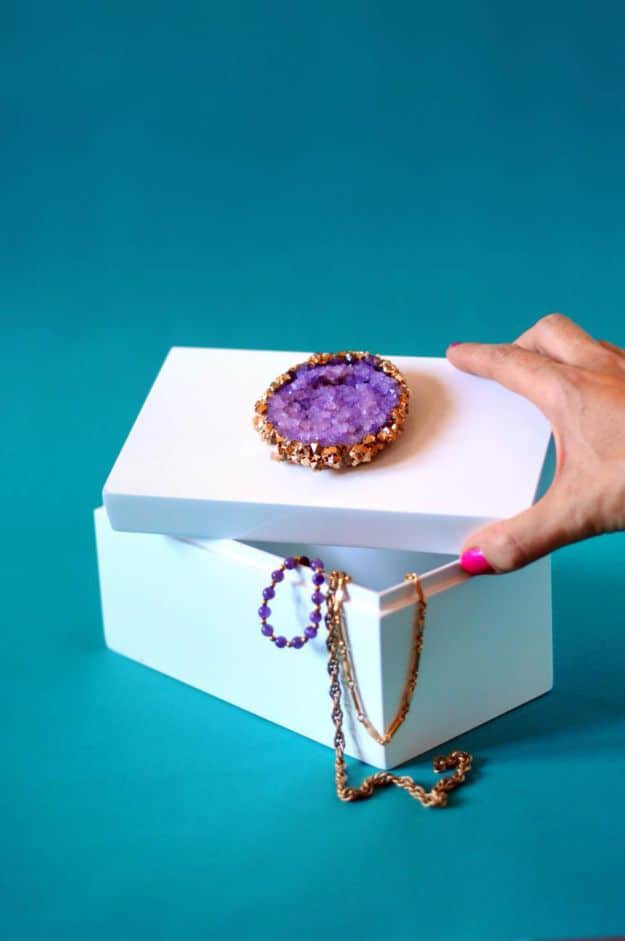
You can keep your necklace in this box. I do not prefer to keep necklaces with rings and earrings because of some reasons. One is that the necklace may entangle with the earrings that may become difficult to separate. While separating the entangled earrings from the necklace the jewelry may get harmed.
You may also loose the small earrings or the rings while taking the necklace from the box. So, it is better to keep different types of jewelry separate.
Idea 9

If you are the owner of so many jewelries you can choose a cabinet jewelry box like this. This cabinet jewelry box consists of a total of 6 drawers. fold outsides, and a case on the top with a lid. Inside the lid, there is a mirror. To keep different kinds of jewelry on the basis of category this jewelry box is a wonderful choice.
Idea 10
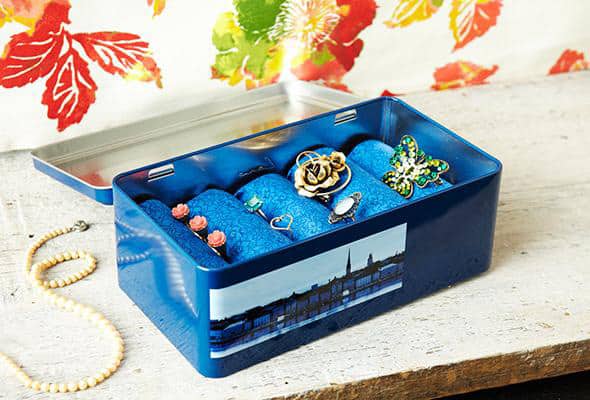
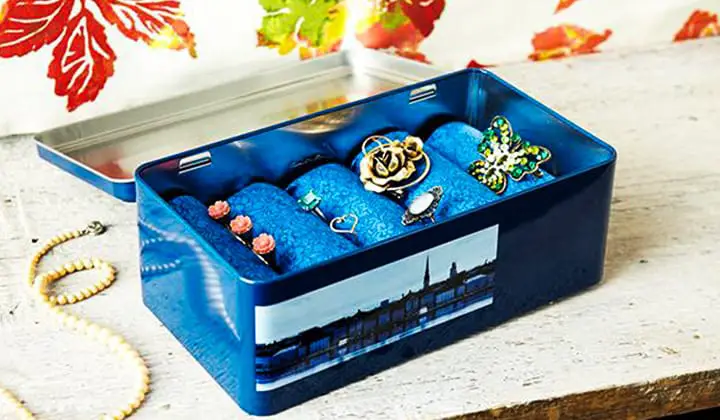
You can convert an old tin box into a jewelry box like this. You have to keep some pillows inside the box so that perfect narrow space is created to keep your jewelry inside the box.
Idea 11
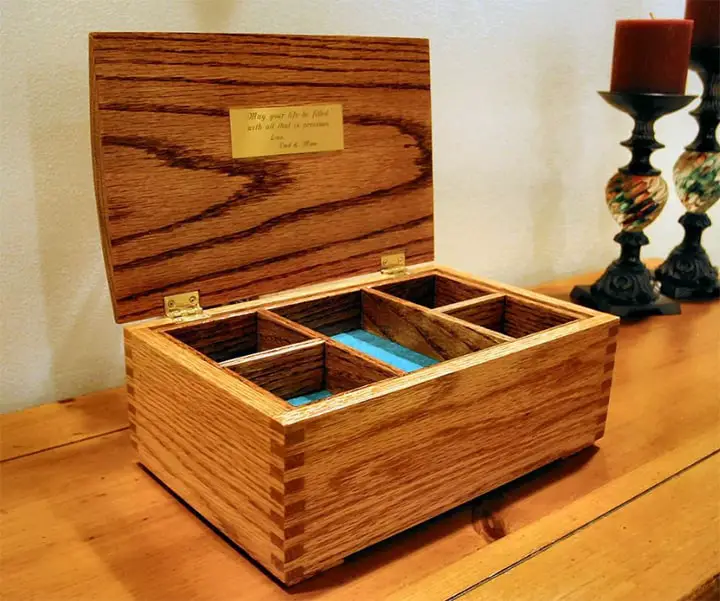
Oak has been used to construct this jewelry box. The parts are assembled by the mechanism of finger joint that ensures its high strength and hence the durability.
There is a total of five separate compartments in this box where you can keep 5 different kinds of jewelry. For example, in these small compartments, you can keep earrings, rings, nose pin, and bracelets. The big compartment at the middle position is perfect for keeping your necklace.
Idea 12
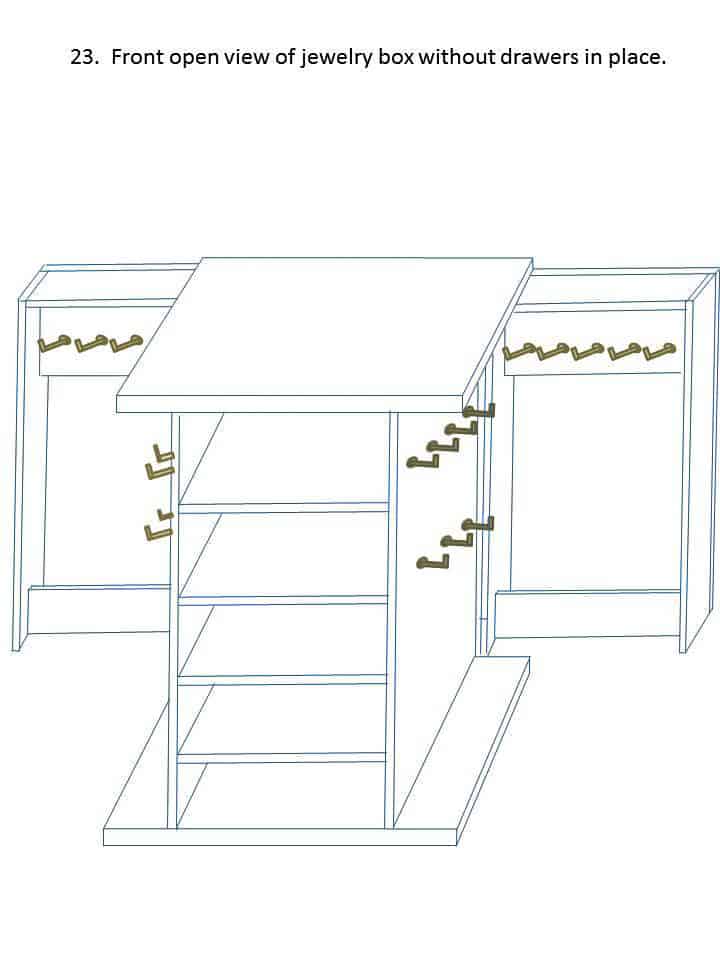
This jewelry box looks very fancy with a total of 7 drawers. You may think that I am wrong as you can see a total of 5 drawers. There are an additional two drawers on the two sides of this box.
Idea 13
This jewelry box is not so fancy to look at. If you are looking for a fancy jewelry box then this one is not for you. Those who are attracted by classic design this jewelry box is for them.
Idea 14
can you imagine the building material of this jewelry box? I am sure that you cannot. An old chocolate box has been used to make this jewelry box. From now on, if you bring chocolate I think you will not throw the box away.
Idea 15
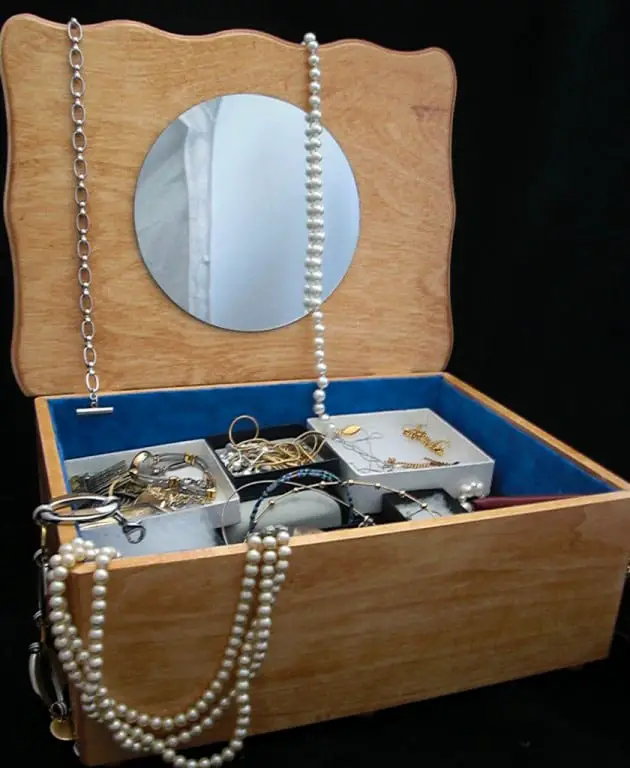
The inside of this jewelry box is covered with blue velvet. It also includes a mirror inside the lid. It is big enough to hold a lot of jewelry pieces. It does not have separate compartments but it is not a problem if you keep the jewelry in small boxes.
Final Words
A jewelry box is a good choice to take care of your jewelry set. A homemade jewelry box that you have made with your hand is a love. From the 15 ideas discussed in this article, I hope that you have already found an idea that met the thirst of your heart to have a wonderful jewelry box. You can also customize the ideas and make a jewelry box of new design blended with your idea.
Making a jewelry box can be a wonderful DIY project. I hope that you already have understood that making a gorgeous jewelry box is not a costly project at all. So, if you do not have enough budget still want to gift your beloved one a gorgeous gift you can choose the project of making a jewelry box.

I'm Joost Nusselder, the founder of Tools Doctor, content marketer, and dad. I love trying out new equipment, and together with my team I've been creating in-depth blog articles since 2016 to help loyal readers with tools & crafting tips.