I love creating free content full of tips for my readers, you. I don't accept paid sponsorships, my opinion is my own, but if you find my recommendations helpful and you end up buying something you like through one of my links, I could earn a commission at no extra cost to you. Learn more
Power drills are extremely convenient and versatile, but they need the right drill bit to complete the job. It is okay if you are unsure of how exactly you are supposed to exchange a drill bit for another! Whatever keyless drill or keyed chuck drill you have, we’ll guide you through it step-by-step. You can do it either way and it is fairly easy. Rest assured, you’ll be able to begin drilling in just a few minutes.
In this post we'll cover:
What Is a Chuck?
A chuck maintains the bit’s position in the drill. Three jaws are inside the chuck; each opens or closes depending on the direction you turn the chuck. In order to install a new bit correctly, it must be centered within the jaws of the chuck. Centering is simple when dealing with large bits. With small bits, however, they will often get stuck between the chucks, rendering the drill impossible to operate.How to Change Drill Bits
You must turn off your drill and have the power pack uninstalled and laid nearby before you do anything else.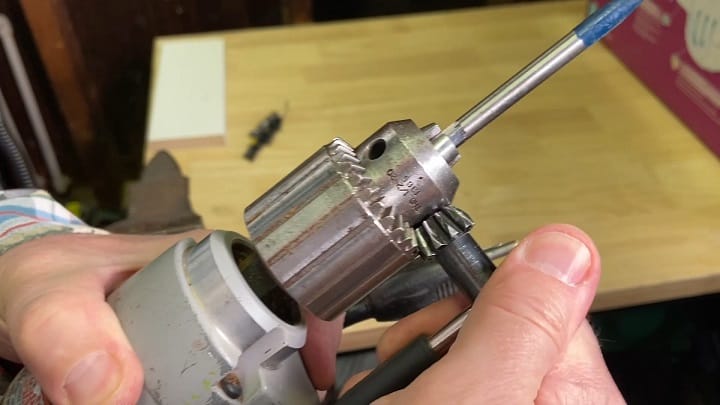
How to Change the Drill Bit Without the Chuck?
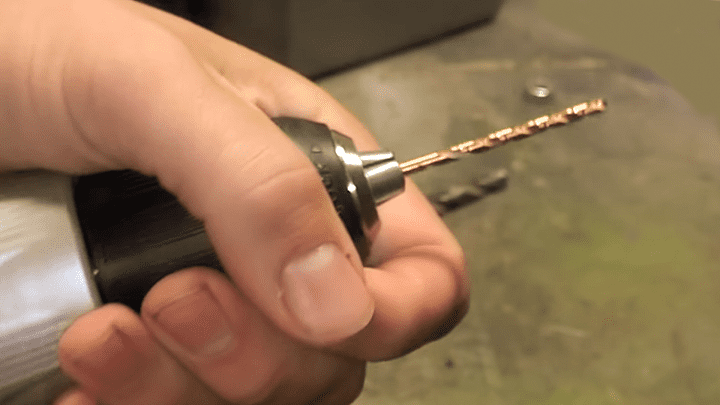
In order to complete a variety of drilling projects, you might need to use drill bits specific to the project. However, if your drill has a keyless chuck or if you lost it, you will be concerned about how you will change the bit without a key. Don’t panic, you have come to the right place. The task is not rocket science, but more like a chore, you do every day at home.Replacing the Bit Manually
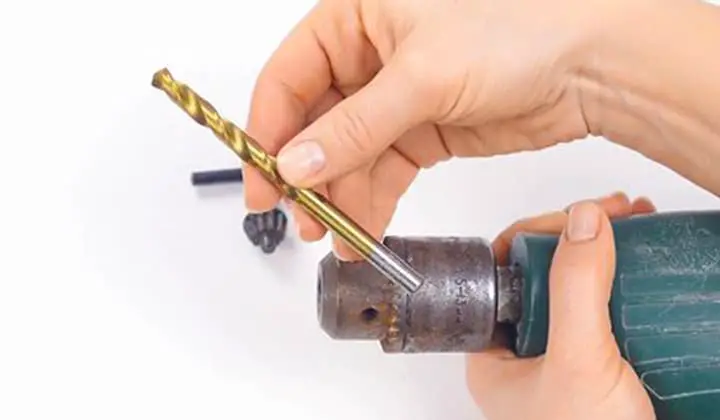
Here’s how you can replace your drill bit manually:1. Loosen the Chuck
2. Remove the Bit
3. Set the Bit
4. Squeeze the Trigger
By lightly holding the bit, you can squeeze the trigger a few times to tighten the bit in place. By doing this, you will ensure the bit is correctly installed.5. Engage the Ratcheting Mechanism
It is also possible to apply a little extra pressure to the shank if the bit has a ratcheting mechanism. To use this mechanism, you must twist this mechanism tight at the end of the drill chuck in a clockwise direction.6. Check the Drill Bit

Using Chunk to Change the Drill Bit
Make Use Of the Chuck Key
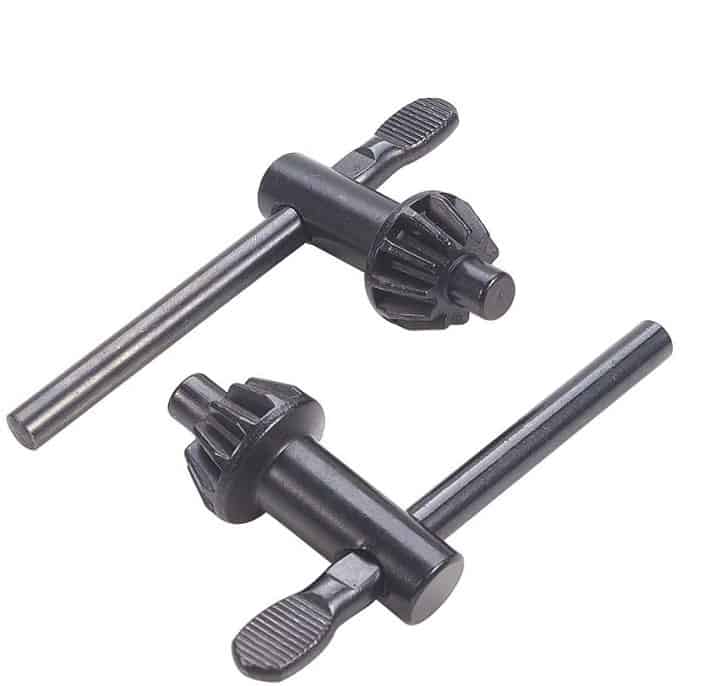
To loosen the chuck, you will need to use a chuck key provided with your drill. You will see a cog-shaped end on the drill key. Put the tip of the chuck key in one of the holes on the side of the chuck, align the teeth with the teeth on the chuck, then insert it into the hole. Drills using chuck keys are usually equipped with a secure place to store the key. It is more common to find a key chuck on a corded drill than on a cordless one.Open the Jaws of the Chuck
Turn the wrench counterclockwise once it is positioned on the drill. Slowly but surely, you’ll notice the jaws opening. As soon as you feel a drill bit can be inserted, stop. Don’t forget, there are three to four jaws in front of the chuck that is ready to immobilize the bit.Get Rid Of the Bit
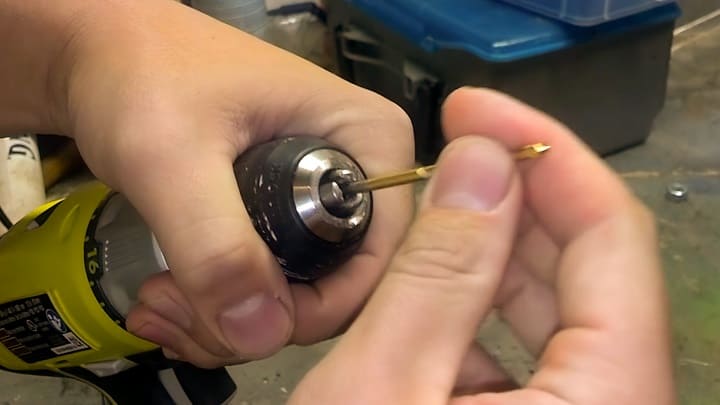
Once the chuck is loosened, pull out the bit by using your index and thumb. The drill may just fall out if you turn it face down with the chuck wide open. Once you have removed the bit, inspect it. Make sure there are no damaged or worn areas. In the case of dull (due to overheating) bits, you should replace them. Don’t reuse bent or cracked items. Throw them away if they show signs of damage.Replace the Drill Bit
Insert your new bit while the jaws are open wide. Insert the bit by holding the smooth end of the bit between your thumb and index finger and pushing it into the jaws of the chuck. Since the bit isn’t secured, your fingers should be on the bit and the chuck otherwise it may slip. Ensure again that the chuck is tightened.Adjust the Chuck
Rotate the chuck’s jaws clockwise by turning the chuck key with one hand while holding the bit in place. To make the bit secure, tighten it firmly. Get rid of the chuck key. Put your hand away from the drill bit and start to test it before you use it.When to Change a Drill Bit?
On DIY shows, you may have seen one of the handymen switching black and decker drill bits as he went from one part of the project to another. Although it may seem that changing drill bits is just a show or something to make audiences believe that it is happening, the change serves a variety of purposes. In order to eliminate wear and tear, drill bits often need to be replaced, especially if cracks can be seen. As opposed to just replacing one currently attached part with another of a different size, this is more about replacing them with new ones. It takes a bit of practice to master this skill, but you will feel more agile and sharp if you are able to swap bits when you are working. If you are switching from concrete to wood, or vice versa, or trying to adjust the size of the bit, you will have to swap drill bits.Final words
Changing out drill bits is a simple habit that we all get into in a woodshop, but there are a few things to keep in mind if you want to be successful. As you already know, the chuck secures the bit to the drill. When you rotate the collar, you can see three jaws inside the chuck; depending on which direction you rotate the collar, the jaws open or close. In order to install a bit properly, you will need to keep the bit centered in the chuck between all three jaws. With a larger bit, it’s usually not an issue, but when you use a smaller one, it may actually become stuck between two of the jaws. Even if you tighten it down, you will still be unable to drill through it, since the bit will spin off-center. However, on top of everything, the process of changing a drill bit is straightforward, no matter what type of chuck it has. I wish you the best of luck with this article.
I'm Joost Nusselder, the founder of Tools Doctor, content marketer, and dad. I love trying out new equipment, and together with my team I've been creating in-depth blog articles since 2016 to help loyal readers with tools & crafting tips.