Painting the walls with a sponge effect is a beautiful and fairly simple way to ensure that your walls are less boring and also give a nice effect.
With just a sponge, a number of different colors of paint and glaze you can give your walls a real transformation.
When you plan to add a nice technique to creating nice special effects on the walls, the sponge effect is definitely the one with the most beautiful effects.
You don’t need a steady hand, expensive gear or oil-based paint. And do you find out that part of the wall is lighter than the rest? Then that can easily be solved with the sponge effect by sponging a darker color over it.
In this article we explain step-by-step how to give your walls a makeover using the sponge technique. We have used five different colors for this, but you can easily adjust this yourself if you want to use more or less colors. It is true that when you use more colors, you get a cloud effect. This is the best thing about this technique.
What do you need?
• A paint roller
• A paintbrush
• A paint tray
• A stepladder
• Old cloths
• Painters tape
• Low gloss paint for the base
• Latex paint for the sponge accent
• Latex glaze
• Extender
You can get all the above products online or at the hardware store; You probably still have the old canvases at home. An old T-shirt will also do, as long as it can get dirty. With a natural sea sponge you get the best results because they leave a more varied pattern. However, these sponges are more expensive than a standard sponge. In addition, you can easily get latex paint out of these sponges so you really only need one. Latex glaze causes the latex paint to become thinner and appear translucent. Oil-based glazes are also available, but it is better not to use them for this project. The extender you see in the list is used to make the glaze and paint mix slightly thinner. It also slows down the drying time. If you want to lightly sand the paint, you will also need a number of scouring pads.
Experiment before you start
It is a good idea to experiment with the colors you have before applying it to the wall. Certain color combinations can look great in your head, but don’t really come into their own once on the wall. In addition, the incidence of light also plays a role, so pay attention to that too. In addition, you also get to know the sponge, and you know what to do to get the most beautiful effect. You can practice on a piece of wood or drywall if you happen to have one lying around. It is a good idea to consider in advance which colors you would like on the wall. That way you can check in the hardware store whether these colors really go together. If you can’t figure it out, you can of course always ask an employee for help.
Step-by-step explanation
- Mix the paint with the glaze as described on the package. If you also use the extender, you should mix it with it. You would do well to save and label a small amount of this mix. If stains or damage appear on the walls in the future, you can easily repair this.
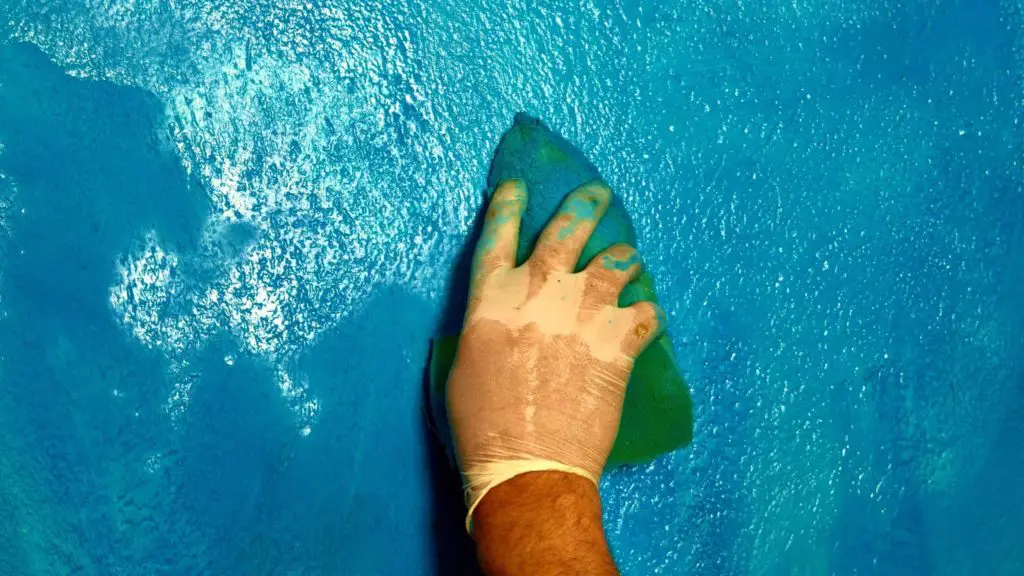
- Before you start sponging, make sure that all furniture is covered and the baseboards and ceiling are taped. When that’s done, start applying the first coat. Start in the least conspicuous place, somewhere with a cupboard in front of it, for example. Dab the sponge into the paint, then dab most of it off onto the paint tray. Lightly press the sponge against the wall. The harder you press, the more paint comes off the sponge. Use the same amount of paint, the same side of the sponge and the same pressure for the entire wall. When you are done with this color, immediately wash the sponge so that you can use it for the next color.
- Dab the paint into the corners of the walls and along the baseboards and ceiling. You can do this with a brush, but if you have a small piece of sponge it can also be done with that.
- When the first color has completely dried you can apply the second color. You could apply this more randomly than the first color, leaving more space between the areas.
- When the second color has also dried completely, you can start with the third color. You get the best effect when you apply it very lightly. This way you get a blurry effect. Did you accidentally apply a little more than you wanted in one place? Then you can dab it with a clean brush or a piece of clean sponge.
- If you want to sand the wall, you can do that during this step. Just make sure you only do this when the wall is completely dry. Sanding is especially useful when, for example, drops on the wall, or when the wall has many irregularities. Sanding is best done with some water and a synthetic scouring pad. If you want to remove paint from the wall that is already completely dry, the best way to do this is to sprinkle some baking soda on the scouring pad.
- For the fourth color we really only need a little bit; it is therefore best to do this with a small sponge. So only apply this color in a few places, for example where you still see some stains or irregularities.
- The last color is the accent color. It is most beautiful when this color reflects something and is a contrast of the other colors that have been used. Add this in lines on the wall, but not too much. If you apply this color too much, the effect disappears, and that is a shame.

I'm Joost Nusselder, the founder of Tools Doctor, content marketer, and dad. I love trying out new equipment, and together with my team I've been creating in-depth blog articles since 2016 to help loyal readers with tools & crafting tips.