The indoor frames need to be repainted once in a while. Whether this is because they have yellowed, or because the color no longer matches your interior, it has to be done.
Although it is not a difficult job, it can be time consuming. In addition, it also requires some precision.
You can read in this article how you can best paint the frames inside and which items you need for this.
In this post we'll cover:
The step-by-step plan
- You start this job by checking the door frame for wood rot. Is the frame rotten in certain parts? Then you would do well to stash all the parts away with a chisel and then use wood rot stopper and wood rot filler for this.
- After this you can clean and degrease the frame. This is best done with a bucket of warm water, a sponge and a little bit of degreaser. After you have cleaned the frame with degreaser, go over it again with a clean sponge with water.
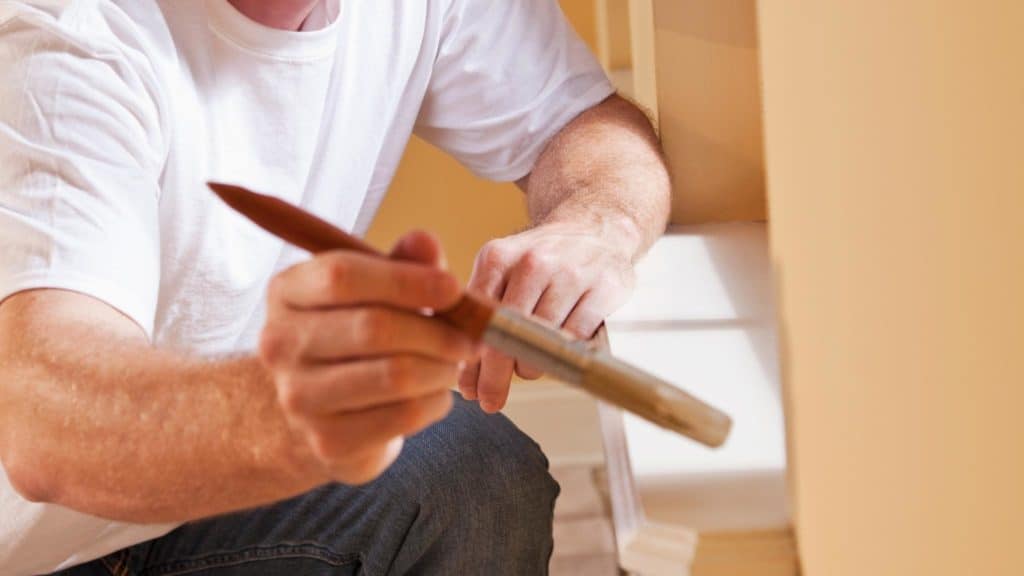
- After this, remove any loose paint blisters with a paint scraper and sand down the damaged parts.
- Check the frame carefully for any irregularities. You can make these nice and smooth again by filling them. You need a wide and a narrow putty knife for this. With the wide putty knife you apply the stock of putty to the frame, and you then use the narrow knife for the putty work. Do this in layers of 1 millimeter, otherwise the filler will sag. Allow each coat to cure properly as directed on the packaging.
- When the filler has completely cured, you can sand the entire frame again. This can be done with fine sandpaper. If the frame is made of untreated wood, it is better to use medium-coarse sandpaper. After sanding, remove the dust with a soft brush and a damp cloth.
- Now you can start taping the frames. You can easily tear off the corners sharply with a clean putty knife. Also don’t forget to tape the windowsill.
- Once everything has been sanded, you can prime the frame. Stir the paint well before you start. To paint, use a round brush and work from the bottom up and back again. Allow the primer to dry thoroughly and then sand it with fine sandpaper. Then wipe the frame with warm water and a little degreaser.
- Then remove all sealant and seams with acrylic sealant. The best way to do this is by cutting the tube down to the screw thread. Then turn the nozzle back on and cut it diagonally. You put this in the caulking gun. Place the caulking gun at a slight angle on the surface so that it is square to the surface. Make sure to spray the sealant evenly between the seams. You can remove the excess sealant immediately with your finger or a damp cloth. Then let the sealant dry thoroughly and check the packaging to see when the sealant can be painted over.
- Before painting, dip the brush a few times in the acrylic lacquer, wiping it off on the edge each time. Do this until the brush is saturated, but not dripping. then start with the corners and edges along the windows first, and then the long parts of the frame. As with the primer, do this in long strokes along the length of the frame.
- After you have painted everything with the brush, roll the work with a narrow paint roller. This makes the layer look even nicer and smoother. For maximum coverage, apply at least two coats of paint. Always allow the paint to dry thoroughly in between and sand it lightly with fine sandpaper or a sanding sponge.
What do you need?
Quite a few materials are needed if you want to give the frames a makeover. Fortunately, all items are for sale at the hardware store or online. In addition, there is a good chance that you already have part of it at home. Below is the complete overview of the supplies:
- paint scraper
- wide putty knife
- Narrow putty knife
- Hand sander or sandpaper
- round tassels
- Paint roller with paint bracket
- caulking syringe
- Soft hand brush
- blade
- stir stick
- scouring pad
- primer
- lacquer paint
- quick putty
- Coarse sandpaper
- Medium-coarse sandpaper
- Fine sandpaper
- acrylic sealant
- masking tape
- degreaser
Extra painting tips
Do you want to keep the brushes and paint rollers after painting? Do not rinse the acrylic lacquer under the tap because this is bad for the environment. Instead, wrap the brushes and rollers in aluminum foil or place them in a jar of water. This way you keep the tools good for days. Do you have paint remnants? Then don’t just throw it in the garbage, but take it to a KCA depot. When you no longer need the brushes and rollers, it is best to let them dry first. Then you can throw them into the container.
Painting windows inside
Is your (wooden) frame in need of a makeover, but you don’t want to buy completely new frames?
Opt for a lick of paint!
Give your windows a second life by painting them.
Next that your windows will look good again after painting, it is also good for the protection of your home.
Good paintwork protects your frame against the various weather conditions.
Painting windows will be an easy job with the step-by-step plan below.
Grab the brush yourself and get started!
Painting frames Step-by-step plan
If you want to paint your windows, make sure you do this in a well-ventilated area where it is around 20°C.
Then first clean your windows well.
Paint adheres best to a clean surface.
Clean your windows with warm water and a degreaser.
Fill any holes and cracks with wood filler.
Then you will sand the frames.
If the frame is in poor condition, it is recommended to first scrape off the peeling layers of paint with a paint scraper.
Then wipe off all the dust with a cloth.
Finally, tape off anything you don’t want to paint with masking tape.
Now your frame is ready to be painted.
Important: you first paint frames with primer.
This ensures better coverage and adhesion.
- Stir the primer with a stirring stick.
- Grab a brush for the small areas and a roller for the larger areas.
- Open the window.
- Start by painting the inside of the glazing bars and the part of the frame that you can’t see when the window is closed.
- After painting the first part, leave the window ajar.
- Now paint the outside of the window frame.
- Then paint the remaining parts.
Tip: With wood, always paint in the direction of the wood grain and paint from top to bottom to avoid sags and dust.
- Once everything is painted, allow the primer to dry thoroughly.
- Check the packaging of the primer for exactly how long it needs to dry.
- After drying, start painting the frame in the color of your choice.
- If you have waited longer than 24 hours with the topcoat, you still need to lightly sand the primer.
- Then start painting in the same way as the primer.
- When everything is painted, remove the tape. You do this when the paint is still wet.
- Painting frames with acrylic paint
Paint windows inside with a water-based paint.
Painting interior windows is completely different when you are painting exterior windows.
By this I mean that you are not dependent on weather influences indoors.
Fortunately, you do not suffer from rain and snow.
This means, first of all, that the paint does not have to be strong enough to withstand the weather.
Second, it’s better to schedule it when you’re going to do it.
By this I mean that you can start planning the exact time when you want to do the job.
After all, you are not bothered by rain, wind or sun.
To paint windows indoors, you simply use a water-based paint.
You can basically paint the windows yourself.
I will explain exactly which order to apply and which tools to use.
In the following paragraphs I also discuss why you should apply water-based paint and why, the preparation, the execution and a checklist of sequence.
Painting window frames indoors and why acrylic paint
Painting windows inside should be done with an acrylic paint.
An acrylic paint is a paint where the solvent is water.
For some time now you are no longer allowed to paint window frames inside with a paint based on turpentine.
This has to do with VOC values.
These are volatile organic compounds that possess a paint.
Let me explain it differently.
These are substances that evaporate easily.
Only a small percentage may be in the paint from 2010 onwards.
The substances are harmful to the environment and your own health.
I personally think that acrylic paint always smells nice.
Acrylic paint also has its advantages.
One of those advantages is that it dries quickly.
You can work faster.
Another advantage is that light colors do not yellow.
Read more information about acrylic paint here.
Inside performing your painting and preparation
Performing within your painting work requires preparation.
We assume that this is an already painted frame.
First of all, you have to remove curtains and net curtains in front of the window frame.
Remove stick holders or other screwed elements from the frame if necessary.
Make sure you have enough space to paint.
Cover the floor with a piece of plastic or plaster.
A stucco runner is easier because you can use it more often.
Tape the stucco runner to the floor so that it cannot move.
Get everything ready: bucket, all-purpose cleaner, cloth, scouring sponge, painter’s tape, paint can, screwdriver, stirring stick and brush.
Painting your windows in the house and its implementation
when you start painting in the house, you first clean.
This is also known as degreasing.
You degrease with an all-purpose cleaner.
There are different types for sale.
I myself have good experiences with St. Marcs, B-Clean and PK cleaner.
The first has a lovely pine scent.
The last two mentioned do not foam, you do not have to rinse and are also good for the environment: biodegradable.
When you have degreased everything properly, you can start sanding.
Do this with a scotch brite.
A scotch brite is a flexible scouring pad that allows you to get into tight corners without leaving scratches.
Then you make everything dust-free.
Then take painter’s tape and tape off the glass.
And now you can start painting windows inside.
I wrote a special article about how to paint a window frame exactly.
Read the article here: painting frames.
Painting frames in your home and a summary of what to pay attention to
Here is a summary of the most important points: painting windows inside.
Always acrylic paint inside
Advantages: quick drying and no yellowing of light colours
Use Vos values for 2010: fewer organic volatile substances in accordance with the 2010 standard
Making preparations: making space, dismantling, clearing the frame and stucco
Execution: degrease, sand, dust and paint the frame inside
Tools: painter’s tape, stirring stick, all-purpose cleaner and brush.
This is how you paint the inside door
Painting a door is not really a difficult job, if you follow the standard rules.
Painting a door is really not difficult, even if you are doing it for the first time.
Everyone always dreads that, but believe me, it’s also a matter of doing and painting a door is something you just have to try.
Preparing to paint a door.
Painting a door stands and falls with good preparation.
We start from an ordinary door that is completely flat without windows and/or floors.
The first thing to do is to disassemble the handles.
Then you can thoroughly degrease the door with St. Marcs or B-clean in lukewarm water!
When the door has dried, sand with 180-grit sandpaper.
When you have finished sanding, make the door dust-free with a brush and then wipe it wet again with lukewarm water without degreaser.
Now the door is ready to paint.
Placing stucco.
Before you start painting, I always put cardboard on the floor, or a piece of scrap.
I do that for a reason.
You will always see the small splashes that fall on the cardboard when rolling.
When splashes of paint come next to the cardboard, you can immediately clean it with thinner.
Then immediately with lukewarm water afterwards, to prevent stains.
For painting a door it is best to use a paint roller of 10 cm and a corresponding roller tray.
To achieve a good result, always ground the door first!
For grounds, you then follow exactly the same instructions as given above.
For interior doors, use a water-based paint.
Always pre-tape the roller before you start rolling!
This has the advantage that when you remove the tape, the first hairs remain in the tape and do not get into the paint.
This is really very important!
The method of painting a door
You first make sure that your roll is well saturated before you apply the first paint on the door!
I divide a door into 4 compartments.
Top left and right, bottom left and right.
You always start at the top of the door at the hinge side and roll from top to bottom, then left to right.
Make sure you distribute the paint well and do not press with your roller, because then you will see deposits later.
Continue at 1 pace!
When the course is finished, no more rolling.
After this you will paint the box on the left in the same way.
Then bottom right and the last box.
Then do nothing.
If a mosquito flies on the door, let it sit and wait until the next day.
Remove these with a damp cloth and you will no longer see anything (the legs are so thin that you can no longer see them).

I'm Joost Nusselder, the founder of Tools Doctor, content marketer, and dad. I love trying out new equipment, and together with my team I've been creating in-depth blog articles since 2016 to help loyal readers with tools & crafting tips.