Printing on wood is fun. You can transfer pictures to wood professionally or you can do it for your own pleasure or to gift your near and dear ones something unique made by yourself.
I believe that developing a skill is always good. So, you can learn the ways of printing on wood to increase the number of your skills also.
In today’s article, I will show you 5 easy and simple ways to print on wood that you can try at home. Well, let’s start at…..
In this post we'll cover:
Way 1: Printing on Wood Using Acetone
Printing on wood using acetone is a clean process that provides an image of good quality and after transferring the image to the wooden block the paper does not stick to it.
Let me first tell you about the necessary materials for the printing project:
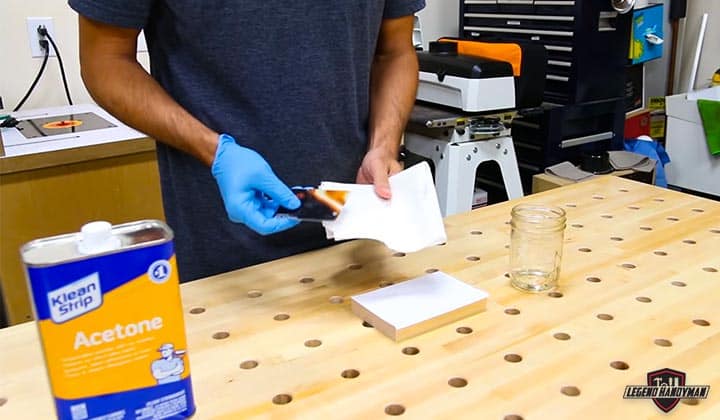
- Acetone
- Nitrile Gloves
- Paper Towel
- Laser Printer
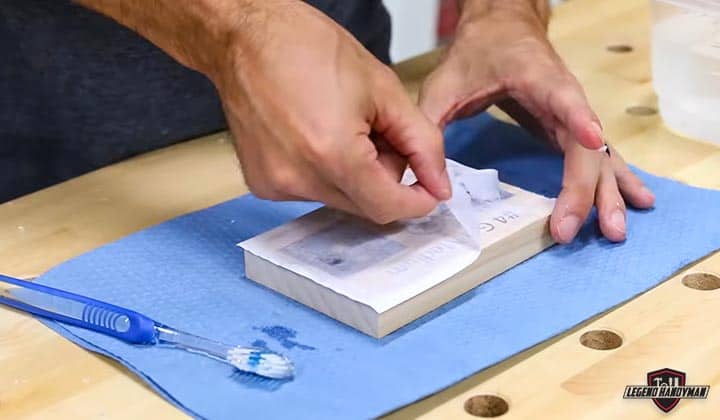
Here we will use acetone as the toner. Your favorite picture or text or logo that you want to transfer on wood print the mirror image of that thing using a laser printer.
Then crease the printed paper over the edge of the wooden block. Then dip the paper towel in the acetone and rub gently on the paper with the acetone soaked paper towel. After a few passes, you will see that the paper easily peels right up and reveals the image.
While doing this, press the paper firmly down so that it cannot move; otherwise, the quality of printing will not be good.
Caution: Since you are working with a chemical product take all the cautions written on the can of acetone. I would like to inform you that if your skin comes in contact with acetone it may get irritated and highly concentrated acetone may cause nausea and dizziness.
Way 2: Printing on Wood Using Clothes Iron
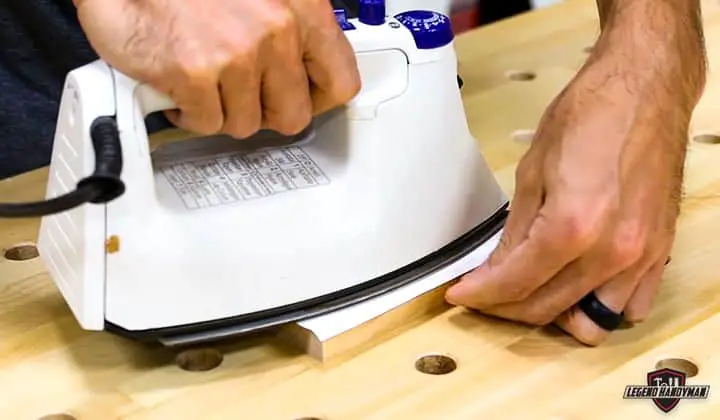
Transferring image to the wooden block using clothes iron is the cheapest method. It is a quick method too. The image quality depends on your printing skill. If you have a good printing skill you can easily understand how fairly you have to press the iron to get a good quality image.
Printing your chosen image on the paper place it upside down on your wooden block. Heat the iron and iron the paper. While ironing, make it sure that the paper should not move around.
Caution: Take enough caution so that you do not burn yourself and do not heat the iron so much that it scorches the wood or paper or do not heat it so less that it cannot transfer the image to the wooden block.
Way 3: Printing on Wood Using Water Based Polyurethane

Transferring image on wood using water based polyurethane is safer compared to the previous methods. It provides an image of good quality but this method is not as quick as the previous two methods.
Here is the list of the required materials needed for printing on wood using water based polyurethane:
- Polyurethane
- A small brush (acid brush or other small brush)
- Stiff toothbrush and
- Some water
Take the small brush and soak it in the polyurethane. Brush on the wooden block using the polyurethane soaked brush and make a thin film over it.
Take the printed paper and press it down onto the polyurethane wet surface of the wood. Then smooth the paper from the center outward. If there remains any bubble that will be removed by smoothing it.
Setting the paper firmly onto the wooden surface let it sit there for about an hour. After an hour, wet the whole back part of the paper and then try to peel off the paper from the wooden surface.
Obviously this time the paper will not peel off smoothly like the first or second method. You have to scrub the surface gently with the toothbrush to remove the paper completely from the wooden surface.
Way 4: Printing on Wood Using Gel Medium

If you use water-based gel, it is also a safe method to print on a wooden block. But it is also a time-consuming method. You need the following materials to apply this method:
- Liquitex gloss (You can take any other water-based gel as a medium)
- Foam brush
- Key card
- Toothbrush and
- Water
Using the foam brush make a thin film of Liquitex gloss over the wooden block. Then press the paper upside down onto the thin film of gel and smooth it from the center to outwards so that all the air bubbles are removed.
Then set it aside to dry out for one and half an hour. It is more time-consuming than the previous method. After one and half an hour scrub over the paper with a wet toothbrush and peel the paper off. This time you will face more difficulties to remove the paper than the previous method.
The work is done. You will see your chosen image on the wooden block.
Way 5: Printing on Wood Using CNC Laser
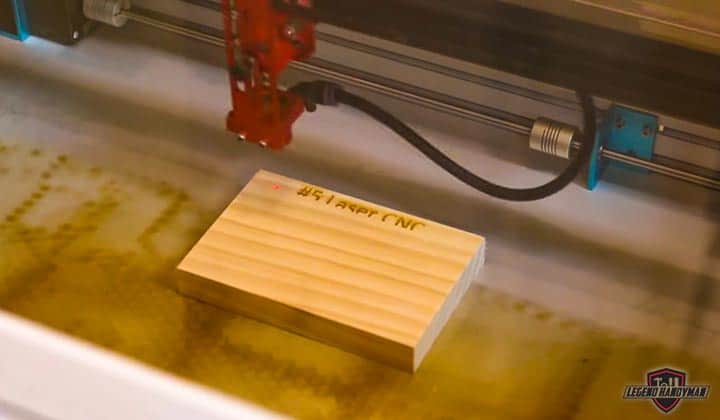
You need a CNC laser machine to transfer your chosen image to the wood. If you want to get excellent detail of text and logo laser is the best. The setup is pretty much easier and the necessary instructions are provided in the manual.
You have to provide your chosen image, text or logo as input and the laser will print it on the wooden block. This process is expensive compared to all the 4 methods described in this article.
Wrap UP
If quality is your first priority and you have a high budget you can choose laser to print on wood. To complete your work within a short time the first and second method that is printing on wood using acetone and printing on wood using clothe iron is the best.
But these two methods have some risk. If you have enough time and safety is the first priority you can choose method 3 and 4 that is printing on wood using gel medium and printing on wood using polyurethane is the best.
Depending on your requirement choose the optimum way to print on wood. Sometimes it becomes difficult to understand a method clearly just by reading. So here is a useful video clip you can check out for clear understanding:
You may also like to read other DIY projects we covered – Diy projects for moms

I'm Joost Nusselder, the founder of Tools Doctor, content marketer, and dad. I love trying out new equipment, and together with my team I've been creating in-depth blog articles since 2016 to help loyal readers with tools & crafting tips.