Among the woodworking power tools, the scroll saw is really fun to play with. That’s because you can do so many things with it that would otherwise be tedious as hell if not impossible. One of the exceptional things a scroll saw can do is to make through cuts.
But that requires you to remove and reinstall the blade. And with a plain end blade, it could prove to be an effort on its own. In this article, we will explore the idea of how to install a plain end scroll saw blade easily.
But first –
In this post we'll cover:
What Is A Plain End Scroll Saw Blade?
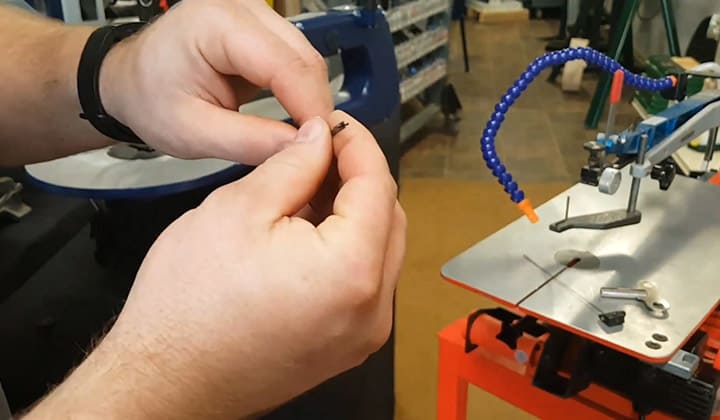
A plain end scroll saw blade is a blade for the scroll saw that has plain ends. If you know, you know. But if you don’t know, then the common scroll saw uses is to make intricate and complex curved cuts. A scroll saw excels at making tight corners cuts, insanely accurate cuts, and most importantly, through cuts.
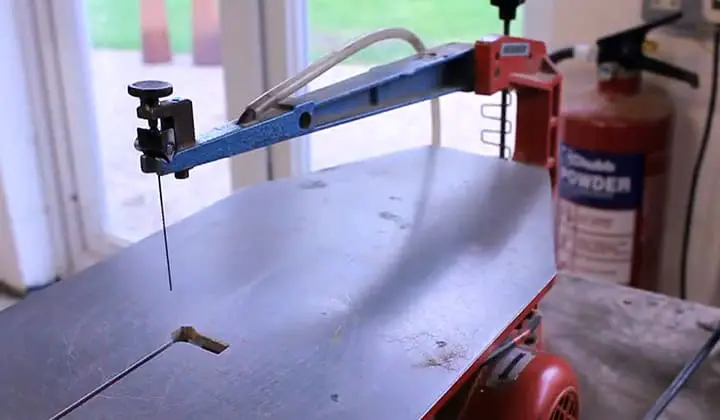
If you paid attention to the types of cut a scroll saw is good at, you can see that they all have one thing in common. All of the cuts require you to be extremely precise. And the through cut requires you to insert the blade through the block of wood.
Both the accuracy and the ability to go through the woodblock call for a thin blade. A really thin blade. But the thinner a blade is, the more effort it takes to install and remove the blade.
Hence an extremely thin blade is not as user-friendly as a thicker/bigger blade is. Compromises had to be made. Thus, comes two types of blades for a scroll saw.
- A blade that is easy to mount and unmount, the blades with a pin on each end, thus the name, “Pinned scroll saw blade.”
- A blade that is exceptionally accurate and extremely thin. Because it does not need to be thick to support the tension through the pin, the “pin-less scroll saw blade,” also known as a plain end/flat scroll saw blade.
Why Install A Plain End Scroll Saw Blade?
Okay, so we came to the conclusion that the pins of a pinned scroll saw blade helps tremendously to hold the blade in place and under tension. Since a plain end blade does not have pins, it is relatively difficult. So why would you go through the trouble? There are plenty of reasons.

- If your scroll saw model does not support a pinned blade. It is obvious.
- A pin-less blade is significantly thinner. The thinner a blade is, the better quality of cut we will get.
- With the ability to install a pin-less blade, you will open yourself to a lot more blade options, thus more freedom.
So, overall, it is better to use a pin-less blade scroll saw model. It is still beneficial to convert your pinned saw model into a pin-less one if it does not support it already. In case your saw model does not, then we will use alternative methods like using an adapter or clamp to lock on the blade.
How To Install A Plain End Scroll Saw Blade
There are two types of scroll saws—one that comes with the ability to use pin-less blades, and the ones that do not.
On A Pin-Less Supported Scroll Saw
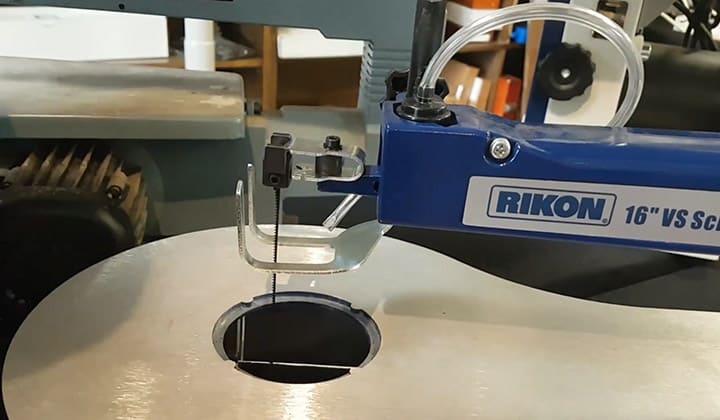
If your scroll saw already supports pin-less blades, Then it will be easy for you. If you look closely, the functionality on the upper arm and the lower arm is somewhat different.
In general, the lower end (towards the teeth of the blade) is locked inside an adaptor or clamp. The clamp is a separate entity that either comes with your saw or you might need to purchase on your own.
- Process
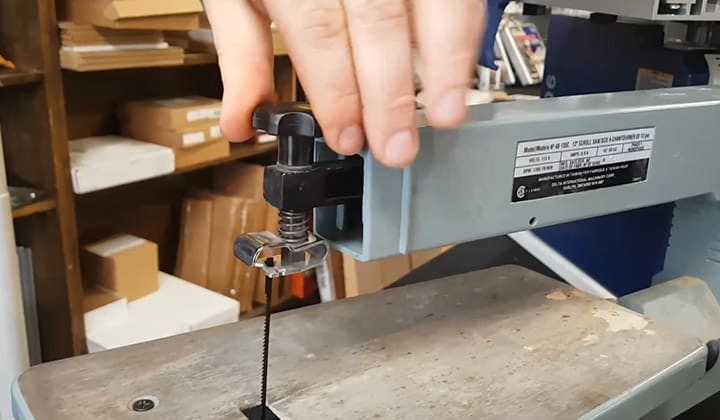
There is a slot on the clamp that you insert the blade and tighten a screw to fix it. After that, the clamp acts as a hook. The upper end does not need a clamp. Rather the upper arm itself acts as a clamp.
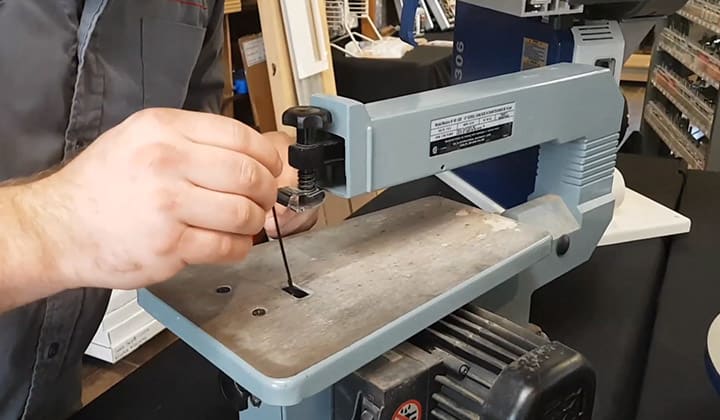
I mean, the slit and the screw is a permanent feature of the upper arm on the scroll saw. So, when you need to change the blade, you begin with unscrewing the upper arm blade locker screw. That releases the blade.
Then what you need to do is to jiggle the blade up and down and that should release the hook-like adaptor on the bottom end. That completely sets the blade free. Then you pull the blade out and remove the bottom clamp from the blade. Take the new blade and add the bottom clamp on the new blade.
Remember the bottom side? Towards the direction that the teeth are pointing. Once the bottom clamp is added, the new blade is ready to be placed on the saw.
In the same way, as you pulled the blade out, insert the new one. You should be able to locate the tip of the lower arm of the saw. There will be a curved edge. You put the clamp around it and pull the blade upwards.
A little bit of upward force will prevent the blade from moving and going off the spot. The curve also helps. Anyway, hold the blade with one hand, and push the upper arm of the saw downward. It should lower with just a small amount of force. Insert the blade through the slit again and tighten the screw back up.
- Tips
Oh! Be sure to tighten like there is no tomorrow. You don’t want the blade to come free while you are putting tension on, do you? Or even worse, mid-operation. With the new blade installed, give it a test run before putting it through some wood. If it looks good, then do a test run with a piece of wood, and you are good to go.
On A Pinned Only Scroll Saw
I know not all the scroll saw supports pin-less blades. Some models only support pinned blades. However, using a pin-less blade is still beneficial. To use a plain-end blade, all you need to do is to buy a couple of adapters.
As the machine is originally intended to be used with only pinned blades, you saw will not provide them. Buying a couple of adapters is really easy. They should be available in the local hardware shops or online. The package is most likely to include the Allen wrench that you will be needing.
Anyway, installing the blade is the same process as attaching the adapters on the lower end of the previous process, but done on both ends. After attaching the adapters on both ends, connect the lower clamp to the lower arm and the other end to the top arm of the saw.
Conclusion
Removing and reinstalling endless blades on a scroll saw is not a tough process. It is very simple. Although at first few times, you do need to be careful about a couple of things.
First of all, always connect the clamps properly. I mean, tighten the screws as hard as you can without ruining the screw itself, which should be next to impossible.
Then you have to be watchful about the orientation of the blade. If you place the blade the wrong way around, that’ll ruin the workpiece, your face, and even possibly the blade itself. However, with time and practice, it should be more than easy.

I'm Joost Nusselder, the founder of Tools Doctor, content marketer, and dad. I love trying out new equipment, and together with my team I've been creating in-depth blog articles since 2016 to help loyal readers with tools & crafting tips.