Are you planning to renew the kitchen, bathroom or toilet soon, but are you very hesitant to replace all the tiles? You can also easily paint the tiles with special tile paint. You can choose from different colors and types of paint so that it always matches the rest of the room. In this article you can read exactly how to tackle this and what you need for it.
Are the sanitary tiles very dirty? Then use this special cleaning agent for sanitary tiles:
What do you need?
For this job you need a number of things that are all available in the hardware store. In addition, it is also possible that you already have certain materials in your shed.
degreaser
cover fleece
masking tape
cover foil
Basic tile paint
Hot water resistant lacquer or water resistant paint
primer
sandpaper
Turpentine
Bucket cloth
Brush
roller
paint tray
The step-by-step plan
First of all, determine which tile paint or tile varnish you want to use. Different types of paint are available. You can use a base paint, but it is not suitable for the shower. You can also choose a paint that is warm water resistant, which requires you to apply a primer (like these top brands) first, or a water resistant paint that consists of two components.
Before you can start applying the paint, you must first scrub the tiles with warm water and a degreaser (like these I’ve reviewed). Also use sandpaper, because that immediately makes the tiles a bit rougher, which in turn ensures that the paint adheres better. Then dry the tiles well and make sure that the room is sufficiently ventilated. a temperature around 20 degrees is most ideal. If you have broken tiles, replace them before painting.
Then cover the floor with a covering fleece. Cover fleece has an absorbent top layer and has an anti-slip layer on the bottom. Also cover everything with masking tape that does not need to be painted and cover the furniture with masking film.
First of all, stir the paint well with a stirring stick and pour the paint into a paint tray. Remove any loose brush bristles by running your brush over a piece of coarse sandpaper. Then run a piece of tape over your roller to remove any loose tufts.
Start painting the edges and joints with a brush. Do you use a warm water resistant lacquer? Then first apply a primer over all the tiles before you start with the lacquer.
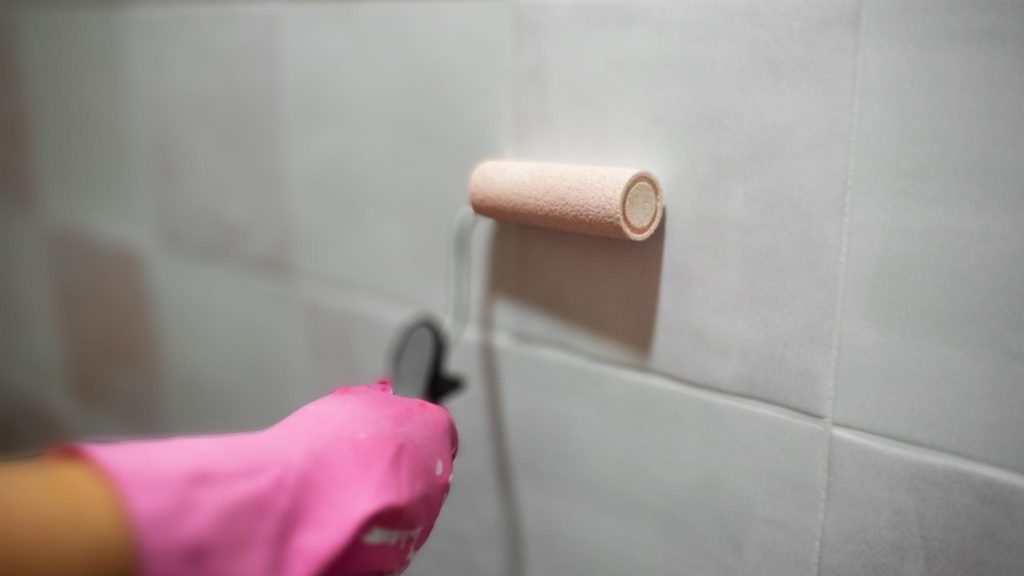
Now you can start painting the rest of the tiles. Make sure to apply the paint liberally in vertical strokes. Then spread the paint horizontally. Work from the top down to make sure the paint doesn’t drip down and to avoid dust as much as possible. Then roll everything in long lines. That way you won’t get streaks in your painting.
Do the tiles need a second or even third layer? Then wait at least 24 hours before applying it and sand the painted tiles again lightly before you start.
The tape is best removed when the paint is still wet. If you leave the tape on too long, you risk damaging the paint layer and leaving glue residue behind.
Extra tips for the tiles
Do you have smooth painted tiles? Then it is best to use a velor roller. This roller absorbs a lot of paint and also holds it between the short coat. The soft core ensures an even effect when rolling without creating air bubbles.
Do you want to apply the second or third coat the next day? Wrap the brushes tightly in aluminum foil or place them under water in a jar. This way you can keep your brushes good for a few days.
Also read:
Painting at a toilet renovation
painting the bathroom
whiten the ceiling
Wall paint for the kitchen and bathroom

I'm Joost Nusselder, the founder of Tools Doctor, content marketer, and dad. I love trying out new equipment, and together with my team I've been creating in-depth blog articles since 2016 to help loyal readers with tools & crafting tips.