Have you recently tried to drill through something and noticed that your bits are not cutting as they used to cut? Maybe some of the bits are in terrible condition.
This makes it impossible to drill through soft metals and wood without creating high shrieking squeaks and a plume of smoke.
The quickest and easiest way to sharpen drill bits is with a drill bit sharpener like the Drill Doctor 500x and 750x models.
Well, before dashing to the nearby hardware to get yourself a box of new drill bits, try the following sharpening procedures.
The drill bit sharpeners (like these best ones!) are so easy to use, you’ll end up saving money because you’re not constantly buying new bits.
Drill bit sharpeners have grinding wheels that remove metal from the tips of the bits until the edges are sharp again.
Plus, using dull drill bits is very dangerous. They can break and hurt you. So, it’s always best to use sharp drills that can withstand the task.
In this post we'll cover:
Is it worth sharpening drill bits?
One of the most common questions is always if it’s worth sharpening your drill bits. It seems like it’s easier to buy new ones but it’s wasteful and unnecessary.
If you spend a lot of time working with drills, you should really invest in a drill bit sharpener. It’s going to save you money in the long run.
Since you spend time working with tools in the shop, you know how annoying a blunt drill bit is. Once they get dull, the bits just don’t cut like they used to and this makes your work harder.
So, to save time and money, a drill bit sharpener is a true lifesaver.
Think about it like this: how long do your drill bits last?
Sometimes, I break at least one a day while working. If I’m lucky, a good quality bit lasts me up to three weeks.
But since I have a drill bit sharpener, I can reuse the dull and broken one (as long as it’s still sharpenable, of course).
When you use dull drill bits, it slows you down. Nothing compares to a sharp crisp edge of a new (or newly sharpened) drill bit.
You can work quicker and more efficiently without putting your hands in danger.
Is the drill bit sharpener worth it?
Of course, it is, because a tool like the Drill Doctor makes drill bits like new. In some cases, they work better than new ones because if you split the point on them, they become sharper and work better.
But even with very dull drill bits, you can revive them and make them sharp again in seconds. If you want to save a ton of money, you can take used and junky drill bits and make them like new again.
This way you don’t need to spend money on expensive drill bits.
According to the DIYhelpdesk, a good drill bit sharpener can sharpen over 200 drills before you have to replace the grinding wheel – so that’s a lot of value for your buck.
Drill sharpeners work for 2.4mm to 12.5mm drill bits so you can get a lot of use out of them.
What is the best drill sharpener?
The two most popular and effective drill sharpeners are the Drill Doctor models 500x and 750x.
They are relatively affordable so they make a great addition to any tool shop or handyman’s tool kit.
Even if you just like to do DIY projects, you’ll still benefit from a drill sharpener, because they are easy to use for everyone.
When you’re working on a large project and drilling through dense hardwood, your drill bit can become dull within minutes!
Just imagine how many you need for working in a huge house. So, if you work with hardwood and steel, you definitely need to get a drill bit sharpener to save you time. Simply restore the cutting edge and get back to work.
The Drill Doctor 750x is a great option:
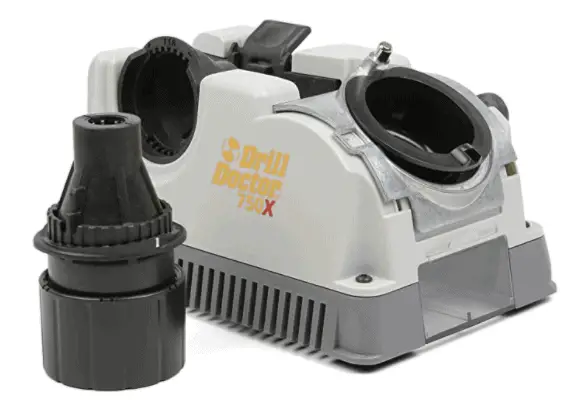
It sharpens multiple types of drill bits, therefore it’s very versatile for your garage or shop. You can sharpen drill bits of any material, including steel and cobalt in no time.
A tool like this allows you to sharpen your bits, split them, and align them, which makes your life easier.
Just think about how much waste all those dull drill bits are creating. Like me, you probably have boxes or containers of dull and useless drill bits lying around.
With a sharpener, you can reuse them all again! Out of all the Drill Doctor sharpeners, the pros recommend the 750x because it works extremely well.
Getting Started
If you already have your handy drill bit sharpener, here’s how to use it properly. Follow our tips and your drill bits will look and work like new!
1. Connecting to a Drill
1. Ensure that the jaws mounted on the drill chuck are tight and fully closed. You should always use a drill with a 43mm collar and a 13mm (1/2 inch) chuck.
2. Fit the drill bit sharpener onto the drill.
3. You should loosen the wingnuts to enable the outer tube slide over the chuck.
4. You should set the outer tube to grip the drill’s collar and not the chuck. The drill should be connected to the drill bit sharpener by friction only.
2. Properly sharpened bits
You should know that your bits are properly sharpened after identifying the following characteristics.• A sharp point at the center of the bit.• Two equal and sharp cutting edges.• Two trailing edges positioned slightly lower than the cutting edges.
How to Use Drill Bit Sharpener
1.You should connect the drill and the drill bit sharpener then clamp the drill into a vice holding the sharpener in an upright position.
2.Connect the drill to the main supply.
3.Place a single drill bit into the appropriate hole. Note that some drill bit sharpeners are not suitable for sharpening masonry bits.
4.Pull the trigger mounted on your drill. For better sharpening, exert a considerable downward pressure onto the bit while making back and forth rotations of about 20 degrees. While inside the drill bit sharpener, you must keep the bit in motion.
5.After approximately 5 to 10 seconds of sharpening, you should remove the drill bit to reduce damages.
Check out this helpful video which shows you how to sharpen with a Drill Doctor.
Sharpening hints
• Overheating is experienced whenever the tip of the bit starts turning blue. In this case, you should reduce the amount of sharpening time and exerted pressure. It is advisable to cool the bit with water between the sharpening cycles regularly.
• In the case whereby one edge becomes more extended than the other, it is advisable to sharpen the longer side to attain the required length.
• You should use a bench grinder to rough broken bits into shape. This is because sharpening broken bits rather than blunt bits takes much time to attain their original shapes.
• Always ensure that both sides of the drill bit are exerted to the same amounts of time and pressure while sharpening.
6. Repeat the above steps whenever necessary.
Drill Bit Sharpening Attachments
If you already own a bench grinder, all you need is the drill bit sharpening attachment. Since it’s an attachment, it’s removable and you can use it when you need it. These attachments are usually more expensive, so you really need to think of it as a long-lasting investment. It is durable, so you can sharpen thousands of drill bits.
If you are interested, check out something like the Drill Bit Sharpener Tormek DBS-22 – The Drill Bit Sharpening Jig Attachment For Tormek Water-Cooled Sharpening Systems.
Why is this tool useful?
You can set it to sharpen at any angle between 90 degrees and 150 degrees which means that it sharpens all point angles. As well, the cutting edges are sharpened symmetrically so your edges are always equal and help your drill last longer. The best part about this attachment is that it creates a 4 faceted point and that means superior performance for you when you use the drill bits.
How to sharpen drill bits
- Take out the setting template and set the distance of the universal support from the stone.
- Mount the base plate carefully until it locks securely.
- Now, set the clearance angle. Check your setting template for the recommended angles depending on the material you use and the drill bit dimensions.
- Take the drill bit you want to sharpen and mount it in the holder.
- Set the protrusion with the measuring stop on the guide.
- Now, it’s time to align the cutting edges. They must be parallel with the horizontal lines.
- You can now start to sharpen the primary facet first.
- Position the holder so the lug rests on the primary stop, marked with a P.
- Push until the drill bit actually touches the stone.
- Now, you need to set your cutting depth. Use the cutting screw and lock it in using the locking nut.
- The edge is ground once the grinding noise stops sounding like it’s working against friction.
- Turn the jig around to sharpen from the other side.
- At this point, you can start to grind the secondary facet, just like the primary.
Watch this helpful video tutorial
General safety rules while using a drill bit sharpener
1. Always keep the working area clean. Cluttered working environments invite injuries. You should also ensure that the working area is well lit.
2. Never use powered tools in poorly lit, wet, or damp locations. Do not expose powered machines to the rain. You should never use electrical powered devices in areas with flammable liquids or gases.
3. Keep children away from the working area. You should never admit children or even in-experienced personnel in the working area. Never let them handle extension cables, tools, and or machines.
4. Properly store idle equipment. You should always lock tools in dry locations to inhibit rusting and reaching by children.
5. Never force the tool. The drill bit sharpener is designed to operate more safely at the intended rate.
6. Dress properly. Never wear loose clothing and jewelry that can be caught up in moving parts and cause injuries.
7. Always use hand and eye protection. You should wear approved safety goggles and gloves to protect you from injuries.
8. Always stay alert. Using common sense and always watching whatever you are doing is ideal for perfect operations. Never use a tool while tired.
9. Check damaged parts. You should always inspect any tools for damages and access whether they can operate properly and perform the intended function.
10. Replacement accessories and parts. Use only identical replacements while servicing. Using different parts for replacements voids warrants. Only use accessories that are compatible with the tool.
11. Never operate a tool under the influence of alcohol or drugs. Do not work a machine if in doubt.
12. Keep away from liquids. The drill bit sharpener is designed for dry sharpening operations only.
13. Sharpening produces heat. Both the sharpening head and the bits being sharpened becomes hot. You should always be careful when handling hot parts.
14. Allow the drill bit tips to cool off before storage.
Maintenance
1. Detach the drill bit sharpener from the drill.
2. Remove the head assembly by removing the two screws holding it in place.
3. Detach the wheel assembly. You should ensure that the underneath spring stays intact.
4. Turn the adjustment cylinder in a clockwise direction to unscrew it from the adjustment cylinder.
5. Remove the washer.
6. Remove the worn-out grinding wheel by popping out the wheelbase.
7. Push the new grinding wheel onto the wheelbase, then replace the washer and return the adjustment cylinder by screwing.
8. Replace the wheel assembly onto the drill bit sharpener. You should make sure that the outer flats of the drive spindle line up with the central units of the adjustment cylinder.
9. You should then replace the head assembly and its screws.
Cleaning of Drill Bit Sharpener
Always keep the surface of your drill bit sharpener free of grease, dirt, and grit. Use non-toxic solvents or soapy water to clean the surface. Never use petroleum-based solvents.
Troubleshooting of Drill Bit Sharpener
If the grinding wheel does not rotate, but the drill motor is in operation, make sure that the outer flats of the spindle are in line with the adjustment cylinder’s inner units as described on point 8 above.
Usually, if you encounter problems with your machine, you need to contact customer service. However, you can replace some of the wearables yourself. You can perform the wheel replacement and change the sharpening tubes yourself.
The Bottom Line
We can conclude and note, using a Drill Bit sharpener is never a hard nut to crack. For smooth operations and performance, you should adhere to the set safety rules and regulations. We recommend a Drill Doctor or similar type of machine because you can sharpen bits in minutes.
The machine works perfectly well with the correct spare parts recommended by manufacturers. Employing the correct operational procedures, maintenance, cleaning, and troubleshooting practices guarantees you a better experience while sharpening bits.

I'm Joost Nusselder, the founder of Tools Doctor, content marketer, and dad. I love trying out new equipment, and together with my team I've been creating in-depth blog articles since 2016 to help loyal readers with tools & crafting tips.