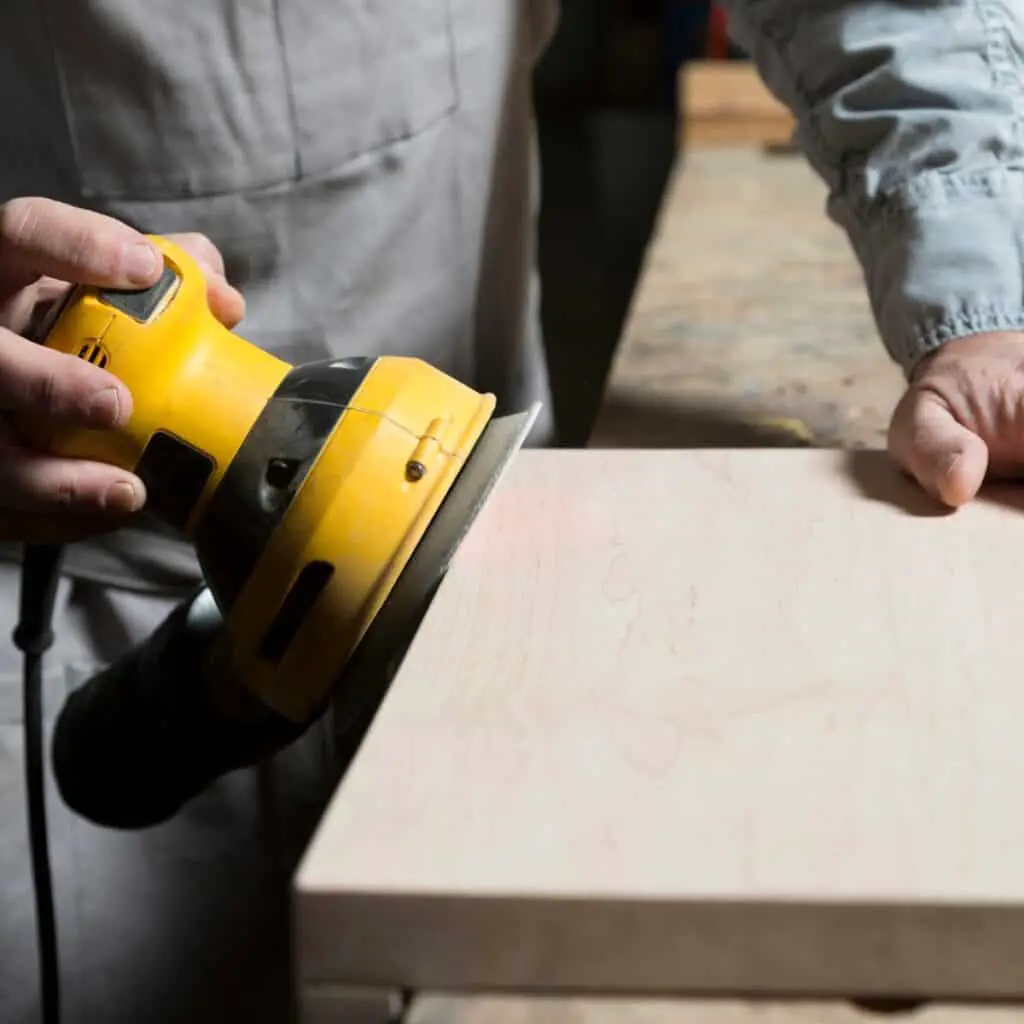
A sander is a power tool used to smooth surfaces by abrasion. They come in handheld, belt, disk, and orbital versions, and use sandpaper, a rotating belt, a circular disk, or a vibrating head to sand surfaces. It’s a great way to remove paint, strip wood, and smooth rough surfaces.
So, let’s look at the different types of sanders and how they work.
In this post we'll cover:
- Understanding the Different Types of Sanders for Woodworking
- Choosing the Right Type of Sander for Your Woodworking Needs
- When to Reach for Your Electric Wood Sander
- Mastering the Art of Sanding: Tips for Safe and Effective Use of Sanders
- Maintaining Your Sander: Keeping It Running Smoothly
- Choosing the Perfect Power Sander for Your Sanding Needs
- Choosing the Right Sandpaper Grit and Type: A Comprehensive Guide
- Frequently Asked Questions About Electric Wood Sanders
- Conclusion
Understanding the Different Types of Sanders for Woodworking
A sander is a power tool that uses abrasives to smooth surfaces. It is an excellent tool for removing paint (best ways in our article here), stripping, and refinishing wood. Sanders come in various versions, from handheld to stationary, and each one has a specific purpose. The simplest sanders are handheld and use sandpaper to abrade the surface. The most powerful sanders are stationary and use a continuous band, flat drum, or cylindrical drum to sand the surface.
The Different Types of Sanders
There are several types of sanders available, each with its own unique features and benefits. Here are the most common types of sanders:
- Belt Sanders: These sanders use a rotating belt to sand the surface. They are best for sanding large, flat surfaces and removing coarse material quickly.
- Disk Sanders: These sanders use a circular disk to sand the surface. They are best for sanding close to edges and difficult-to-reach areas.
- Rotary Sanders: These sanders use a rotating head to sand the surface. They are best for removing paint and stripping wood.
- Vibrating Sanders: These sanders use a vibrating head to sand the surface. They are best for finishing work and smoothing out rough surfaces.
How to Choose the Right Sander
Choosing the right sander depends on the type of work you will be doing. Here are some factors to consider when choosing a sander:
- Material: Consider the type of material you will be sanding.
- Surface: Consider the size and shape of the surface you will be sanding.
- Abrasives: Consider the type of abrasives you will be using.
- Experience: Consider your level of experience with sanding.
- Power: Consider the power of the sander you will need for the job.
The Term “Sanding”
The term “sanding” refers to the process of using a sander to smooth a surface. Sanding can be done by hand using a sanding block or by equipping an ordinary drill with sandpaper. Sanding is a common practice among woodworking and automotive workers, and it has gained popularity in recent years.
Choosing the Right Type of Sander for Your Woodworking Needs
Choosing the right type of sander for your woodworking needs depends on a variety of factors. Here are some things to consider:
- The type of wood you will be sanding: Different types of wood require different types of sanders. For example, if you are sanding a large piece of wood with a tough grain, a belt sander may be the best choice. If you are sanding a thin sheet of wood, a finishing sander may be easier to handle.
- The precision you need: If you need to produce highly accurate finishes on your wood surfaces, a random orbital sander may be the best choice. If you need to sand edges or reach certain angles, a handheld sander may be more appropriate.
- The power source you prefer: Sanders can be powered by electricity or battery. If you need a sander that can handle heavy production work, an electric sander may be the best choice. If you need a sander that is more portable and can be used in different locations, a battery-powered sander may be worth considering.
- The design of the sander: Different sander designs offer different features and benefits. For example, a belt sander may be better for tough production work, while a random orbital sander may offer better precision and accuracy. Consider what features are most important to you when choosing a sander.
The Benefits of Using the Right Type of Sander
Using the right type of sander for your woodworking needs can offer a variety of benefits, including:
- Better finishes: Using the correct sander for the job can help you produce better finishes on your wood surfaces.
- Easier sanding: Certain sanders are designed to make sanding easier and more efficient, which can save you time and effort.
- More accurate sanding: If you need to produce precise finishes on your wood surfaces, using the right type of sander can help you achieve the correct level of precision.
- Longer tool life: Using the correct sander for the job can help prolong the life of your sanding tool, saving you money in the long run.
When to Reach for Your Electric Wood Sander
When you’re working with wood, sanding is a crucial step in the preparation process. An electric wood sander can make this task a lot easier and faster. Here are some specific instances when you might want to use an electric wood sander:
- When you need to remove excess material: If you have a rough or bumpy surface that needs to be smoothed out, an electric sander can help you get rid of the excess material quickly and efficiently.
- When you need to reach hard-to-reach areas: Sanding by hand can be a lot of work, especially when you need to sand in tight or hard-to-reach areas. Using an electric sander can make this task a lot easier.
- When you need to change the shape of the material: If you need to change the shape of the wood, an electric sander can help you do this quickly and easily.
Choosing the Correct Type of Sander
There are a lot of different types of sanders available, and it’s important to choose the right one for your needs. Here are some things to consider:
- The type of finish you need: Different types of sanders are better suited for different types of finishes. For example, if you’re going to be painting or staining the wood, you’ll want to use a sander that smooths the surface and removes any bumps or ridges.
- The size of the surface: If you’re working on a small surface, a smaller sander might be more appropriate. If you’re working on a larger surface, you’ll want to choose a more powerful sander that can handle the job.
- The sensitivity of the material: If you’re working with a sensitive material, such as a softer wood, you’ll want to choose a sander that has features that allow you to adjust the power and speed to avoid damaging the material.
Using Your Electric Sander
Once you’ve chosen the right type of sander for your needs, it’s important to use it correctly. Here are some tips:
- Make sure the sander is plugged in and the switch is in the “off” position before you insert the sandpaper sheet.
- Check the sandpaper sheet to make sure it’s the correct type and grit for the job.
- Turn the sander on and press it gently against the surface you want to sand.
- Move the sander back and forth in a slight circular motion to remove any excess material.
- As you sand, be sure to check the surface frequently to make sure you’re removing the correct amount of material.
- When you’re finished sanding, turn off the sander and remove the sandpaper sheet.
- Use a tack cloth to remove any dust or debris from the surface before you apply your finish.
In addition to making sanding easier and faster, using an electric wood sander can also help you achieve a more professional-looking finish. So if you want to take your woodworking to the next level, it’s definitely worth learning how to use this common and highly useful tool.
Mastering the Art of Sanding: Tips for Safe and Effective Use of Sanders
Before you start using a sander, it’s critical to understand the safety rules and procedures. Here are some essential safety tips to follow:
- Always wear a dust mask (we’ve reviewed them here) to prevent inhaling dust particles.
- Avoid wearing loose clothing or gloves and keep long hair tied back to prevent them from getting caught in the machine.
- Never adjust the sander or its setup while it’s running.
- Don’t remove the guard unless authorized by a technician or WRL manager.
- Setups requiring anything other than the standard sander equipment must be approved by a supervisor.
Choosing the Right Sander for the Job
Different sanders are designed for different types of work, and choosing the right one can make a significant difference in the quality of your work. Here are some tips to help you choose the right sander:
- For large stock removal, use a belt sander.
- For small or thin pieces, use a handheld sander.
- For creating round or curved shapes, use a circular sander.
- For professional woodworking, use a standalone sander.
Inspecting and Setting Up the Sander
Before you start sanding, it’s essential to inspect and set up the sander properly. Here are some tips to help you do that:
- Inspect the sander and its covers for any damages or changes in tension.
- Make sure the sander is clean and free of dust and debris.
- Adjust the sander to the suitable level for the job.
- Allow the sander to run for a few seconds before using it to ensure it’s properly adjusted.
Operating the Sander
Once you’ve inspected and set up the sander, it’s time to start sanding. Here are some tips to help you operate the sander safely and effectively:
- Hold the sander with both hands and keep it level.
- Avoid putting too much pressure on the sander, as it can create significant changes in the stock.
- Turn off the sander before adjusting or removing the sanding belt.
- Refer to the instruction manual or the manufacturer’s website for specific procedures and guidelines.
- Avoid exposing yourself to the exhaust of the sander, as it can be harmful to your health.
Preventing Common Mistakes and Issues
Sanding involves a lot of critical details, and even experienced woodworkers can make mistakes. Here are some tips to help you prevent common mistakes and issues:
- Avoid wearing loose belts, as they can get caught in the machine.
- Don’t sand the same spot for too long, as it can create significant changes in the stock.
- Use the right grit and type of sandpaper for the job.
- Follow the national and local rules and procedures for woodworking machines.
- Don’t use the sander on hard materials that are not suitable for sanding.
Maintaining Your Sander: Keeping It Running Smoothly
Maintaining your sander is essential for keeping it running smoothly and ensuring that it lasts for years to come. Here are some tips for keeping your sander in top condition:
- Clean the dust from your sander periodically. Dust can clog the motor and cause it to wear out faster. Use an appropriate dust collection system or wear a dust mask to protect your eyes and breathing.
- Check the sandpaper regularly. Replace it when it becomes worn or torn. Using abrasive sandpaper can damage the wood or other materials you are working on.
- Clean the motor periodically. Dust and debris can build up inside the motor and cause it to overheat or malfunction. Use a soft brush or compressed air to remove any debris.
Selecting the Right Sandpaper
Choosing the right sandpaper is essential for achieving the desired finish on your wood or other materials. Here are some tips for selecting the appropriate sandpaper:
- Identify the abrasiveness of the sandpaper. Coarse sandpaper is useful for removing material quickly, while fine sandpaper is better for finishing and smoothing.
- Look for sandpaper with an identifying number indicating its abrasiveness. Lower numbers indicate coarser sandpaper, while higher numbers indicate finer sandpaper.
- Choose the appropriate type of sandpaper for your sander. Belt sanders are better for larger surfaces, while vibrating sanders are useful for smaller areas. Disk sanders are ideal for removing material quickly, while drum sanders are better for finishing and smoothing.
- Consider the type of abrasive material used in the sandpaper. Flint, garnet, and emery are common abrasive materials.
Safety Tips
Sanding can be a hazardous activity if appropriate safety measures are not taken. Here are some tips for using your sander safely:
- Wear eye and breathing protection to prevent dust and debris from entering your eyes or lungs.
- Use appropriate tools to hold the material you are sanding. This will prevent your fingers from getting caught in the sander.
- Lower the sander onto the material slowly and steadily. This will prevent the sander from jumping or bouncing, which can damage the material or cause injury.
- Replace worn or damaged sandpaper immediately. Using damaged sandpaper can cause the sander to wear out faster or damage the material you are working on.
Choosing the Perfect Power Sander for Your Sanding Needs
When choosing a power sander, it’s important to consider the size of your project. If you’re working on a smaller piece of wood or in a tight space, a palm sander or detail sander may be the perfect choice. However, if you’re working on a larger piece of wood or a floor, a larger sander like an orbital or belt sander may be required.
Think About the Finish You Want to Achieve
Different sanders offer different levels of finish, so it’s important to think about the finish you want to achieve before choosing a sander. If you’re looking for a smoother finish, an orbital or random orbital sander may be the best choice. If you’re looking for a more unique finish, a detail sander may be the way to go.
Consider Your Budget
Power sanders can be expensive, so it’s important to consider your budget when choosing a sander. While a larger, more powerful sander may be tempting, it may not be necessary for your needs. A smaller, cheaper sander may be the perfect choice for your project.
Look for Helpful Features
When choosing a power sander, look for features that will help you handle and control the tool. Some helpful features include:
- Dust collection: This can help keep your work area clean and prevent damage to the sander.
- Variable speed: This allows you to adjust the speed of the sander to match your needs.
- Comfortable handle: This can make the sander easier to use for longer periods of time.
Be Careful and Familiarize Yourself with the Tool
Using a power sander involves a lot of force and can be difficult to control, so it’s important to be careful and familiarize yourself with the tool before using it. Make sure to read the user guide and follow all safety instructions.
Examples of Sanders for Different Projects
Here are some examples of power sanders for different types of projects:
- Furniture building: A detail sander or random orbital sander would be perfect for creating a fine finish on furniture.
- Floor sanding: An orbital or belt sander would be the best choice for sanding a large floor.
- Home projects: A palm sander or detail sander would be perfect for smaller home projects like sanding a cabinet or a piece of trim.
Remember, the best power sander for your needs will depend on a lot of different factors, so take your time and choose carefully.
Choosing the Right Sandpaper Grit and Type: A Comprehensive Guide
When it comes to sanding wood or any other material, choosing the right sandpaper grit and type is crucial to achieving a smooth and polished finish. Here are some steps to help you pick the right sandpaper grit and type:
- Sandpaper grits are measured by the number of abrasive particles per inch of sandpaper. The higher the number, the finer the grit.
- Coarse sandpaper grits range from 40 to 60 and are used for heavy sanding and stripping.
- Medium sandpaper grits range from 80 to 120 and are used for smoothing surfaces and removing small imperfections.
- Fine sandpaper grits range from 180 to 240 and are used for preparing surfaces for finishing.
- Super fine sandpaper grits range from 360 to 600 and are used for final polishing and achieving a smooth finish.
Reading Sandpaper Packages
When buying sandpaper, it’s important to read the package to make sure you are getting the right sandpaper grit and type. Here’s what to look for:
- The grit size: The grit size is usually indicated on the package in numbers.
- The sandpaper type: The package should indicate the type of sandpaper you are buying.
- The number of sheets: The package should indicate the number of sheets you are getting.
- The size of the sheets: The package should indicate the size of the sheets in inches.
Frequently Asked Questions About Electric Wood Sanders
There are various types of sanders available in the market, including belt sanders, orbital sanders, random orbital sanders, detail sanders, and sheet sanders. Each type of sander has its unique features and uses, making it ideal for specific sanding jobs. It’s essential to choose the right type of sander for the job you want to accomplish.
What are the benefits of using an electric wood sander?
Using an electric wood sander has several benefits, including:
- Saves time and effort: Sanding by hand can be a time-consuming and tiring process. An electric wood sander can make the job much faster and easier.
- Consistent sanding: An electric sander ensures that the sanding is consistent throughout the surface, unlike sanding by hand, which can leave uneven spots.
- Removes excess material: An electric sander can remove excess material quickly, making it ideal for preparing stock for a project.
- Creates a smooth finish: An electric sander can create a smooth finish on the wood, which is difficult to achieve by hand.
What type of sandpaper should I use?
The type of sandpaper you should use depends on the job you want to accomplish. Sandpaper comes in different grits, ranging from coarse to fine. Coarse grits are ideal for removing excess material, while fine grits are suitable for creating a smooth finish. It’s essential to choose the right grit for the job you want to accomplish.
What safety precautions should I take when using an electric wood sander?
Using an electric wood sander involves potential hazards, and it’s essential to take safety precautions to avoid accidents. Here are some safety tips to keep in mind:
- Always wear safety goggles (check out these top picks) and a dust mask to protect your eyes and lungs from dust and debris.
- Keep your hands away from the sanding belt or disc to avoid injury.
- Turn off the sander and unplug it from the mains before changing the sandpaper or making any adjustments.
- Use the sander on a stable surface and avoid leaving it unattended while it’s running.
- Always use the switch to turn the sander on and off, and never rely on the power cord to control the tool.
What is the difference between a standard and a random orbital sander?
A standard orbital sander moves in a circular motion, while a random orbital sander moves in a random circular and elliptical pattern. The random orbital sander is more versatile and can create a smoother finish than a standard orbital sander. It’s also less likely to cause damage to the wood surface, making it an ideal choice for beginners.
Conclusion
So, that’s what a sander is. A power tool used to smooth surfaces by abrading them with sandpaper, drums, or belts. You should now know the different types and which one to use for which job. So, go out and get sanding!

I'm Joost Nusselder, the founder of Tools Doctor, content marketer, and dad. I love trying out new equipment, and together with my team I've been creating in-depth blog articles since 2016 to help loyal readers with tools & crafting tips.