A free-standing deck does not add extra weight to your home rather it can support itself. If you have a split-level home or if your home has a stone foundation you cannot have an attached deck. But that does not mean that you cannot have a deck at all. A free-standing deck can fulfill your dream of having a deck in your home.
This article includes a bunch of ideas of the free-standing deck that does not affect the structure of your home. 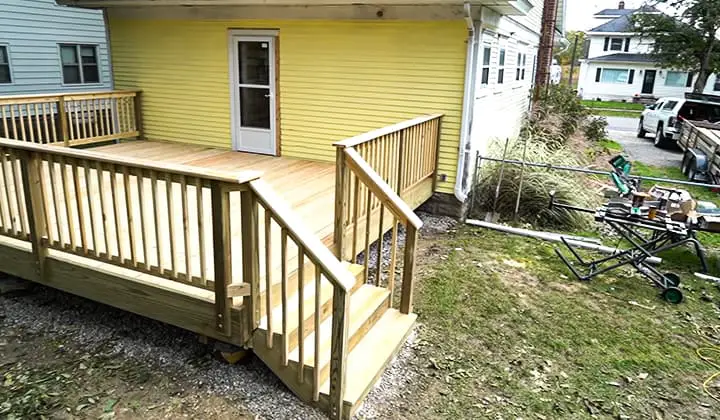
Every project requires some research and certain skills. This DIY project – how to build a freestanding deck step by step is a big project that requires good research and DIY skills to execute successfully. You need to be cautious about certain matters and you also should have a clear idea about the steps that you need to perform one after one.
From this article, you will get a good idea about the topics on which you need to do some research, the necessary tools, and materials, the process of performing the necessary steps, and the matters about which you should take care of.
In this post we'll cover:
8 Steps to Build a Free-Standing Deck
Step 1: Gathering Required Materials and Tools
You need to gather the following materials to build your free-standing deck. The size of the materials depends on the size of your deck.
- Concrete pier blocks
- 2″ x 12″ or 2″ x 10″ Redwood or pressure-treated lumber (depending on the size of the deck)
- 4″ x 4″ Redwood or pressure-treated posts
- 1″ x 6″ Redwood or composite decking planks
- 3″ Deck screws
- 8″ long x 1/2″ carriage bolts and matching sized nuts and washers
- Joist hangers
To process the materials you have gathered you need to have the following tools in your arsenals:
- Shovel
- Rake
- Sledgehammer (i recommend these here!) or jackhammer (optional, if any large rocks need to be broken up)
- Wood or steel stakes
- Mallet
- Sturdy string
- Line level
- Circular saw
- Framing square
- Drill-driver with Phillip’s head bit
- 1/2″ wood bit
- Large level
- C-clamps
- Speed square (optional, for marking cuts)
- Chalk line
Step 2: Inspecting the Project Site
Initially, you have to inspect the project site thoroughly to check if there are any water or utility lines underground the land. You can call a local utility company or a locator service provider to check this information.
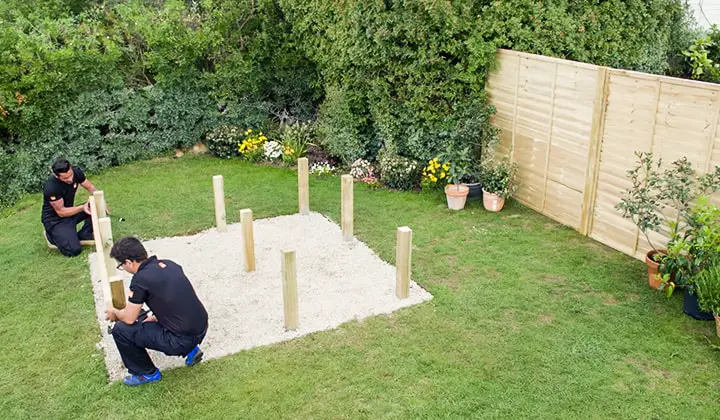
Step 3: Laying Out, Grading and Levelling
Now string the lines tightly between the sturdy stakes and mark the perimeter. If you cannot do it by yourself you can hire a professional person who is an expert in laying out and grading.
All the blocks and the posts should be at the same height for leveling. You can use a line level for this purpose.
To provide the support for framing you have to place the pier blocks and insert the 4-inch x 4-inch posts into the tops. The number of blocks and posts you need depends on the size of the area you are working on. Generally, support is needed for every 4 feet of deck on both directions and this may vary according to the local ordinance.
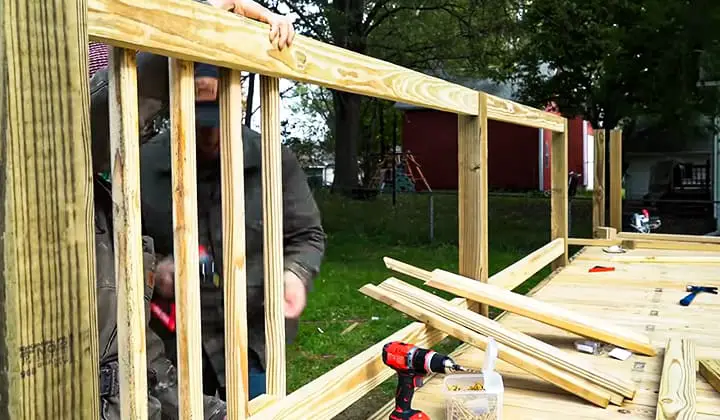
Step 4: Framing
Use the 2″ x 12″ or 2″ x 10″ Redwood or pressure-treated lumber for making the frame. It is very important to keep the line in level during running the lumber around the outsides of the support posts. Be aware of the bumps, stumbles, and dropped tools or materials because these can knock your line out.
Join the framing to the support posts with bolts. You should drill the holes for bolts beforehand. To make your work easier take the help of the C-clamp.
Hold the wood, joist-hanger bracket and post altogether with the C-clamp and then drill holes through the entire thickness using the joist hanger. Then run the bolts through the holes, fasten the bolts and then remove the clamp.
Step 5: Check for Square
Your freestanding deck should be square. You can check it by measuring the diagonals. If the measurement of the two opposite diagonal is the same then it is perfectly squared but if it is not then you should make some corrections.
This measurement should be done after framing but before attaching the joists or laying the deck or subfloor.
Step 6: Joists
I already have mentioned the term joists. If you do not know what the joist is then here I am defining it for you – The 2 x 6-inch members that span through the middle space inside the frame at right angles to the frame across the short dimension is called the joist.
The joists should be kept level with the top of the frame. The joist hanger should remain on the inner side of the main support posts of the frame and the bottom of the bracket should remain at 5 and ¾ inches below the top of the post top.
The top of the interior posts should remain at a height 5 and ¾ inches below that of the exterior posts and the joists spanning this space should not be hung from their sides rather should sit on top of the posts.
To hold the lumber atop and cap the posts, use pre-drilled special brackets with flanges. You must measure the thickness of the bracket before setting the interior posts because though these are small differences these are enough to stick the joists above the frame.
Step 7: Decking
You can use lumbers of different sizes for the decking planks. For example – you can use 1-inch by 8-inch or 1-inch by 6-inch or even 1-inch by 4-inch lumbers for building the deck. You can understand that if you use narrow planks you have to use more planks and also have to spend more time to fasten those.
You also have to decide on the decking pattern. The straight pattern is easier compared to the diagonal patterns. If you like the diagonal pattern you have to cut the planks at an angle of 45 degrees. It requires more material and so the cost also increases.
You should keep space between the planks to allow the expansion and contraction of the wood. To make the space between the planks uniform you can use a spacer.
Screw all the planks tightly and after screwing coat it with a waterproof sealer and let it dry.
Step 8: Railing
Finally, install railing around the deck depending on the height of your deck from the ground. If there is any local ordinance to build up the railing you should follow that rule.
11 Free Standing Deck Ideas
Idea 1: Lowe’s Free Deck Idea
Lowe’s Free Deck Idea provides a list of necessary tools and materials, detail about the design and steps need to follow to execute the idea. If you are enthusiastic about DIY free-standing deck projects Lowe’s Free Deck Ideas can be a great help for you.
Idea 2: Free Standing Deck Plan from Rogue Engineer
The plan for building a free-standing deck for your home provided by Rogue engineer is simple in design and since it is a free-standing deck it is tax-free. You know if you have an attached deck in your house you have to pay tax for it.
The rogue engineer helps you by providing the list of required tools, materials, steps to be followed, and pictures of every step.
Idea 3: Free-Standing Island Deck from The Family Handyman
The free-standing island deck design provided by the Family Handyman is built with composite decking and it is designed in such a way that the fasteners remain hidden. It is a maintenance-free deck that you can place anywhere. It does not require any footing or ledger board.
Idea 4: Redwood Free-Standing Deck Plan
Redwood provides all the detail of their free-standing deck plan including building instructions, diagrams, and blueprints in a pdf file.
Idea 5: Free-Standing Deck Idea by How To Specialist
If you do not like the regular shaped deck rather an exceptionally designed deck you can go for the octagon-shaped deck plan provided by the How to Specialist.
The How to Specialist provides the necessary material list, tool list, tips, and steps with pictures to its visitors.
Idea 6: Free-Standing Deck Plan by DIY Network
DIY Network provides a free-standing deck plan step by step. They describe the steps along with necessary pictures so that the idea becomes clear to you.
Idea 7: Free-Standing Deck Plan by DoItYourself
DoItYourself provides you an idea about how to build a wonderful free-standing deck for entertainment or relaxation. They provide tips about choosing the raw materials, necessary instructions for laying out and building the deck and deck railings for free.
Idea 8: Free-Standing Deck Plan by Handyman Wire
Building a deck becomes easier when you are provided the necessary information in detail and the Handyman Wire provides its visitors the information regarding tool and supply list, planning and construction tips, tips about designing, and estimating.
It also provides detail of every step that you need to perform to make your free-standing deck as well as pictures of each step.
Idea 9: Free-Standing Deck Plan by Handyman
The handyman provides a detailed guide for building a freestanding deck plan including decking materials, fasteners, and all other necessary steps. They claim that they can build a free-standing deck within a day while others take several days or a whole week.
Idea 10: Free-Standing Deck Idea by Dengarden
The Debgarden gives tips regarding the type of free-standing deck, for example- if you want a temporary deck or a permanent deck and what kind of preparation you need to take before starting your free-standing deck project.
They also provide you instructions regarding the style, size, and shape of the deck. A list of necessary materials and tools is also provided.
Idea 11: Free Standing Deck Idea by Better Homes and Gardens
To enhance the exterior of your home the better Homes nad Gardens provide detailed instruction to build a free-standing deck.
Final Thought
The free-standing decks are easy to build and these do not require any drilling into your home. If your home is old then a free-standing deck is a safe option for you.
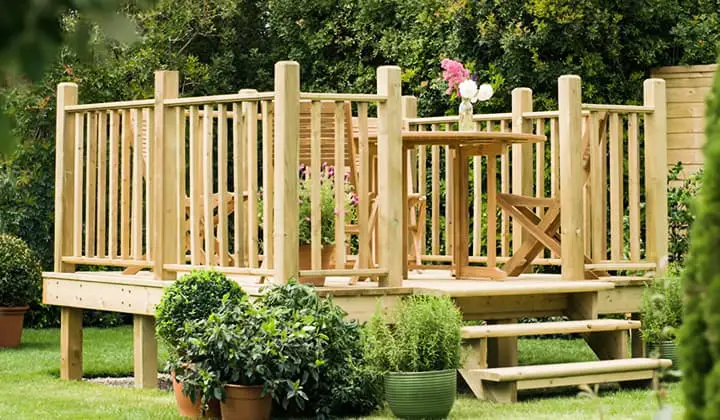
You can construct it in any style and you can easily replace it. A free-standing deck can accommodate a pool or garden too. Yes, its construction cost is higher but it is a better option in the sense that you can customize it according to your requirement.
Also read: these freestanding wooden steps are awesome for your deck

I'm Joost Nusselder, the founder of Tools Doctor, content marketer, and dad. I love trying out new equipment, and together with my team I've been creating in-depth blog articles since 2016 to help loyal readers with tools & crafting tips.