Painting a ceiling: most people hate it. I don’t mind and even like to do it.
But how do you best approach this?
In this article, I’ll show you how you can get this job done and make sure your ceiling looks sleek and neatly painted again. Without deposits or streaks!
In this post we'll cover:
White ceiling without stripes
The ceiling is a very important part of your home. Of course you don’t look at it every day, but it is an important part of how your house looks.
Most ceilings are white, and for good reason. It is neat and ‘clean’. In addition, the room appears larger when you have a white ceiling.
If you ask someone if they can whitewash a ceiling themselves, most people say it’s not for them.
You get a lot of answers like: “I mess too much” or “I’m completely covered”, or “I always have incitements”.
In short: “whitening a ceiling is not for me!”
When it comes to craftsmanship, I can think along with you. However, if you follow the correct procedure, you can whiten a ceiling yourself.
Firstly, you should always remain calm and make good preparations, then you will see that it is actually not that bad.
And see what you save with that!
Hiring a painter costs quite a bit. That’s why it always pays to whiten a ceiling yourself.
What do you need to whiten the ceiling?
In principle, you don’t need a lot if you want to whiten the ceiling. You can also just get all the stuff in the hardware store.
In the overview below you can see exactly what you need:
- Cover for the floor and the furniture
- Cover foil or paper for the walls
- masking tape
- painter’s tape
- Wall filler
- ragebol
- Paint cleaner
- Primer
- Latex ceiling paint
- stir sticks
- Round brushes (suitable for latex)
- A few plastic bags
- Good quality paint roller
- Telescopic rod to bridge the distance from paint tray to ceiling
- Small roller 10 cm
- Paint tray with grid
- kitchen stairs
- wipe
- Bucket with water
For ceiling whitening you really need a good roller, preferably an anti-spatter roller. Do not make the mistake of buying a cheap roller, this will prevent deposits.
As a painter it is simply better to work with good tools.
Wet the rollers 1 day in advance and put them in a plastic bag. This prevents fluff in your latex.
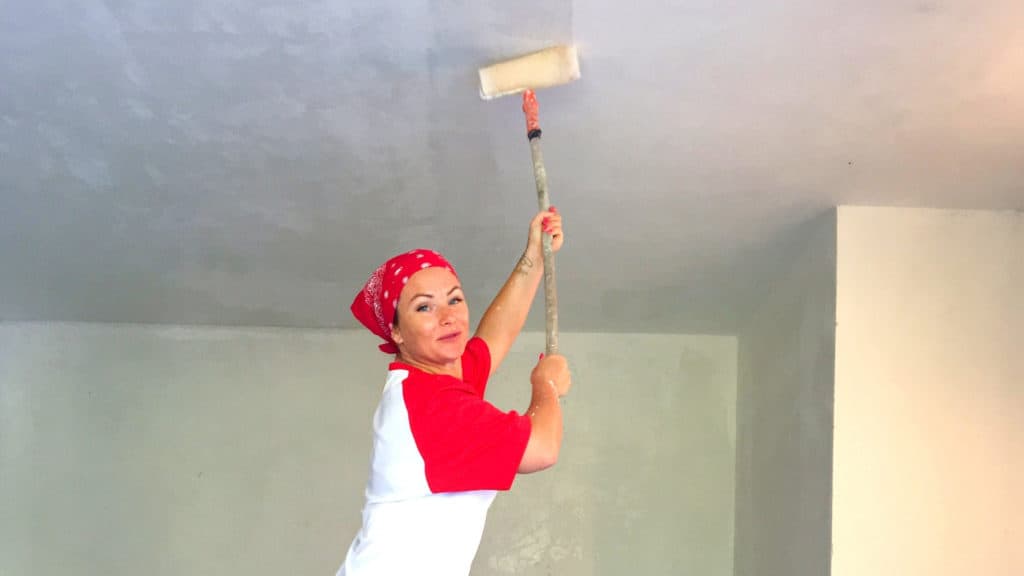
Whitewashing the ceiling can be a physically demanding job because you often work overhead. That is why you would do well to at least use a telescopic handle.
The most affordable ceiling paint (better for the ceiling than regular wall paint) is this one from Levis with very high ratings on Bol.com:
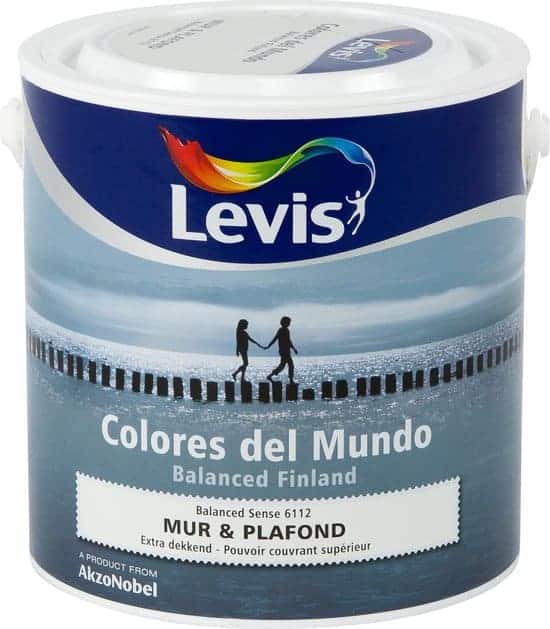
Very opaque while it is not that expensive.
Now that you have everything you need, you can start preparing. You know: good preparation is half the battle, especially when whitewashing a ceiling.
Whitewashing the ceiling: preparation
Whitening the ceiling (also called sauces in the painting profession) with a streak-free result requires good preparation.
Let’s see what all you need to think about.
Remove furniture
The room where you are going to whiten the ceiling must first be cleared of furniture.
Make sure you store the furniture in a dry room and cover it with a protective film.
This way you have enough space to get to work and to move freely on the floor. You also prevent paint stains on your furniture.
Cover floor and walls
You can cover the walls with paper or plastic.
When whitewashing a ceiling, you must first mask the top of the wall, where the ceiling starts, with painter’s tape.
With this you get straight lines and the paintwork becomes nice and tight.
After that, it is important that you cover the floor with a thick foil or plaster.
Make sure that you fasten the stucco runner on the side with duc tape so that it cannot shift.
Also read: This is how you remove paint that ended up on your (floor) tiles
Clear windows and remove lamps
The next step is to remove the curtains in front of the windows and possibly cover the window sills with a foil.
Then you disassemble the lamp from the ceiling with the help of a kitchen staircase and cover the wires with a terminal block and a piece of painter’s tape.
Whitewashing the ceiling: getting started
Now the space is ready, and you can start cleaning the ceiling.
Cleaning ceiling
Get rid of dust and cobwebs with a rage
Then you will degrease the ceiling. You can use a paint cleaner for this for the best result.
This way you make the ceiling free of grease and dust so that you will soon get a perfect result.
Fill holes and cracks
Also check carefully for holes or cracks in the ceiling.
If this is the case, it is best to fill it with wall filler, a quick-drying putty or with Alabastine all-purpose filler.
Apply primer
If you want to be sure if you have good adhesion, use a latex primer.
This ensures that the paint adheres better and it also helps to prevent streaking.
Allow the primer to dry thoroughly before starting the next step.
When the primer has completely dried, you can start whitewashing the ceiling.
Choose the right paint
Make sure to use paint that is suitable for ceilings.
This paint provides a nice and even layer and also camouflages even the smallest irregularities or yellow spots.
It also depends on what ceiling you have.
Do you have a completely smooth ceiling or does your ceiling consist of so-called sandwiches and is it then packed?
Both ceilings are actually doable. We assume here that the ceiling has been painted before.
Do you have a system ceiling? Then you can also paint these, read here how.
If you have a sandwich ceiling, it is usually spacked, use a special spack sauce for this! This is to prevent streaks.
This spack sauce has a long open time, which means that it does not dry so quickly and that you do not get deposits.
If you have a flat ceiling you will have to roll a little faster, otherwise you will definitely see deposits.
But luckily there is a product on the market that slows down this drying time: Floetrol.
If you add this you can start rolling quietly, because it has a very long open time.
With this tool you always get a streak-free result!
Are you going to work in a damp room? Then consider anti-fungal paint.
Has the ceiling already been painted and with which paint (whitewash or latex)?
You also need to know what paint is on it now. You can check this by running a damp sponge over the ceiling.
If you see some whiteness on the sponge, it means that it has previously been painted with a smudge-resistant wall paint. This is also called whitewash.
It already has whitewash on it
Now you can do two things:
apply another layer of smudge-resistant wall paint (white lime)
apply a latex paint
In the latter case, you must remove the whitewash completely and a primer latex must be applied as a substrate so that the latex wall paint adheres.
The advantage of a latex is that you can clean it with water. You cannot do this with a smudge-resistant paint.
You have to make the choice yourself.
It already has latex paint on it
With a ceiling that has already been painted with latex wall paint:
- Close holes and cracks if necessary
- degrease
- latex wall or ceiling paint painting
Make sure you have a team
Just a tip in advance: if you have a large ceiling, make sure you do this with two people. One person starts with a brush in the corners and edges.
You can alternate in between and make the work easier.
Adjust the telescopic rod correctly
You put your roller on the extendable handle and first measure the distance between the ceiling and your waist.
Try to roll dry beforehand, so that you have set the distance correctly.
The sauce work begins
Divide the ceiling into imaginary square meters, as it were. And finish it like this.
Don’t make the mistake of brushing all the way around the corners first. You will see this later.
Start in the corners of the ceiling first and roll horizontally and vertically from those corners.
Make sure you start at the window, away from the light. First paint 1 meter in the corners.
The second person takes the roller and starts rolling lanes. Dip the roller in the latex and remove the excess latex through the grid.
Raise the roller and start from where the first person in the corners started.
First go from left to right.
Dip the roller in the latex again, then roll from front to back.
When you have done a piece, the second person between the corners and the rolled piece continues to roll with the small roller.
Do roll in the same direction as the large roller.
The person with the large roller goes repeats that and then sauces towards the wall with the second person going back into the corners at the end with a brush and then rolling again with the small roller in the same direction as the large roller.
At the end you close the layer again with a brush.
After this, the process repeats again until the entire ceiling is ready.
Just make sure you paint wet on wet and overlap the lanes.
Are you going to whitewash the walls too? Read all my tips here to sauce the walls without streaks
Keep calm and work carefully
Most of the time you are afraid of making mistakes. The main thing is that you stay calm and do not rush to work.
If you can’t do it the first time, just try a second time.
Is the ceiling dripping? Then you used too much paint.
You can solve this by running the paint roller over all the lanes without applying paint first. In this way you rub out the ‘too wet’ spots, so that it no longer drips.
You are just working in your own home. Basically nothing bad can happen. It’s a matter of doing.
Remove the tape and leave to dry
When you’re done you can remove the tape and you’re done.
Remove the tape and foil from the walls while the paint is still wet, this way you won’t damage the paint.
If the result is not to your liking, apply another layer as soon as the latex is dry.
After this you can clear the room again.
Paint ceiling without deposits
Still deposits of paint on the ceiling?
Whitening a ceiling can lead to incrustations. I now discuss what could be the cause and what solutions there are.
- You should never take a break while whitewashing the ceiling: finish the entire ceiling in 1 go.
- Preliminary work not good: degrease well and apply a primer if necessary.
- Roller not used properly: too much pressure with the roller. Make sure the roller is doing the work and not yourself.
- Cheap tools: spend a little more for a roller. Preferably an anti-spatter roller. A roller of approximately € 15 is sufficient.
- Not good wall paint: make sure you don’t buy cheap wall paint. Always buy a super matte wall paint. You see less on this. A good latex costs on average between € 40 and € 60 per 10 liters.
- Deposits in a plaster ceiling: buy special plaster sauce for this. This one has a longer open time.
- Despite all the measures, still incitements? Add a retarder. I work with Floetrol myself and I am very pleased with it. With this retarder, the paint dries less quickly and you have more time to reroll without deposits.
You see, it is best to sauce a ceiling yourself, provided you work systematically.
Now you have all the materials and knowledge you need to whiten your ceiling yourself. Good luck!
Now that the ceiling looks neat again, you may also want to start painting your walls (this is how you do it)

I'm Joost Nusselder, the founder of Tools Doctor, content marketer, and dad. I love trying out new equipment, and together with my team I've been creating in-depth blog articles since 2016 to help loyal readers with tools & crafting tips.